

Create a new Dynamic Fields is very simple and user-friendly. Please follow next steps:
- Click on
 button in List view of Dynamic Fields module.
- Choose module and fill Description (Name of Dynamic Fields to have an overview about your created Dynamic Fields), choose if you want Pop-up window and click on
 button.
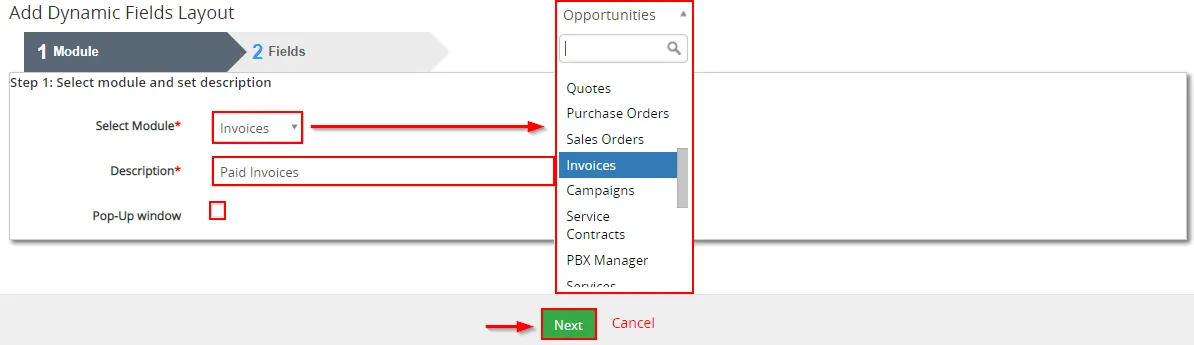
How to create Dynamic Fields - In the next step you will have to add fields or blocks. When you add field or block you can set actions like:
Show – fields will be visible for users
Hide – fields will be hidden for users
Read only – fields are visible, but can’t be changed
Show as mandatory – make this fields mandatory/required
You are also able to set this value for each field separately or for each block at once. The default option is Select option (do not any change). When you will be done with editing press button.
Full process is shown in the next picture:
How to create Dynamic Fields - When Dynamic field is created, you will be taken back to ListView. Here you you have option delete or edit your Dynamic Fields via
 buttons.

Dynamic Fields ListView
If you want to add Process Flow to Dynamic fields, please follow next steps:
- We used our already created Dynamic Field “Paid Invoices” as an example for module Invoices.
Open Dynamic Field which was already created and you will be taken to DetailView.
There you can see Related Process Flows.Now there is no Process Flow because we haven’t added it yet.
Let’s change it.
First, you have to create Process Flow, how to do it you can find in our manual here: Process Flow - Go to your already created Process Flow. (We want our Dynamic Fields trigger only when the status of invoice will be Paid). So your Process Flow settings should look like this:
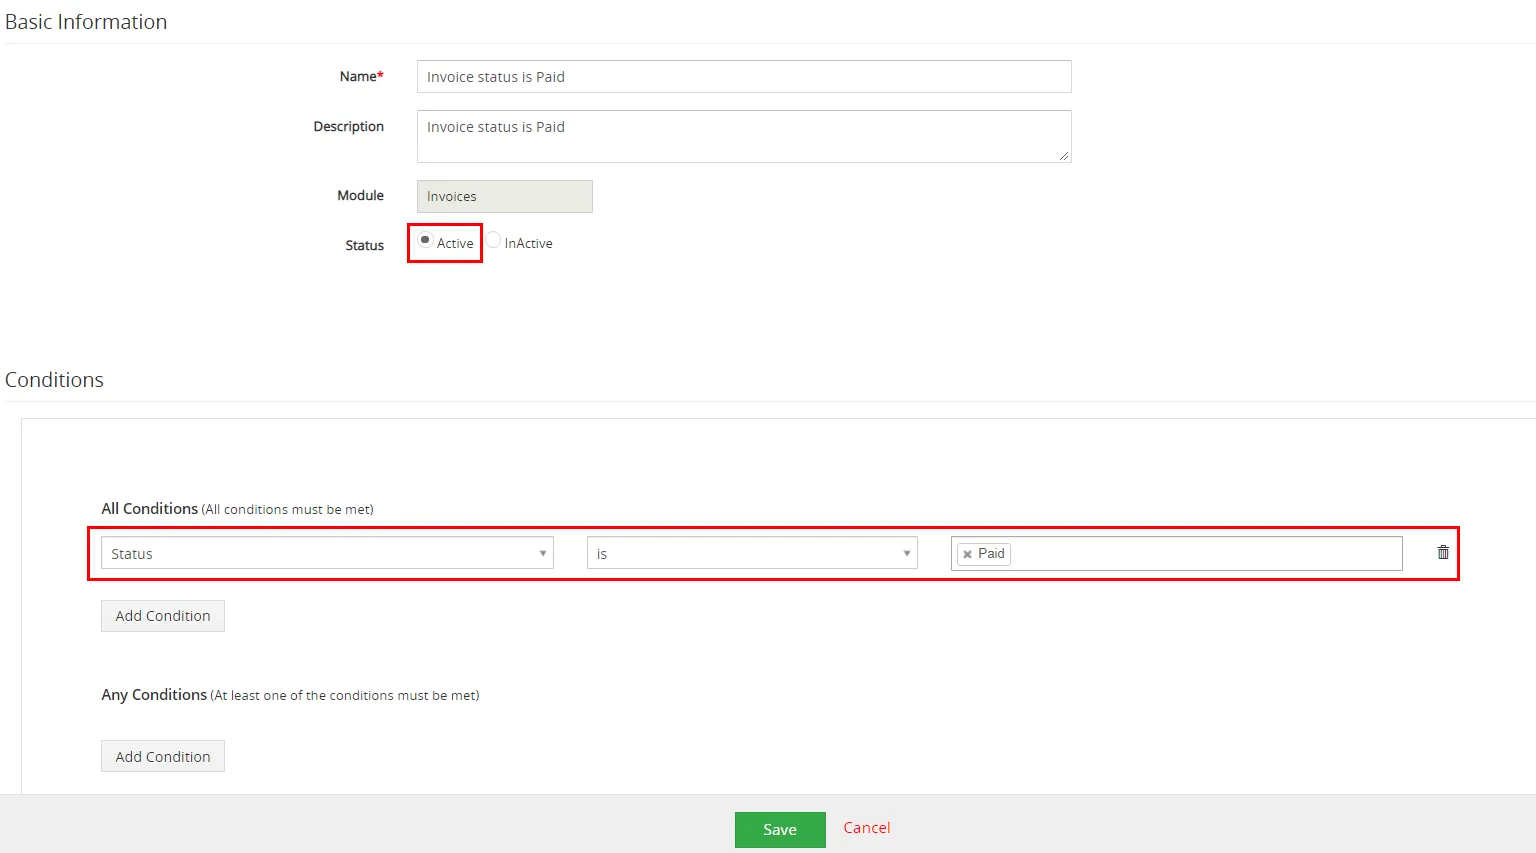
How to add Process Flow to Dynamic Fields  Note: When adding conditions, you need to select a condition from the box or write it correctly. You can’t write “paid” otherwise the process will not work. You need to write “Paid” or choose it from the box. Its same for all conditions. Example:

Process Flow adding conditions, wrong 
Process Flow adding conditions, correct - To add Process Flow to Dynamic Fields follow next picture.
How to add Process Flow to Dynamic Fields - Process Flow now appears in the DetailView of Dynamic Fields we already created.

How to add Process Flow to Dynamic Fields
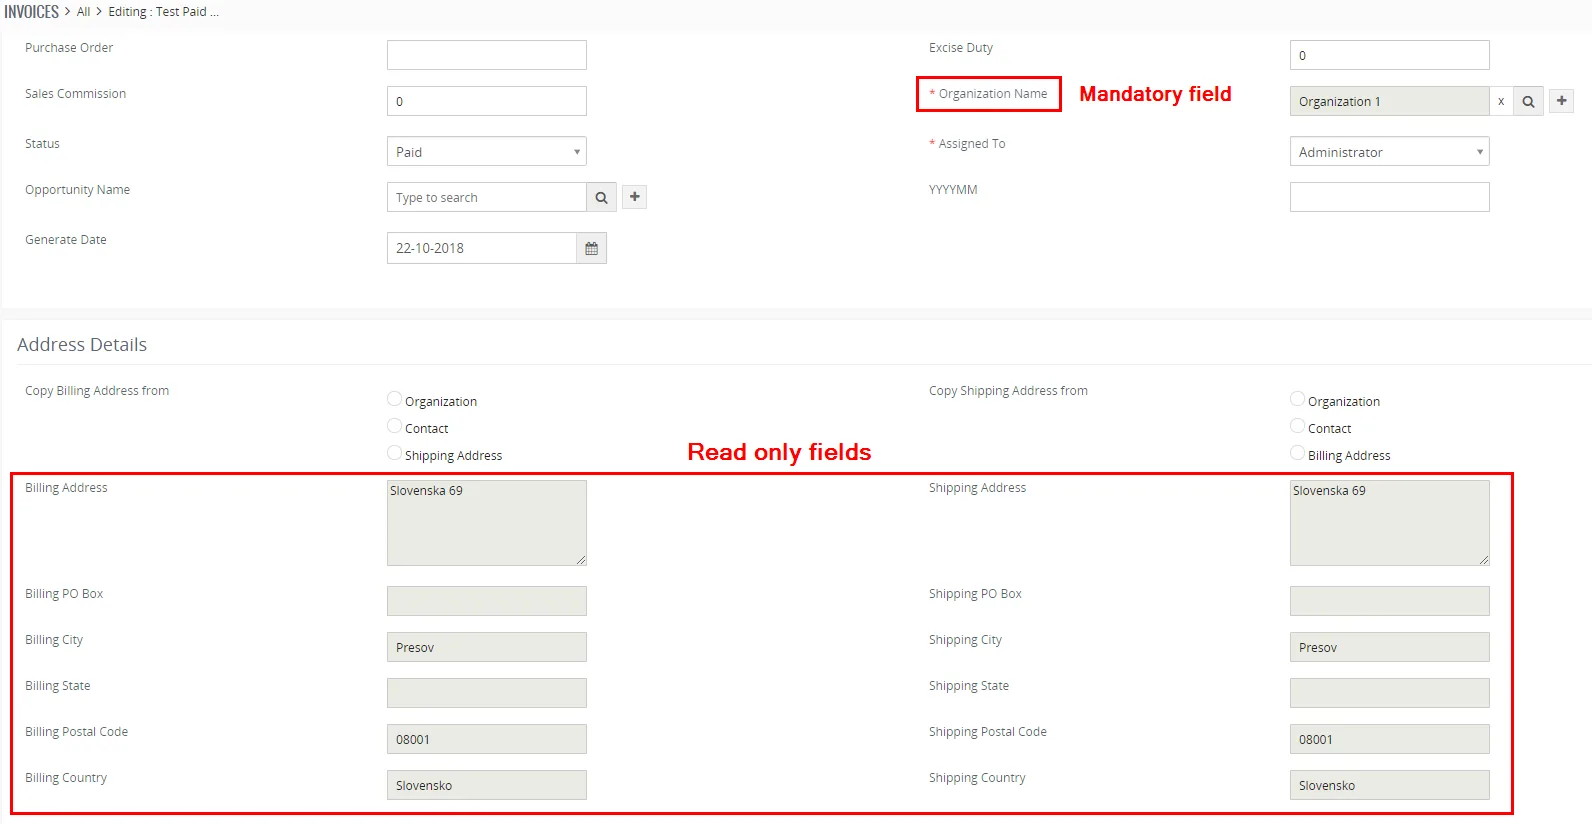
Now the results are every time you set or create invoices with Status “Paid”, address fields will be just read only (you can see them, but you can’t edit them) and Organization will be always shown as mandatory. This is just an example how Dynamic Fields and Process Flow works.
4.1 How to create Fields group
Fields group is a new feature in our Dynamic Fields extension. With Fields group you can create lists of fields and blocks and then use it in normal Dynamic Fields Layouts.
In next steps you will learn how to create Fields group and apply it to Dynamic Fields Layout. The main idea behind this feature is save time where you don’t need to add fields and blocks separately one by one, but you can create groups and add them with one click, then you can set actions for the group you added like show, hide, read only, show as mandatory.
Add Fields Group is very simple and user-friendly. Please follow next steps:
- Click on
 button in List view of Dynamic Fields module.
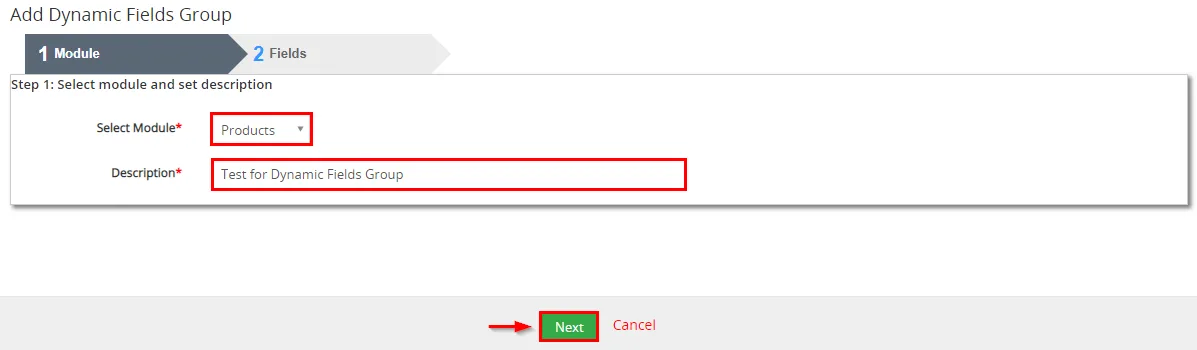
- Choose module and fill Description (Name of Dynamic Fields Group to have an overview about your created Dynamic Fields Group), and click on button.
How to add Fields Group - In the next step you will have to add fields or blocks. Only action here is deleting the field or block you added via
 button. When you will be done with editing, press button.
Full process is shown in the next picture:
How to add Fields Group - When Dynamic fields group is created, you will be taken back to ListView. Here you you have option delete or edit your Dynamic fields group via buttons.

Dynamic Fields ListView
How to add Fields group to Dynamic Fields Layout
- Make sure your Fields group is created correctly. You can go to List of fields group and see if it’s there.
- There are two possible options how to add Fields group:
A) To already existing Dynamic Fields Layout
B) When you are creating a new Dynamic Fields Layout
A) How to add a Fields group to already existing Dynamic Fields Layout
Note: Make sure that the modules are same for Fields Group and for Dynamic Fields Layout.
B) How to add a Fields Group, when you are creating a new Dynamic Fields Layout
4.2 Default Forms
With Dynamic Fields extension you can also edit your fields and blocks for all modules which are as default in Vtiger 7 system. You can do it via Default Forms.
For blocks you can:
- Show or Hide block
For fields you can:
- Hide fields
- Make fields as Read only
How to Hide/Show blocks
Please provide following steps in order to edit Default form blocks (as an example, we used module Invoices):
- Go to ListView of Dynamic Fields and click on Default Forms,here you can choose which module you want to edit. Choose module and proceed to the next step.
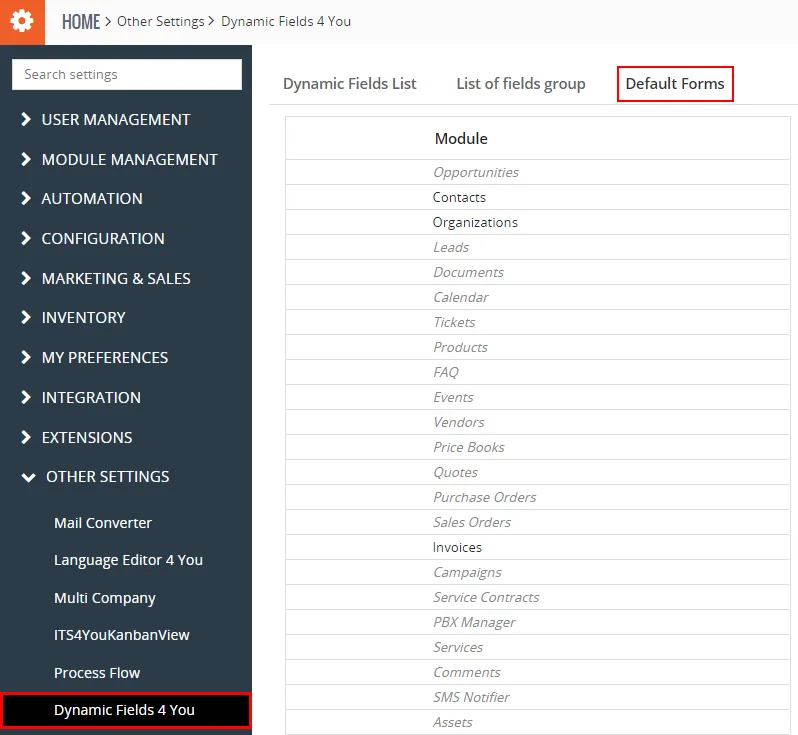
Dynamic Fields – Default forms, blocks - On the next screen you will see all blocks and fields for the module you choose. Now you can hide any block you want. Lets hide some blocks we don’t want to see. The process is shown on the next picture:
Dynamic Fields – Default forms, blocks As an example we want to hide blocks: Terms & Conditions, Description Details and Cashflow Information (Cashflow is our module which you can purchase via e-shop).
When you are done with edit click on button and you will be redirected back to modules list of Default Forms.
- Now changes should appear in your Invoice details like this:
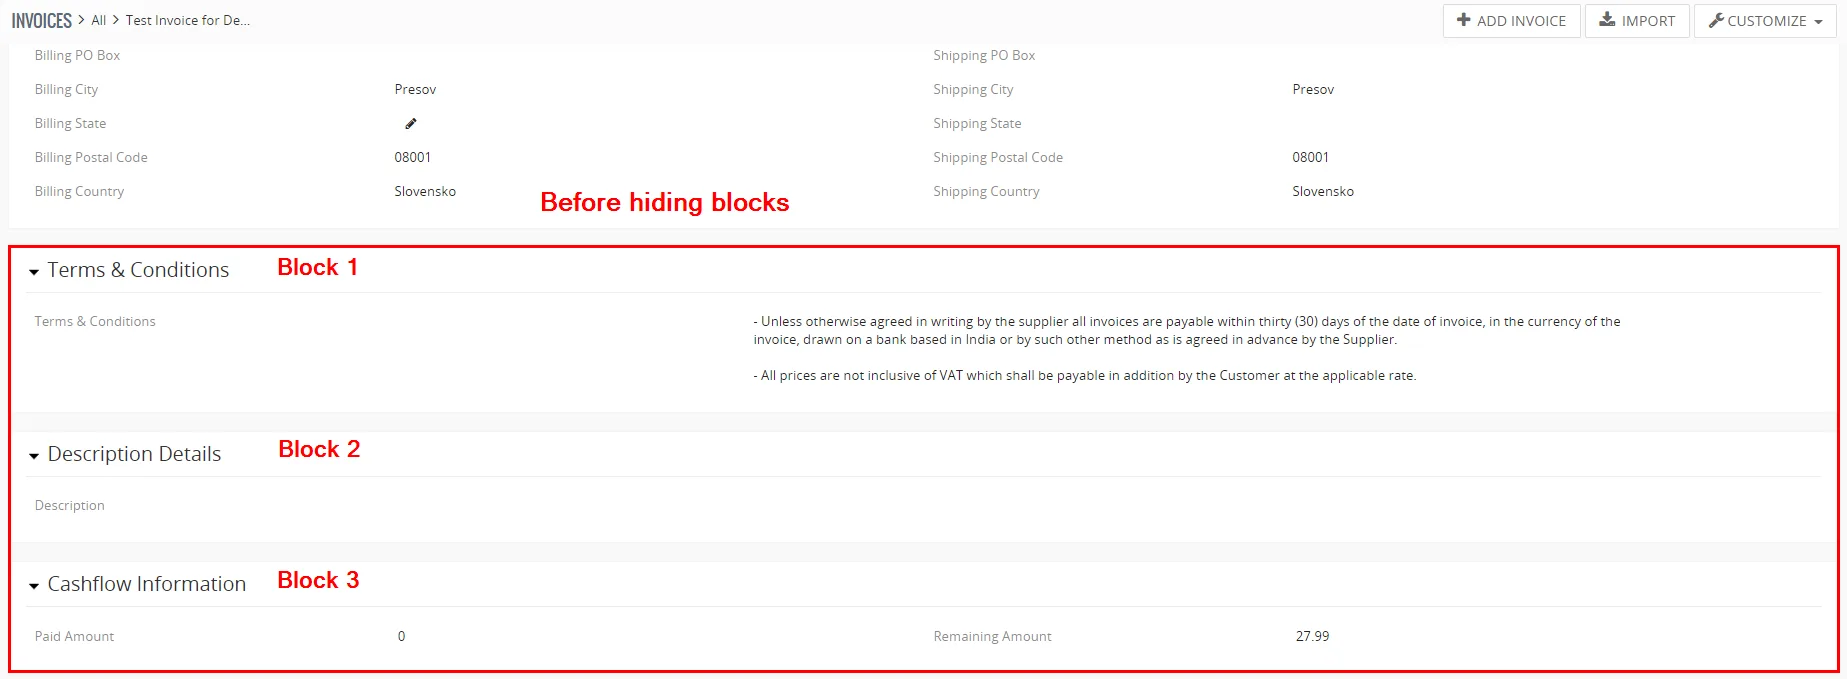
Before hiding Blocks 
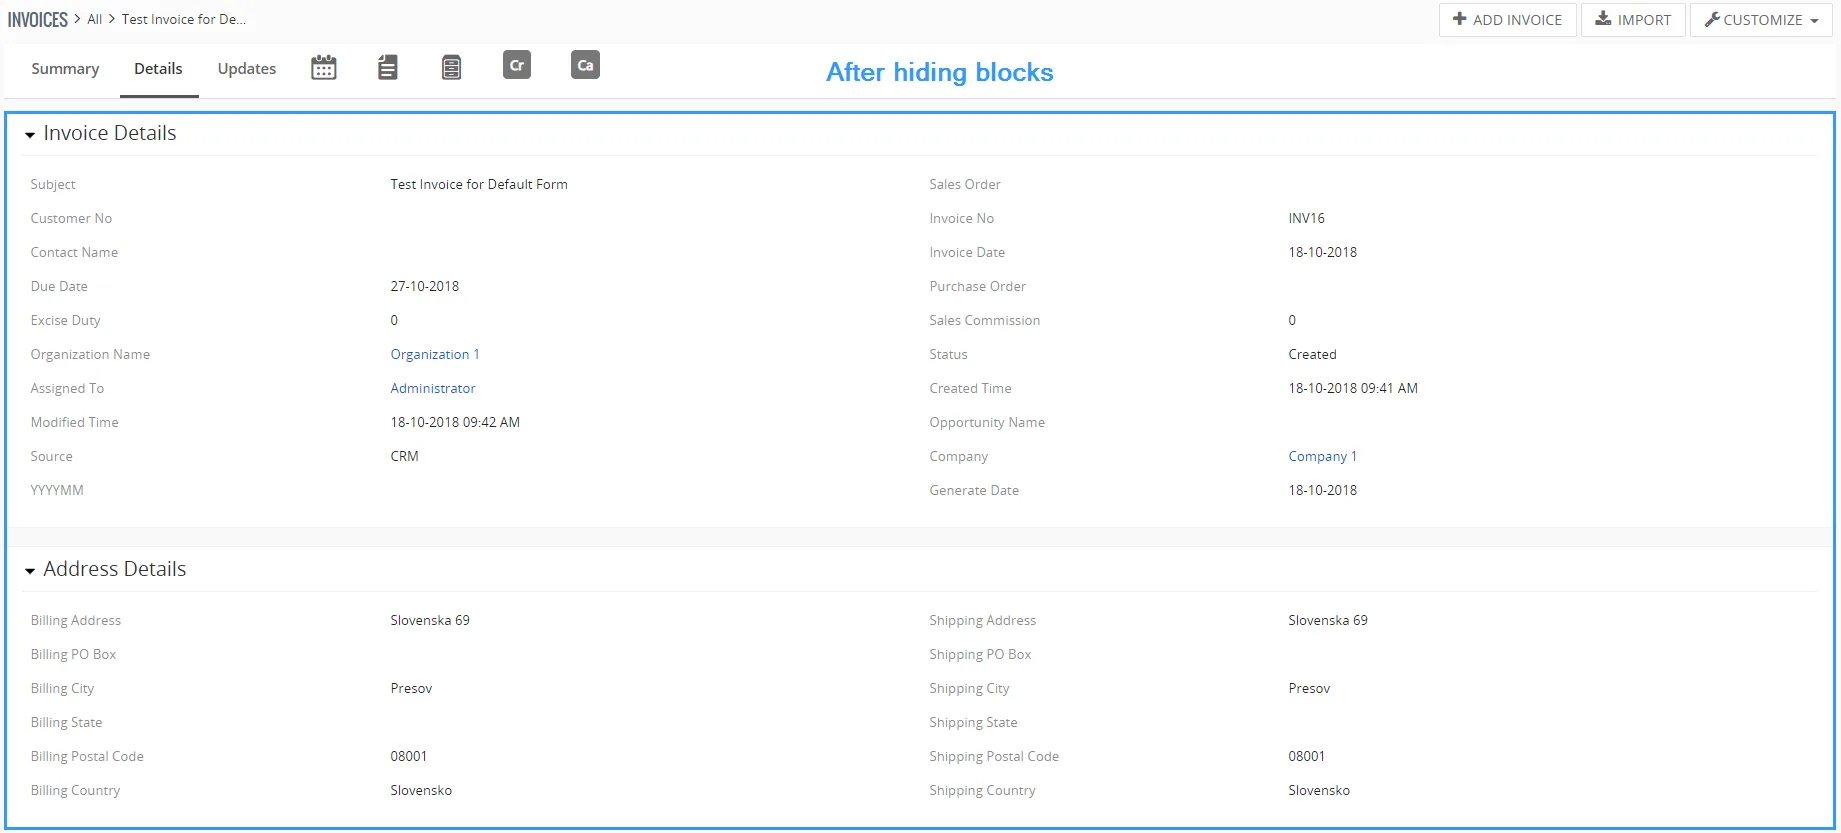
After hiding Blocks Note: If you hide Block all Fields inside that block will be hidden too, and you can’t see / edit them.
How to Hide or set Read only fields
Please provide following steps in order to edit Default form fields (as an example, we used module Invoices):
- Go to ListView of Dynamic Fields and click on Default Forms, here you can choose which module you want to edit. Choose module and proceed to the next step.
- On the next screen you will see all blocks and fields for the module you choose. Now you can hide or make read only any fields you want. The process is shown on the next picture:
Dynamic Fields – Default forms, fields As an example we want to hide fields: Sales Order, Purchase Order, Source, YYYYMM, Excise Duty and make Read only field Status.
When you are done with edit click on button and you will be redirected back to modules list of Default Forms. - Now changes should appear in your Invoice details like this:
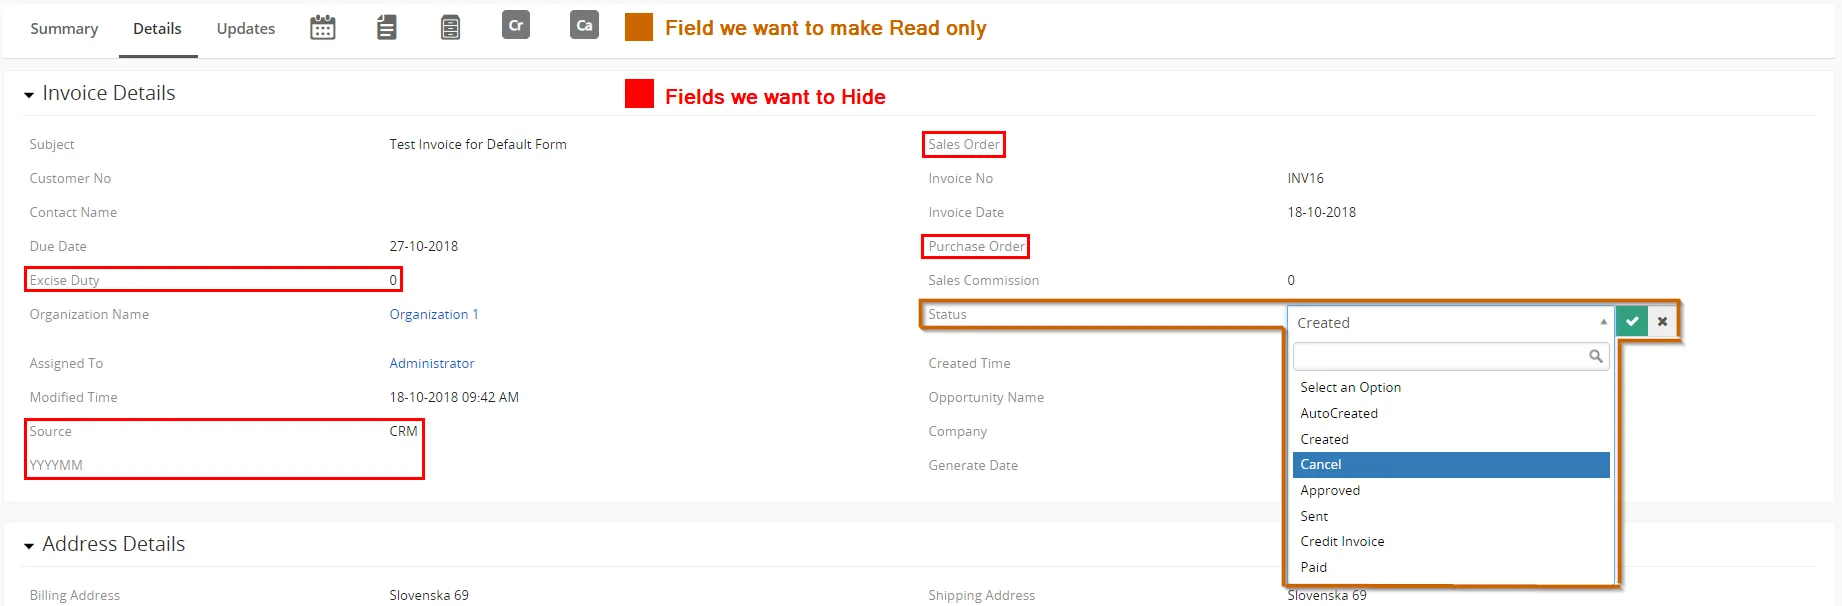
Before doing changes 
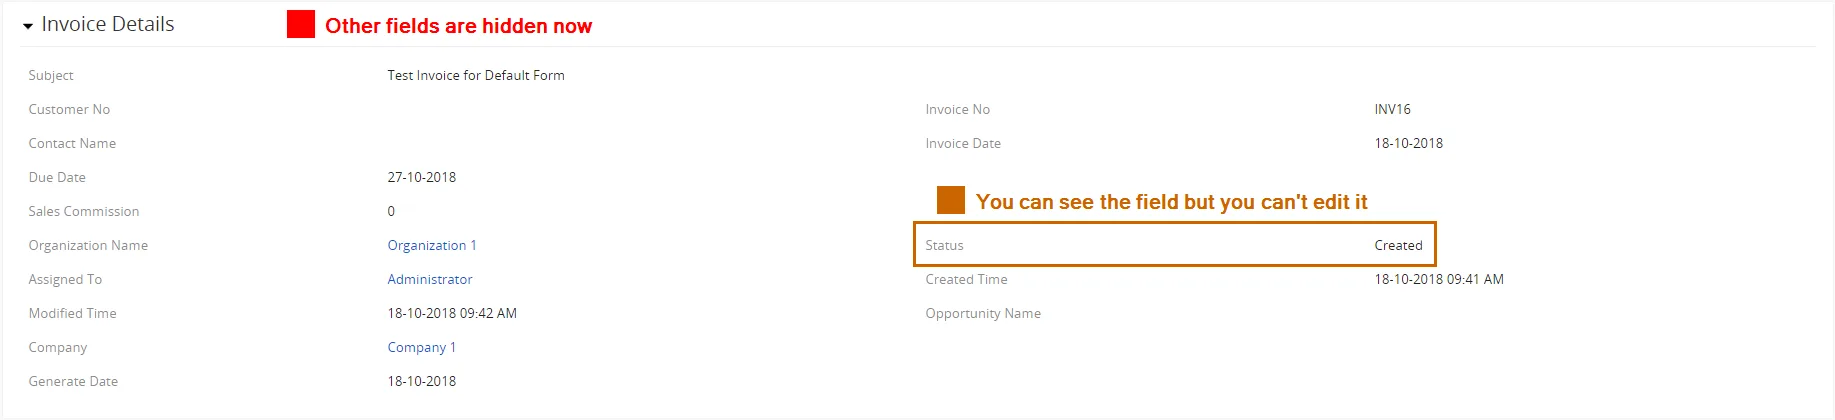
After changes was applied Note: Hidden fields can’t be seen or edited. Read only fields can be seen, but can’t be edited.
Need help with Dynamic Fields?
Our support team answers questions about installation, templates and settings.