

1.Introduction
Dynamic fields module is designed for Vtiger CRM 7 Open Source. Dynamic Fields allows you to modify your form – fields and blocks in a form – based on conditions you set.
Benefits of Dynamic Fields:
- support of standard and custom modules (Calendar module, Events, To Do-not supported)
- support of all fields and blocks,
- unlimited count of Dynamic Fields,
- option to create conditions like you wish and need – of course unlimited too,
- option to customize Default forms (show/hide/read only for fields and blocks),
- option to create list of fields group,
- compatible with Vtiger 7,
- compatible with Process Flow.
Do you have Invoices where the total amount is more than 100.000 € and the status is paid?
Do you want to protect it against overwrite? That’s just one example of a lot possibilities.
Then Dynamic fields module is what you are looking for!
 Note: Dynamic Fields module requires to download and install our free module Process Flow.

2.How to Install Dynamic Fields
There are currently two options how to install extension:
- (Recommended) Using our Free extension Installer
(Please visit the Installer page for more info) - Manually installation using a .zip file
(You still need to have Installer in order to activate license)
![]() Note: For versions ITS4YouDynamicFields_4_0 and higher, you will be needing to have installed our Installer in order to activate license keys.
Note: For versions ITS4YouDynamicFields_4_0 and higher, you will be needing to have installed our Installer in order to activate license keys.
Since December 2019 we launched our extended version of Installer which helps you install modules and manage extensions.
2.1.Installation via Installer
Make sure you have Installer installed, you can download Installer via our E-shop when you log in under Free Downloads section.
Next, simply install Installer via Module Management in Vtiger CRM by importing the .zip file you downloaded.
After successful installation, you can access Installer in two ways:
- by a click on Notifications Icon
 and then on the button
  ,
, - or via Main Menu – Settings – CRM Settings – Extensions – ITS4YouInstaller.
![]() Note: To see modules and manage licenses you have to log in to our e-shop with @email and password via
Note: To see modules and manage licenses you have to log in to our e-shop with @email and password via ![]() button (top right screen side in Installer module).
button (top right screen side in Installer module).
After log in, you can activate Dynamic Fields or our Packages licenses associated to your account via ![]() button.
button.
When the license was activated you can see module available in the Modules tab below.
Simply hit the ![]() button and Extension is installed now.
button and Extension is installed now.
2.2.Manual Installation
Please provide following steps in order to install Dynamics Fields:
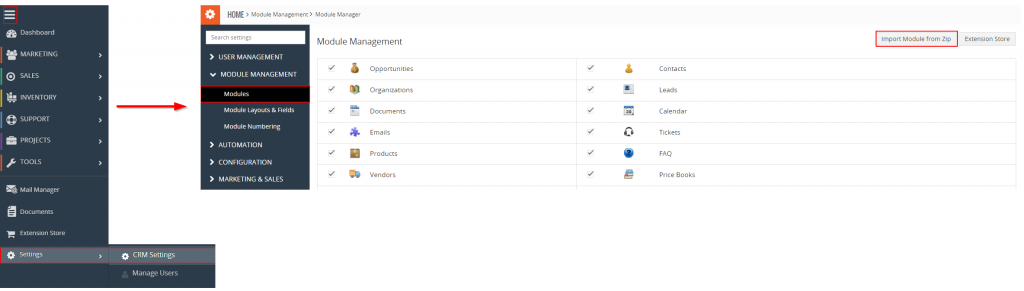
- Install the .zip (package) file of the Dynamic Fields module via Setting -> CRM Settings -> Module Management -> Modules. Click on the Import Module from Zip.
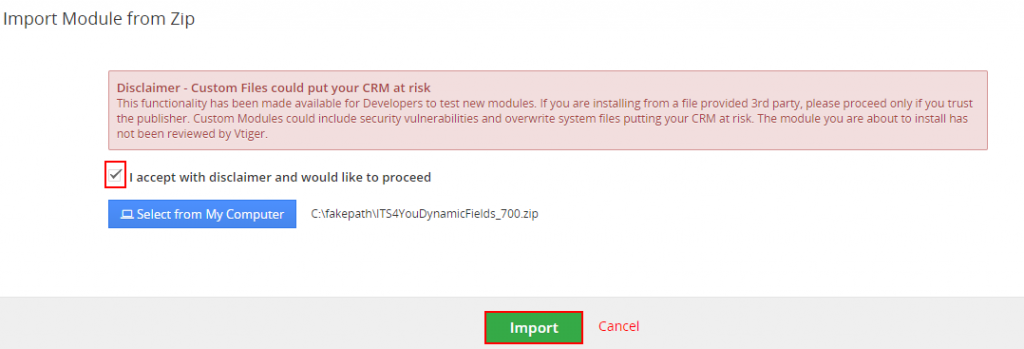
Installation of Dynamic fields for vtiger 7 – step 1 - Select the .zip (package) file that you downloaded from our shop. Please check that you accepted the disclaimer and would like to proceed. Click on the [Import] button.
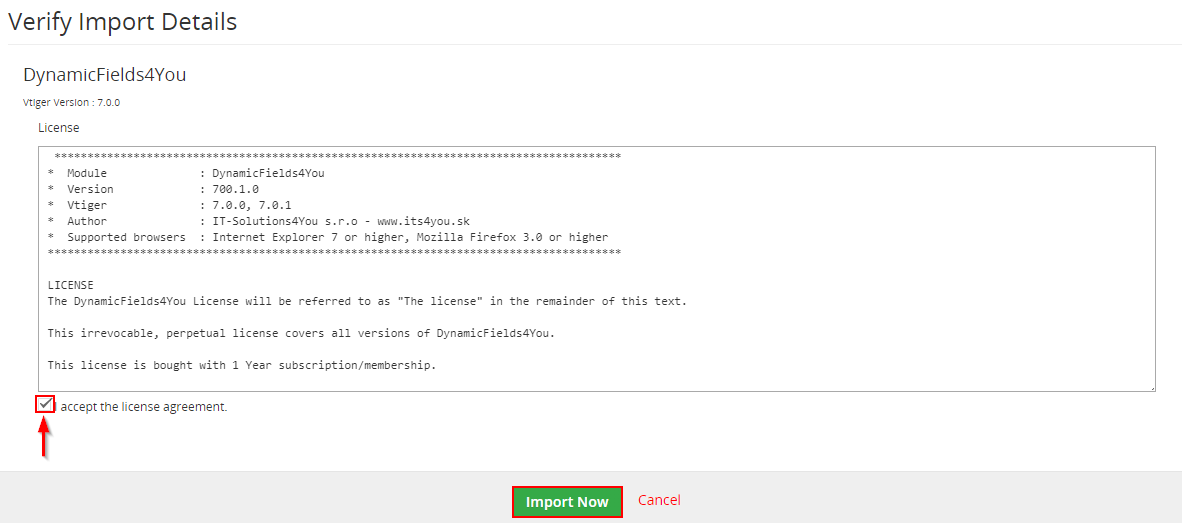
Installation of Dynamic fields for vtiger 7 – step 2 Note: If you have after this step error message: Sorry! Attempt to access restricted file. Please check if folder test/vlib has correct write permission for browser (apache, www-data). - Verify the import details parsed from the .zip (package) file. Please check that you accepted the license agreement and click [Import Now] to proceed or [Cancel] to cancel.

Installation of DynamicFields for vtiger 7 – step 3 - Dynamic Fields module was imported.

Installation of DynamicFields for vtiger 7 – step 4

![]() Note: In order to finish installation, you need activate license. For that please use our Installer
Note: In order to finish installation, you need activate license. For that please use our Installer
3.How to update Dynamic fields
The upgrade of the module is initiated manually or via our Installer.
Updating via Installer:
- open the Installer in the CRM
- in the Modules tab find your installed module and you should see the
 button available
 - If the new version is available, you will be notified via Installer Notifications icon

Updating Dynamic Fields manually:
Click on Upgrade link in list view of Dynamic fields.


As you can be seen on the Picture below you will be notified that the Dynamic Fields module already exists. Confirm License agreement and upgrade will start immediately when you click on the ![]() button.
button.

After upgrade the notification about successful upgrade is shown.
4.How to create Dynamic Fields
Create a new Dynamic Fields is very simple and user-friendly. Please follow next steps:
- Click on
 button in List view of Dynamic Fields module.
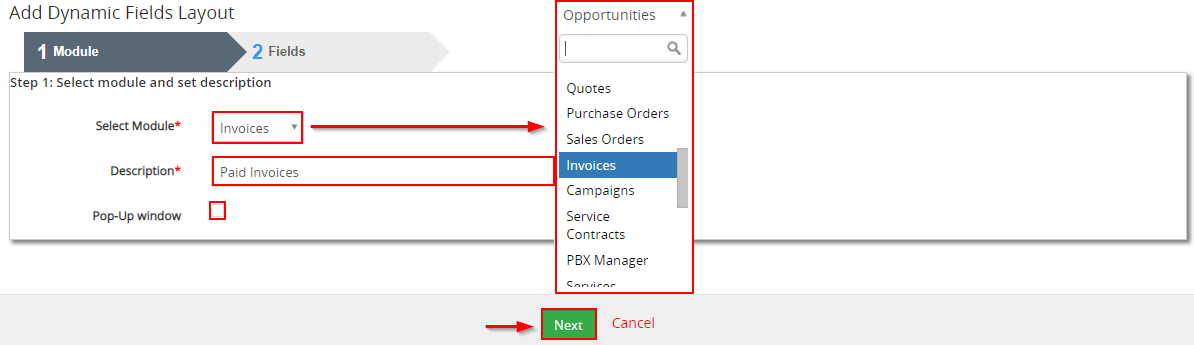
 - Choose module and fill Description (Name of Dynamic Fields to have an overview about your created Dynamic Fields), choose if you want Pop-up window and click on
 button.
How to create Dynamic Fields - In the next step you will have to add fields or blocks. When you add field or block you can set actions like:
Show – fields will be visible for users
Hide – fields will be hidden for users
Read only – fields are visible, but can’t be changed
Show as mandatory – make this fields mandatory/required
You are also able to set this value for each field separately or for each block at once. The default option is Select option (do not any change). When you will be done with editing press button.
Full process is shown in the next picture:
How to create Dynamic Fields - When Dynamic field is created, you will be taken back to ListView. Here you you have option delete or edit your Dynamic Fields via
 buttons.

Dynamic Fields ListView
If you want to add Process Flow to Dynamic fields, please follow next steps:
- We used our already created Dynamic Field “Paid Invoices” as an example for module Invoices.
Open Dynamic Field which was already created and you will be taken to DetailView.
There you can see Related Process Flows. Now there is no Process Flow because we haven’t added it yet.
Let’s change it.
First, you have to create Process Flow, how to do it you can find in our manual here: Process Flow - Go to your already created Process Flow. (We want our Dynamic Fields trigger only when the status of invoice will be Paid). So your Process Flow settings should look like this:
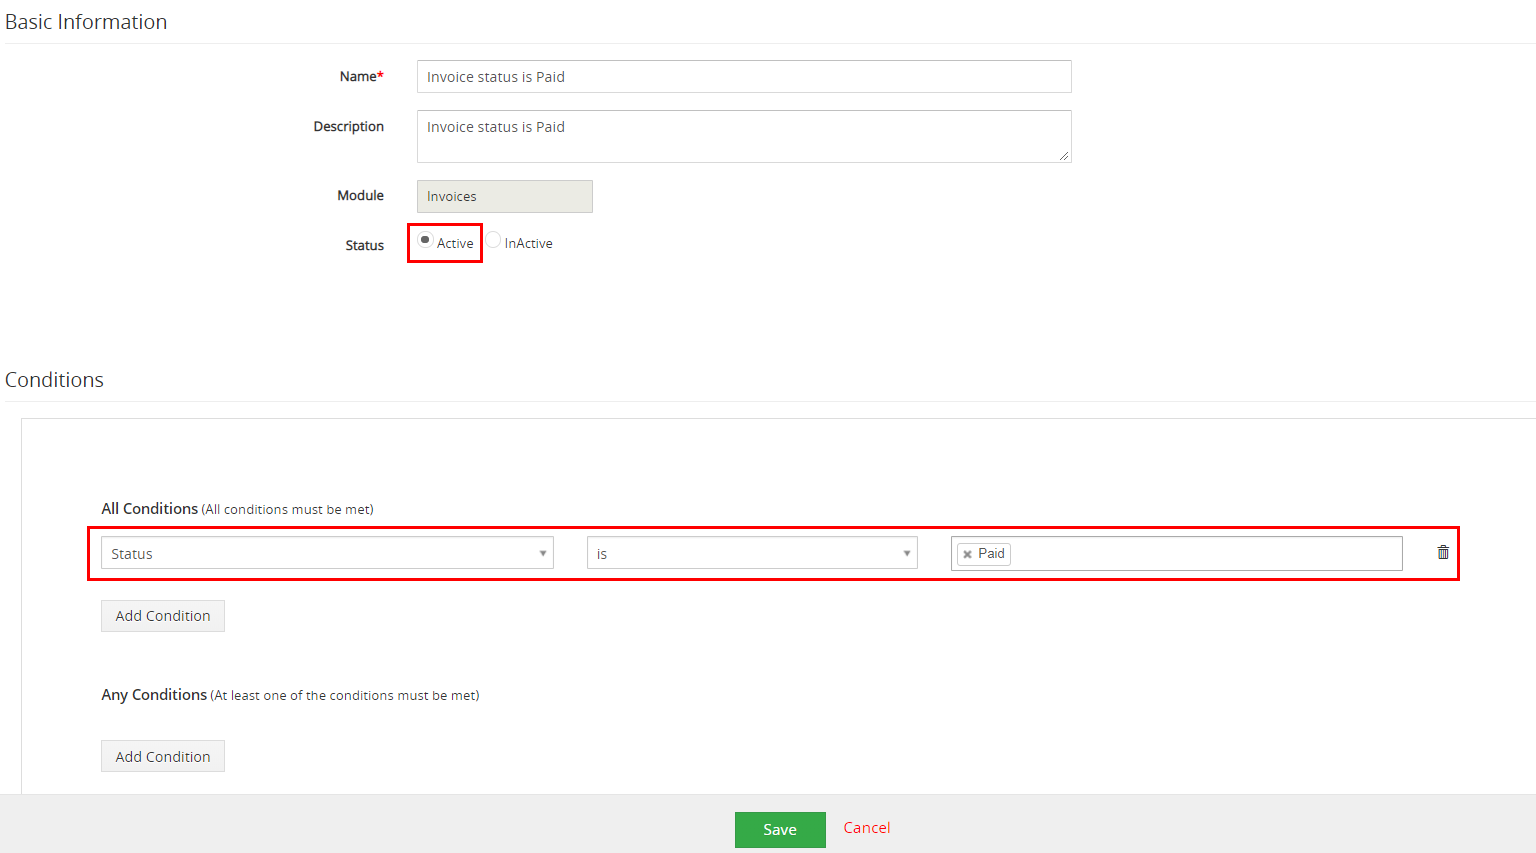
How to add Process Flow to Dynamic Fields Note: When adding conditions, you need to select a condition from the box or write it correctly. You can’t write “paid” otherwise the process will not work. You need to write “Paid” or choose it from the box. Its same for all conditions. Example:
Process Flow adding conditions, wrong 
Process Flow adding conditions, correct - To add Process Flow to Dynamic Fields follow next picture.
How to add Process Flow to Dynamic Fields - Process Flow now appears in the DetailView of Dynamic Fields we already created.

How to add Process Flow to Dynamic Fields
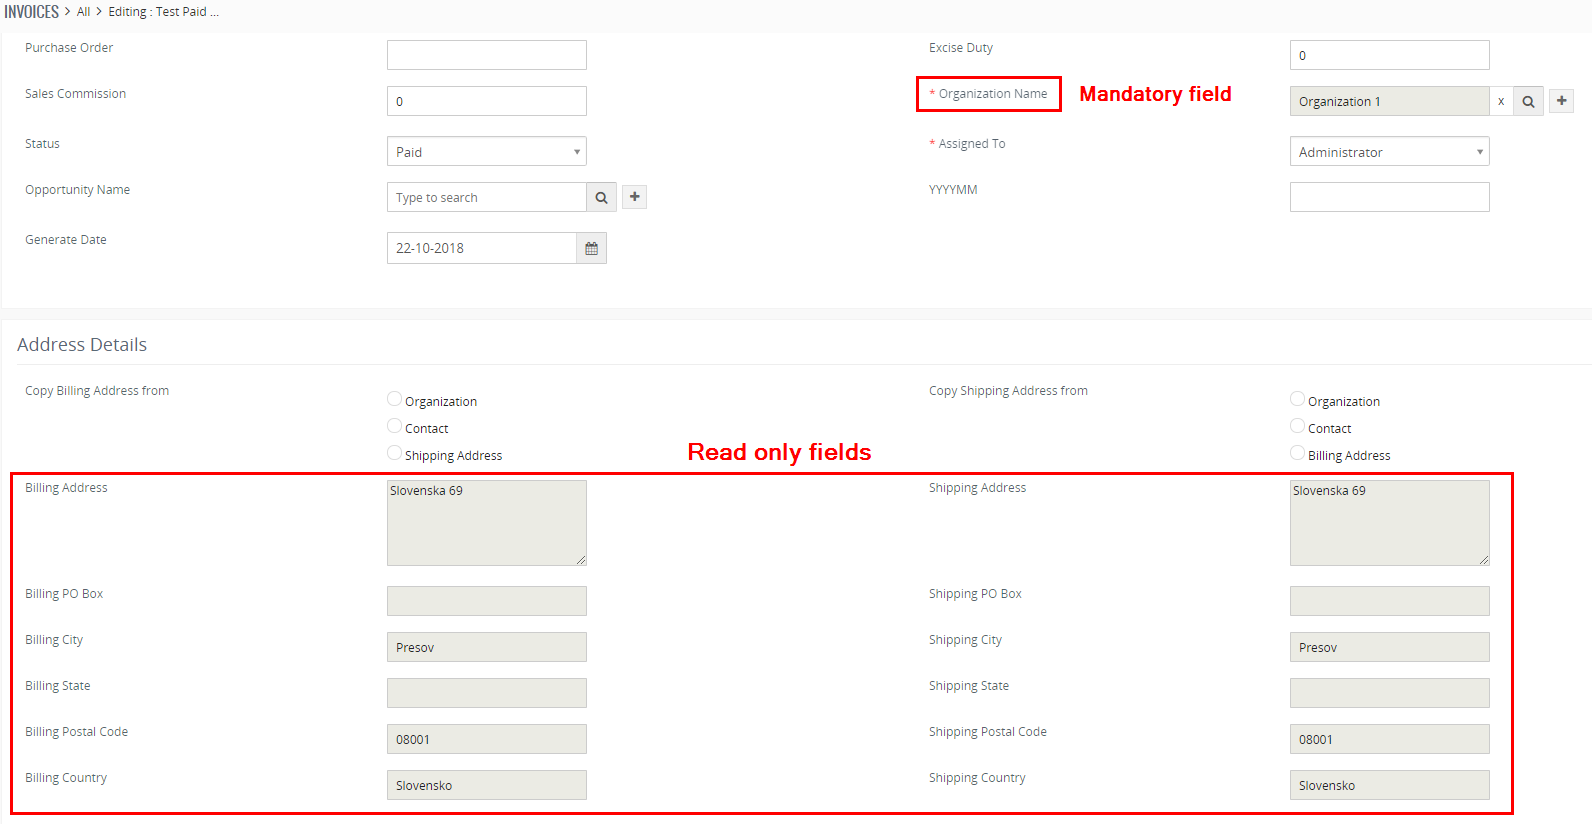
Now the results are every time you set or create invoices with Status “Paid”, address fields will be just read only (you can see them, but you can’t edit them) and Organization will be always shown as mandatory. This is just an example how Dynamic Fields and Process Flow works.
4.1.How to create Fields group
Fields group is a new feature in our Dynamic Fields extension. With Fields group you can create lists of fields and blocks and then use it in normal Dynamic Fields Layouts.
In next steps you will learn how to create Fields group and apply it to Dynamic Fields Layout. The main idea behind this feature is save time where you don’t need to add fields and blocks separately one by one, but you can create groups and add them with one click, then you can set actions for the group you added like show, hide, read only, show as mandatory.
Add Fields Group is very simple and user-friendly. Please follow next steps:
- Click on
 button in List view of Dynamic Fields module.
 - Choose module and fill Description (Name of Dynamic Fields Group to have an overview about your created Dynamic Fields Group), and click on button.

How to add Fields Group - In the next step you will have to add fields or blocks. Only action here is deleting the field or block you added via
 button. When you will be done with editing, press button.
Full process is shown in the next picture:
How to add Fields Group - When Dynamic fields group is created, you will be taken back to ListView. Here you you have option delete or edit your Dynamic fields group via buttons.

Dynamic Fields ListView
How to add Fields group to Dynamic Fields Layout
- Make sure your Fields group is created correctly. You can go to List of fields group and see if it’s there.
- There are two possible options how to add Fields group:
A) To already existing Dynamic Fields Layout
B) When you are creating a new Dynamic Fields Layout
A) How to add a Fields group to already existing Dynamic Fields Layout
![]() Note: Make sure that the modules are same for Fields Group and for Dynamic Fields Layout.
Note: Make sure that the modules are same for Fields Group and for Dynamic Fields Layout.
B) How to add a Fields Group, when you are creating a new Dynamic Fields Layout

4.2.Default Forms
With Dynamic Fields extension you can also edit your fields and blocks for all modules which are as default in Vtiger 7 system. You can do it via Default Forms.
For blocks you can:
- Show or Hide block
For fields you can:
- Hide fields
- Make fields as Read only
How to Hide/Show blocks
Please provide following steps in order to edit Default form blocks (as an example, we used module Invoices):
- Go to ListView of Dynamic Fields and click on Default Forms, here you can choose which module you want to edit. Choose module and proceed to the next step.
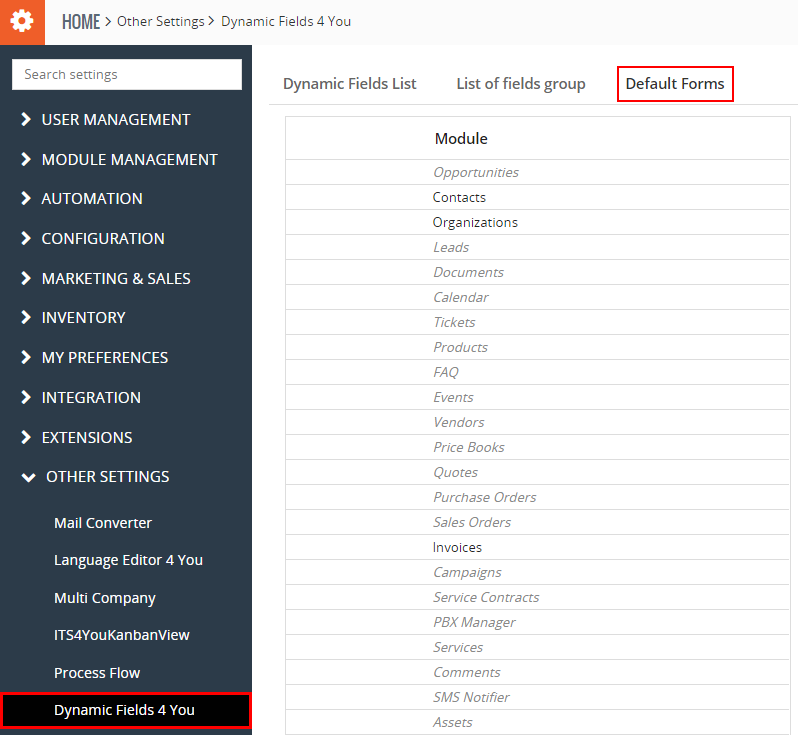
Dynamic Fields – Default forms, blocks - On the next screen you will see all blocks and fields for the module you choose. Now you can hide any block you want. Lets hide some blocks we don’t want to see. The process is shown on the next picture:

Dynamic Fields – Default forms, blocks As an example we want to hide blocks: Terms & Conditions, Description Details and Cashflow Information (Cashflow is our module which you can purchase via e-shop).
When you are done with edit click on button and you will be redirected back to modules list of Default Forms.
 - Now changes should appear in your Invoice details like this:
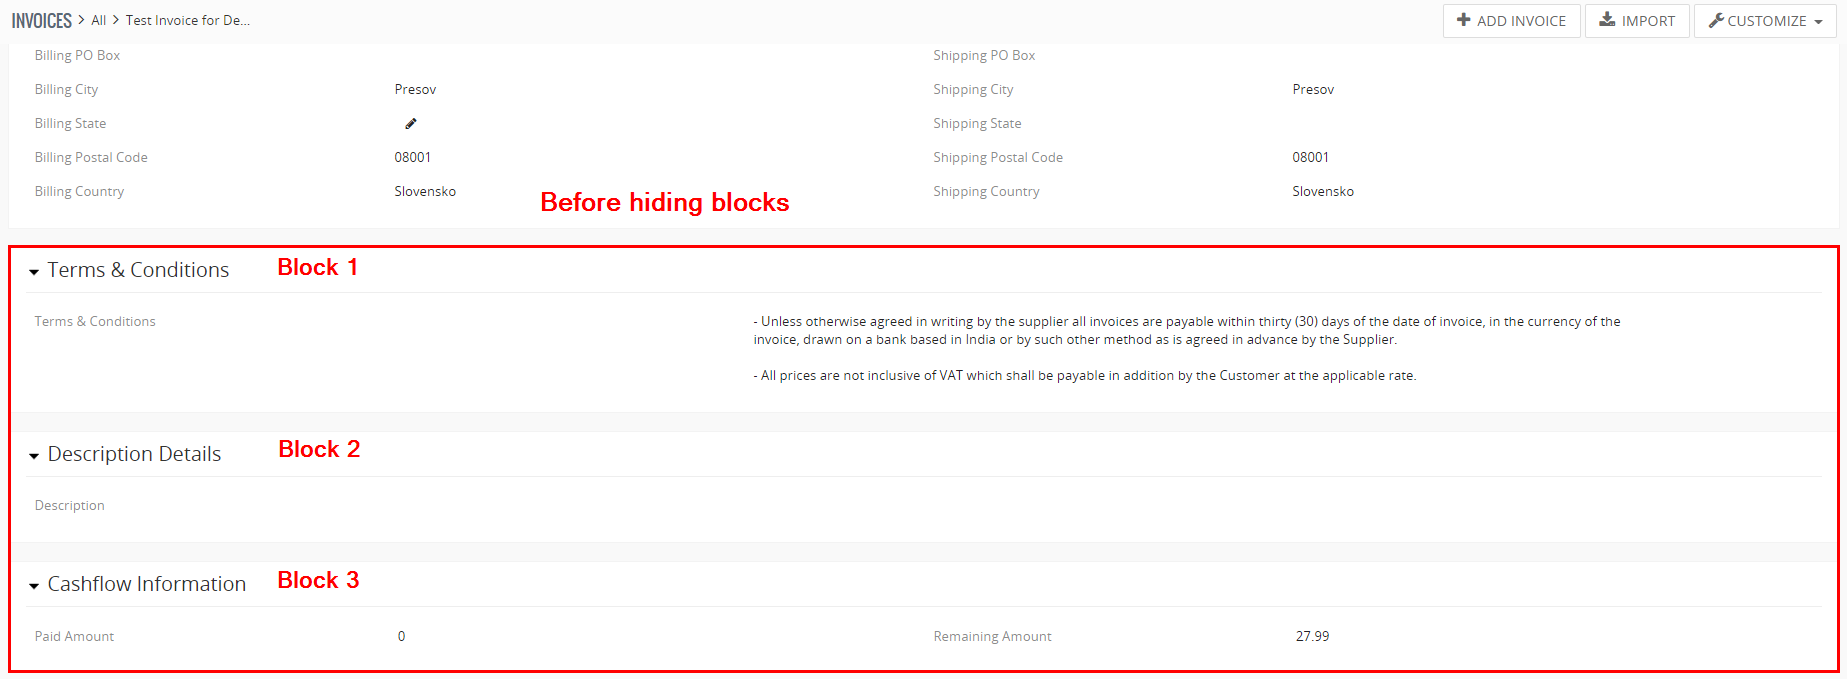
Before hiding Blocks 
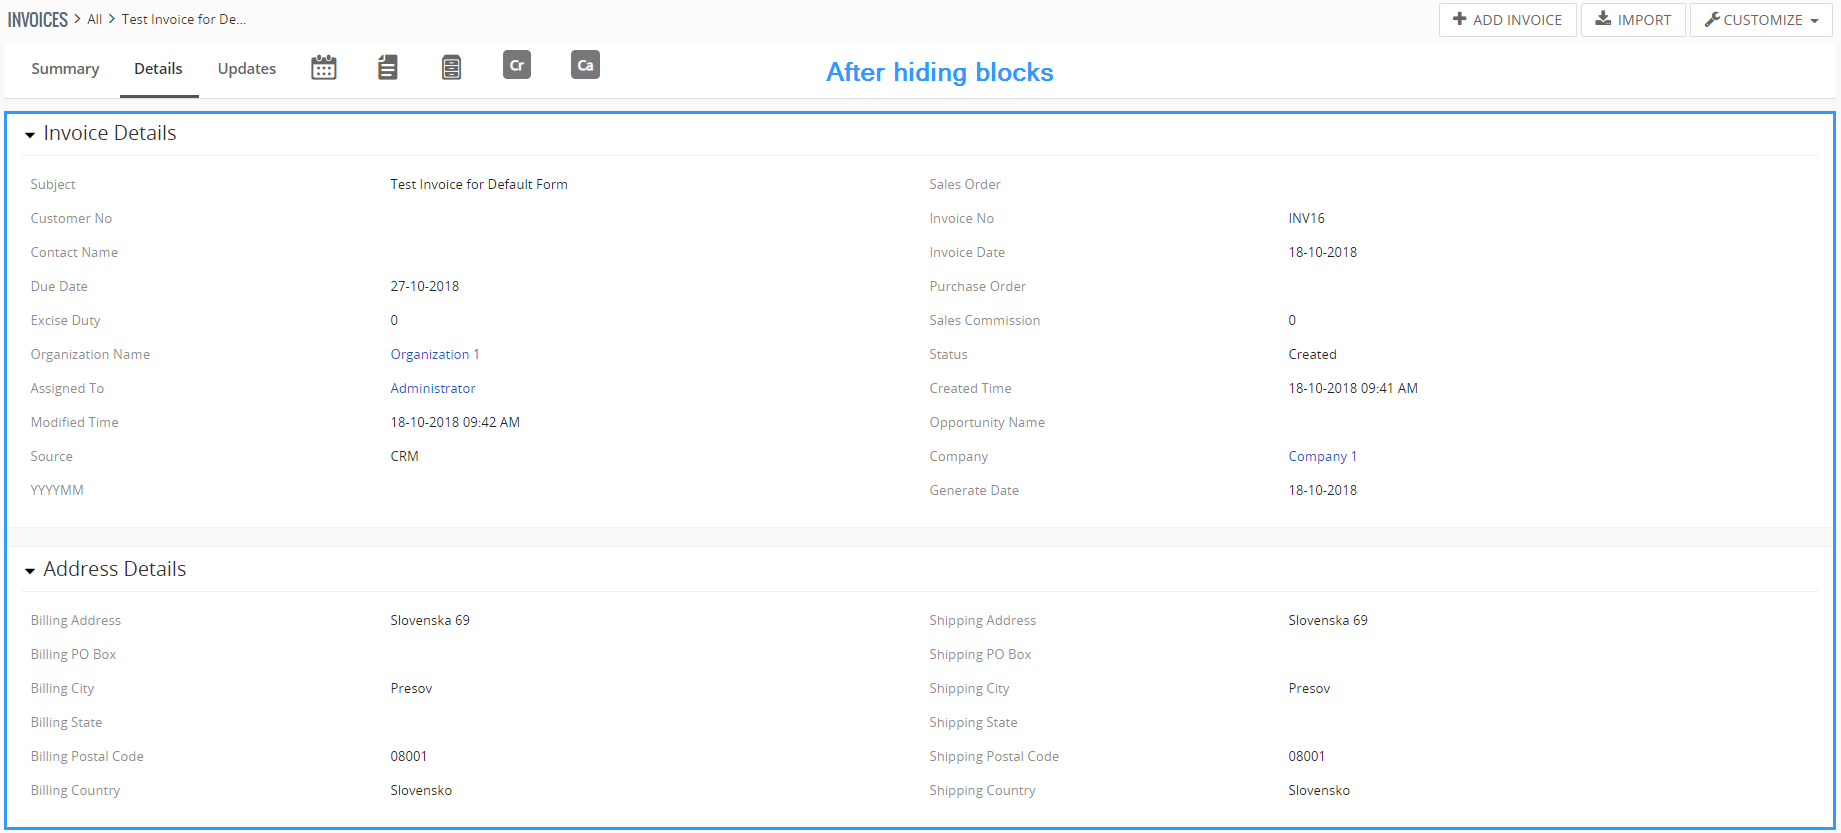
After hiding Blocks Note: If you hide Block all Fields inside that block will be hidden too, and you can’t see / edit them.
How to Hide or set Read only fields
Please provide following steps in order to edit Default form fields (as an example, we used module Invoices):
- Go to ListView of Dynamic Fields and click on Default Forms, here you can choose which module you want to edit. Choose module and proceed to the next step.
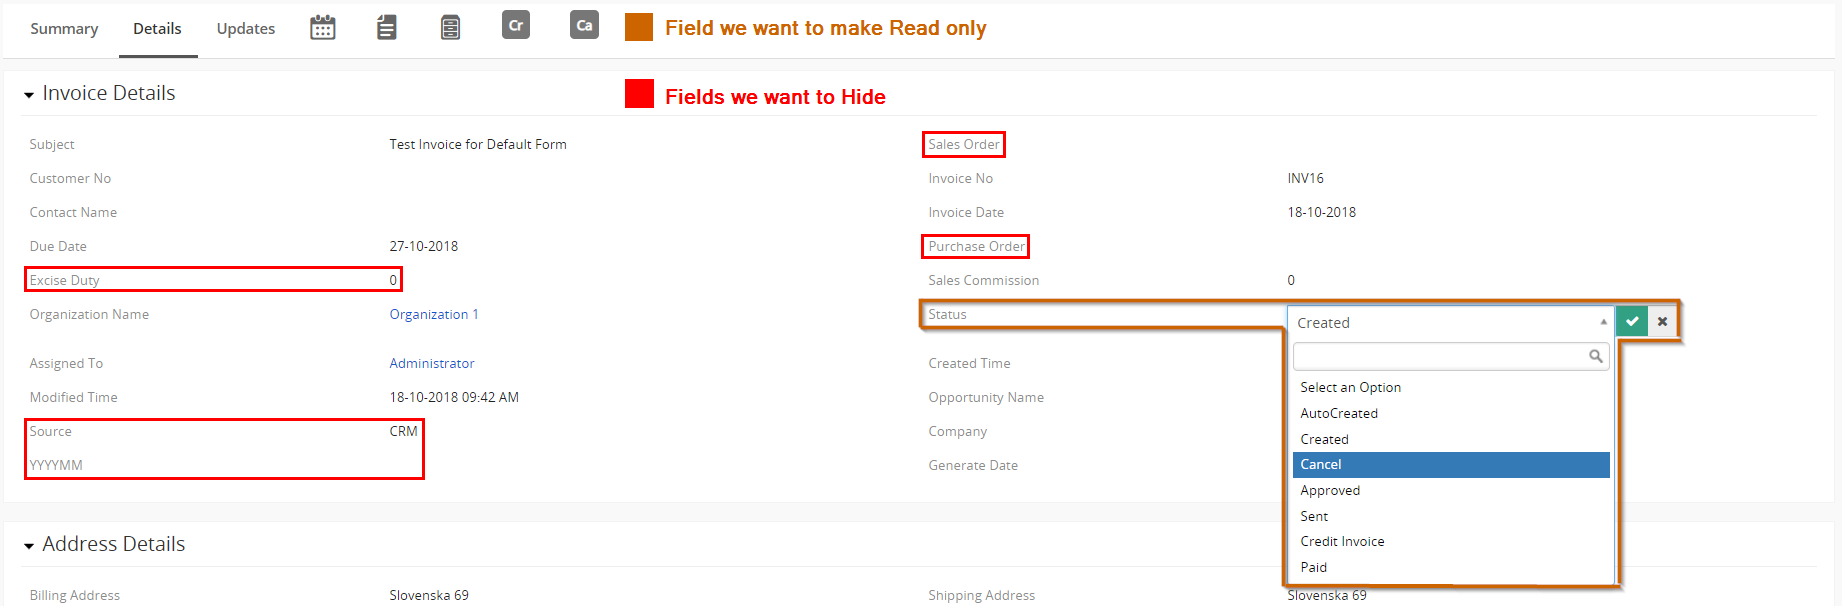
- On the next screen you will see all blocks and fields for the module you choose. Now you can hide or make read only any fields you want. The process is shown on the next picture:
Dynamic Fields – Default forms, fields As an example we want to hide fields: Sales Order, Purchase Order, Source, YYYYMM, Excise Duty and make Read only field Status.
When you are done with edit click on button and you will be redirected back to modules list of Default Forms. - Now changes should appear in your Invoice details like this:
Before doing changes 
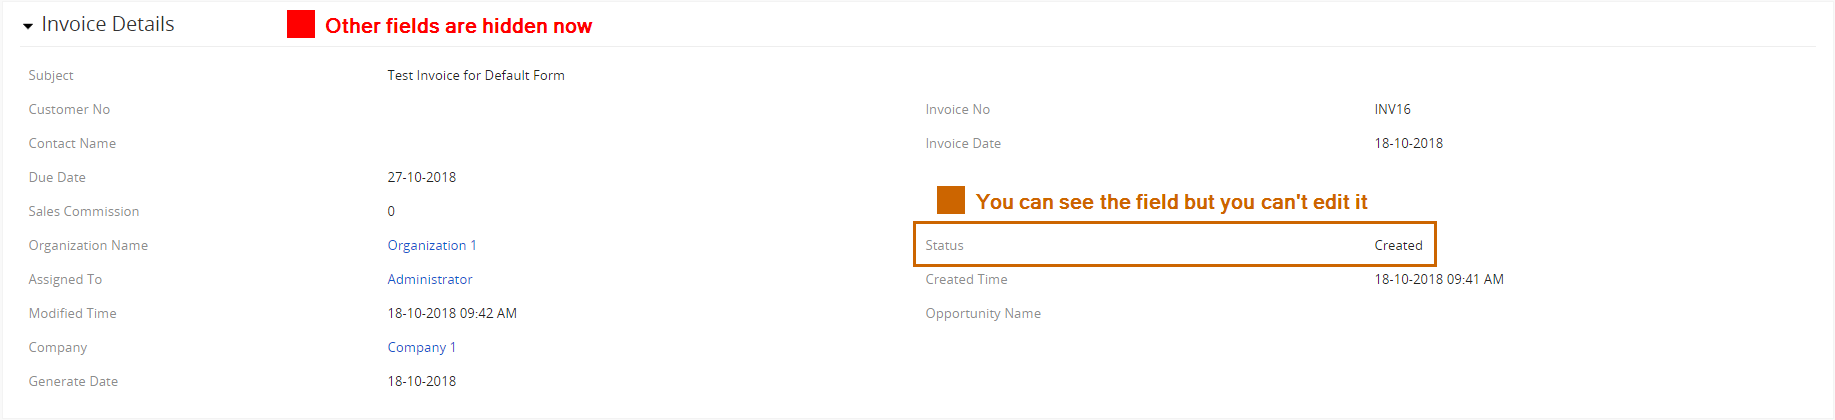
After changes was applied Note: Hidden fields can’t be seen or edited. Read only fields can be seen, but can’t be edited.
5.Work area
The Work area of the Dynamics Fields consists of:
- Listview – used for common tasks like, edit and delete via buttons, also consists of:
Dynamic Fields List, List of fields group and Default Forms. - Detailview – shows already created Dynamic Fields in details.
- Editview– allows to edit already created Dynamic Fields.
 – Settings – used for License setting, Upgrade and Uninstall.
- – used to add fields and blocks separately.
- – used to add fields and blocks as group.
6.Settings
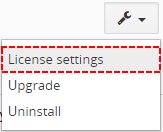
Dynamic Fields settings you can find in Listview. If you click on button ![]() the following settings will appear:
the following settings will appear:
- License settings – here you can reactivate/deactivate your license.
- Upgrade – you can update your module version.
- Uninstall – remove module from your CRM system.

6.1.License Settings
Since December 2019/January 2020 all our modules will be using Installer to manage licenses. Please check our Installer pages for more information.
You can access the License settings like its shown below:
(there can be more options from the pick-list, depends on the module)
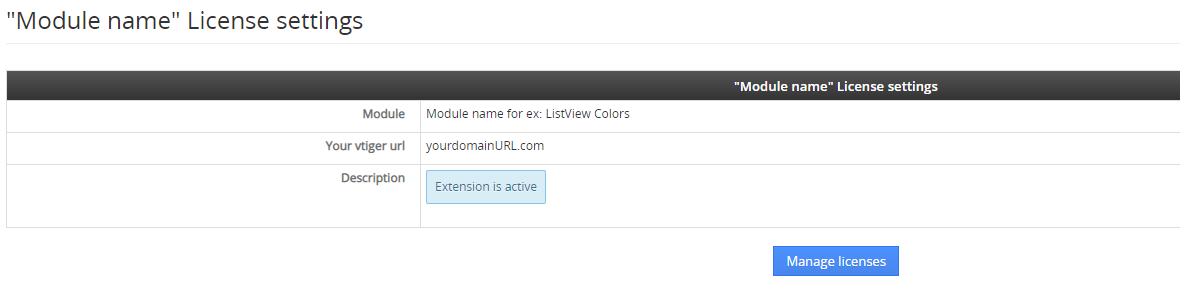
After accessing the License window you can see screen bellow with following information:
- Module name, Your Vtiger domain URL
- Description, if license is activate or not:
 – your license is currently active,
 – your license is not active and you need active it via Installer.
To activate or manage license, click on the ![]() button.
button.
6.1.1.Deactivate license
If you want to deactivate your license, please provide following steps:
- Go to your Installer, by a click on Notifications Icon and then on the button ,
or via Main Menu – Settings – CRM Settings – Extensions – ITS4YouInstaller - The following screen will appear (see below):

Installer – deactivation of license You can deactivate license by click on the button

![]() Note: The module will be deactivated but not uninstalled and license will be removed from the Activated Licenses tab.
Note: The module will be deactivated but not uninstalled and license will be removed from the Activated Licenses tab.
6.1.2.Reactivate license
To reactivate a license after deactivation, you need to follow the same process as you activated it first time:
- Click on the
 button and enter your license key.

- Confirm with
 button.
When the license was activated you can see module available in the Modules tab below.
![]() Note: To see modules and manage licenses you have to log in to our e-shop with @email and password via
Note: To see modules and manage licenses you have to log in to our e-shop with @email and password via ![]() button (top right screen side in Installer module).
button (top right screen side in Installer module).
6.2.How to update Dynamic fields
The upgrade of the module is initiated manually or via our Installer.
Updating via Installer:
- open the Installer in the CRM
- in the Modules tab find your installed module and you should see the button available
- If the new version is available, you will be notified via Installer Notifications icon
Updating Dynamic Fields manually:
Click on Upgrade link in list view of Dynamic fields.
As you can be seen on the Picture below you will be notified that the Dynamic Fields module already exists. Confirm License agreement and upgrade will start immediately when you click on the ![]() button.
button.
After upgrade the notification about successful upgrade is shown.
6.3.Uninstall
If you need to remove the module from your Vtiger you have two options:
- Uninstall via Installer.
- Manually via going to module Settings and choose Uninstall option.
6.3.1.Uninstall via Installer
You have also option to remove the module via Installer window by accessing the Settings – Uninstall window:
- Go to your Installer, by a click on Notifications Icon and then on the button ,
or via Main Menu – Settings – CRM Settings – Extensions – ITS4YouInstaller - Find the module you need to uninstall in the Modules tab
- Via
 pick list button choose the Uninstall option, you will be redirected to the Uninstall window.
 - Click on
 button

- Confirm uninstall with
 button
Now, the module has been removed from your Vtiger and your license has been deactivated. To use this module again, you need to provide installation and validation steps (see Installation chapter).
6.3.2.Manual Uninstall
There is also available option to remove Dynamic Fields from your Vtiger. To uninstall please provide following steps:
- Go to the list view of Dynamic Fields and in Settings choose option Uninstall
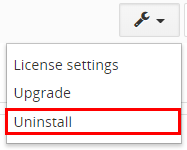
Uninstall Dynamic Fields - Click on button

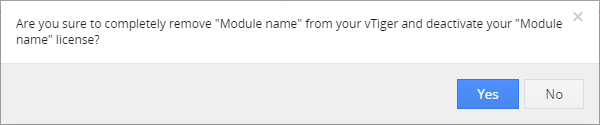
Uninstall Dynamic Fields - Confirm uninstall with
 button

Now, Dynamic Fields is removed from your Vtiger and your license is deactivated. To use Dynamic Fields again you need to provide installation and validation steps (see chapter 2. How to install Dynamic Fields).
7.Change Log
- Check latest versions available and fixes applied
- What was changed/added to manual
7.1.Dynamic Fields
- 3 January 2022 – Dynamic Fields 4.6
- resolved issues related to Process Flow actions TRUE and FALSE where FALSE operations were not applied
— 2021 —
- 14 December 2021 – Dynamic Fields 4.5
- resolved problem where false condition were not working in a Detail view when doing a “quick edit” for some fields
- 21 November 2021 – Dynamic Fields 4.4
- issues with Default forms, where actions defined in Default forms were hiding the values is now fixed
- 11 August 2021 – Dynamic Fields 4.3
- Vtiger 7.4 compatibility
— 2020 —
- 26 August 2020 – Dynamic Fields 4.2
- fixed an issue where changes did not occur after using the assigned to field as a condition via Process Flow
- fixed issue when deleting a custom field used for dynamic fields, subsequent editing dynamic field did not work
- 08 April 2020 – Dynamic Fields 4.1
- fixed issue with using Dynamic fields in combination with Calendar Events, Tasks that the dynamic loading was not working when creating or editing records
- January 2020 – Dynamic Fields 4.0
- new validation system via our FREE extension Installer
— 2019 —
- February 2019 – Dynamic Fields 700.3.1
- fixed issue with the Pop-up feature when it was not presented correctly
— 2018 —
- December 2018 – Dynamic Fields 700.3.0
- fixed issue with the licensing
- November 2018 – Dynamic Fields 700.2.0
- minor improvements and bug fixes
- October 2018 – Dynamic Fields 700.1.0
- compatibility with vtiger 7
7.2.Manual of Dynamic Fields
- January 2020: manual based on Dynamic Fields version: 4.0
- updated chapters: Installation, Updates, License settings, Uninstall
- new licensing via Installer – additional chapters added
- November 2018: manual based on Dynamic Fields 700.1.0
- updated chapter:
- October 2018: manual based on Dynamic Fields 700.1.0
- first initiate for Vtiger 7