
Custom Login Page settings can be accessed from the Extensions list view in Installer.

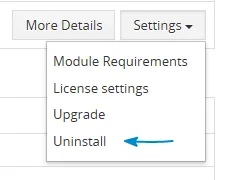
In Settings, you can find:
- Integration: opens the configuration for custom login pages.
- Module Requirements: allows you to check whether all required components are available for the module, such as custom links, event handlers, and other required settings.
- License Settings: shows whether the license is currently active.
- Upgrade: updates the extension when a newer version is available.
- Uninstall: removes the extension from your CRM.
6.1 How to update Custom Login Page
The upgrade of the module is initiated via our Installer or manually.
Updating via Installer (recommended):
- open the Installer in the CRM
- in the Modules tab find your installed module and you should see the
 button available
- If the new version is available, you will be notified via Installer Notifications icon

Updating manually:
Updating module manually is sometimes required when our support team sends you .zip package, if you are having some issues or there is any update or customization available.
Otherwise, we always recommend to use update via Installer.
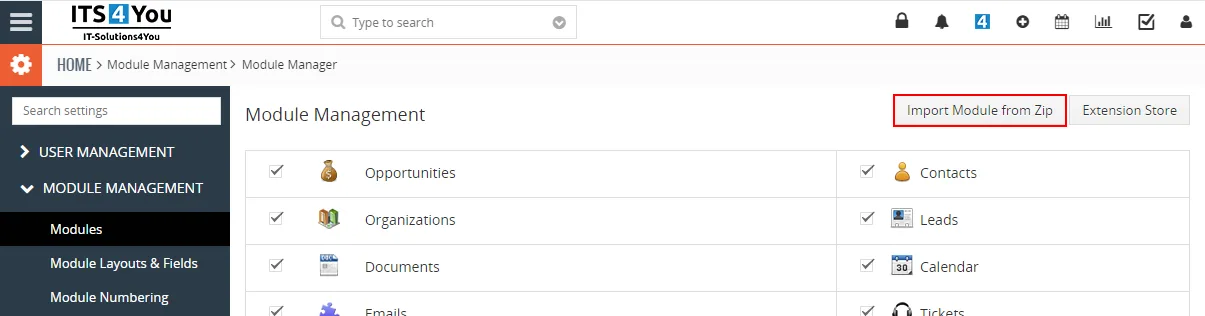
Update can be done via Module Manager by clicking on the button  and selecting the .zip file.
6.2 Uninstall
If you need to remove the Extension from your Vtiger, you have two options:
- Uninstall via Installer.
- Manually by going to module Settings and choosing the Uninstall option.
6.2.1 Uninstall via Installer
You have also option to remove the module via Installer window by accessing the Settings – Uninstall window:
- Go to your Installer, by a click on Notifications Icon and then on the button
 ,
or via Main Menu – Settings – CRM Settings – Extensions – ITS4YouInstaller - Find the module you need to uninstall in the Modules tab
- Via
 pick list button choose the Uninstall option, you will be redirected to the Uninstall window.
- Click on
 button

- Confirm uninstall with
 button
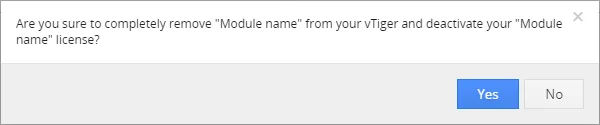
Now, the module has been removed from your Vtiger and your license has been deactivated. To use this module again, you need to provide installation and validation steps (see Installation chapter).
6.2.2 Manual Uninstall
There is also an option to remove the extension from Vtiger CRM manually.
To uninstall the extension, follow these steps:
- Go to Installer and find the extension in the list view. In the Settings dropdown, select Uninstall. Available options in the Settings dropdown may differ depending on the extension.
Extension Uninstall - Click the button.
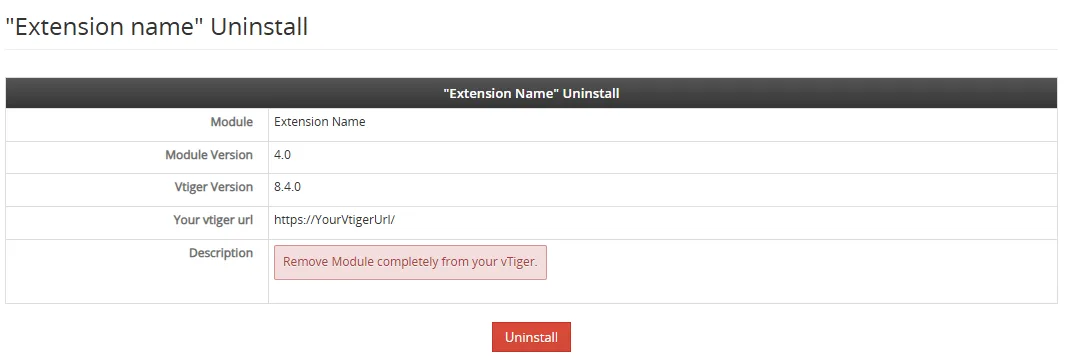
Confirm the uninstall action by clicking the
 button.
The extension is now removed from your Vtiger CRM and the license is deactivated.
To use the extension again, you need to install it and validate the license again.
Need help with Custom Login Page?
Our support team answers questions about installation, templates and settings.