
Settings for Delivery Notes can be found in the List view via  button.

7.1 Preferences
In the Delivery Notes module we have special settings called Preferences, where you have:
- Services enabled
- Update warehouse on delivery enabled
Both of these settings are turned off as default after you install Delivery Notes module to your Vtiger CRM system. You can change these settings via  button.
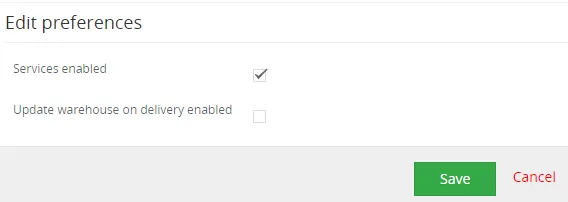
Services enabled
This is for Services module in your Vtiger CRM.
- NO: you CAN’T use Delivery Notes for your Services.
- YES: you CAN use Delivery Notes for your Services.
Example: Delivery Notes are used for Products & Services in Vtiger CRM.
But, Services are turned OFF as default. You can still turn them ON.
 We recommend having this feature turned ON.There can be situation when you creating Invoice or Sales Order and you add Products & Services to it. Then you will be need to create Delivery Note for Services, but you will be not able to do that because you didn’t turn ON this feature in the Preferences settings.
Update warehouse on delivery enabled
This feature is for updating Qty. in Stock field, in Products Detail view, only using Delivery Notes module after products are delivered.

- NO: field Qty. in Stock is updated ONLY when Invoice is created.
- YES: field Qty. in Stock field is update ONLY if you deliver products via Delivery Notes module.
This feature using Workflow which is created upon installing Delivery Notes module.
When you turn this feature ON workflow is enabled. Opposite, when you turn this off workflow will be disabled. So you don’t need touch workflow settings at all. Just use Preferences settings.

Note: You can’t edit this workflow as its using custom functions created by our developer.
7.2 License Settings
Since December 2019/January 2020 all our modules will be using Installer to manage licenses. Please check our Installer pages for more information.
You can access the License settings like its shown below:
(there can be more options from the pick-list, depends on the module)
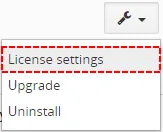
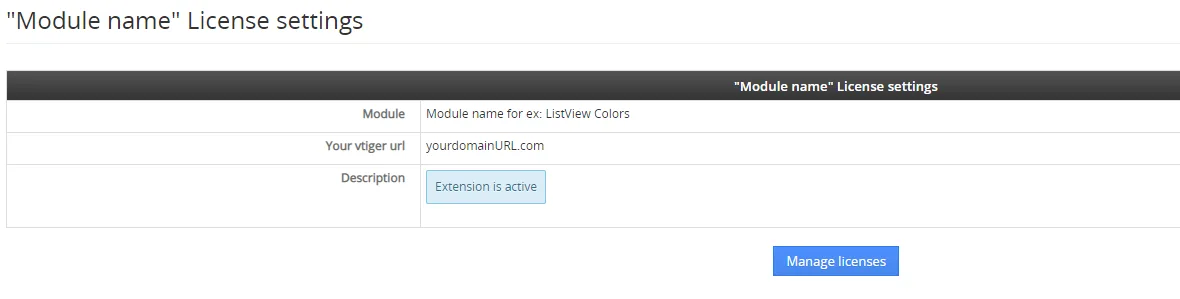
After accessing the License window you can see screen bellow with following information:
- Module name, Your Vtiger domain URL
- Description, if license is activate or not:
 – your license is currently active,
 – your license is not active and you need active it via Installer.
To activate or manage license, click on the  button.
7.2.1 Deactivate license
If you want to deactivate your license, please provide following steps:
- Go to your Installer, by a click on Notifications Icon
 and then on the button ,
or via Main Menu – Settings – CRM Settings – Extensions – ITS4YouInstaller - The following screen will appear (see below):

Installer – deactivation of license You can deactivate license by click on the button

Note:The module will be deactivated but not uninstalled and license will be removed from the Activated Licenses tab.
7.2.2 Reactivate license
To reactivate a license after deactivation, you need to follow the same process as you activated it first time:
- Click on the
 button and enter your license key.

- Confirm with
 button.
When the license was activated you can see module available in the Modules tab below.
Note: To see modules and manage licenses you have to log in to our e-shop with @email and password via  button (top right screen side in Installer module).
7.3 How to update Delivery Notes
The upgrade of the module is initiated manually or via our Installer.
Updating via Installer:
- open the Installer in the CRM
- in the Modules tab find your installed module and you should see the
 button available
- If the new version is available, you will be notified via Installer Notifications icon
Updating Delivery Notes manually:
Click on Upgrade link in list view of Delivery Notes. So please refer to above installation part for details how to initiate the import of the module from the file.

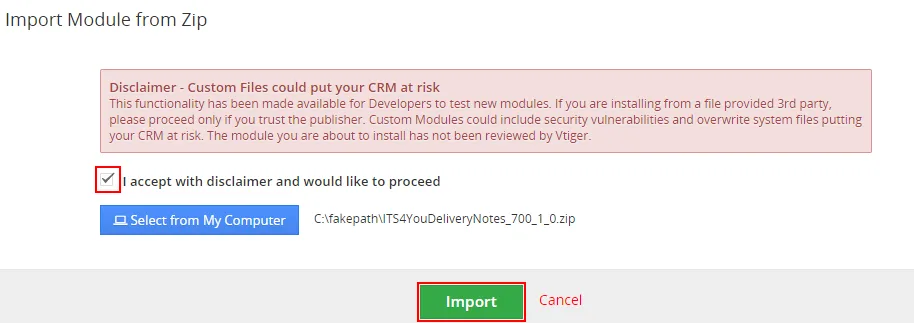
As you can be seen on the picture below you will be notified that the Delivery Notes extension already exists. Confirm License agreement and upgrade will start immediately when you click on the  button.
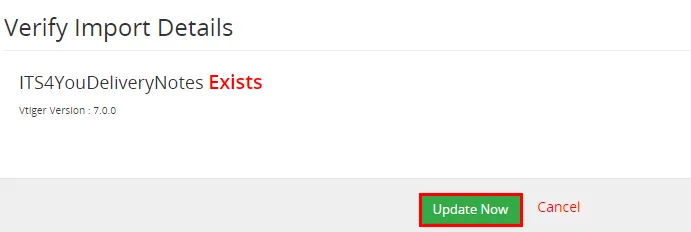
After upgrade the notification about successful upgrade is shown.
7.4 Uninstall
If you need to remove the module from your Vtiger you have two options:
- Uninstall via Installer.
- Manually via going to module Settings and choose Uninstall option.
7.4.1 Uninstall via Installer
You have also option to remove the module via Installer window by accessing the Settings – Uninstall window:
- Go to your Installer, by a click on Notifications Icon and then on the button ,
or via Main Menu – Settings – CRM Settings – Extensions – ITS4YouInstaller - Find the module you need to uninstall in the Modules tab
- Via
 pick list button choose the Uninstall option, you will be redirected to the Uninstall window.
- Click on
 button

- Confirm uninstall with
 button
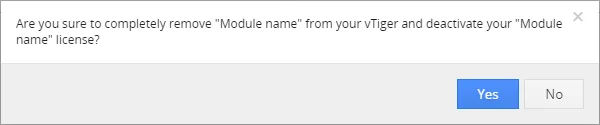
Now, the module has been removed from your Vtiger and your license has been deactivated. To use this module again, you need to provide installation and validation steps (see Installation chapter).
7.4.2 Manual Uninstall
There is also available option to remove Delivery Notes from your Vtiger manually. To uninstall please provide following steps:
- Go to the List view of Delivery Notes and in Settings choose option Uninstall
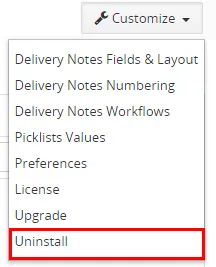
Uninstall Delivery Notes - Click on button

Uninstall Delivery Notes - Confirm uninstall with
 button
Now, Delivery Notes is removed from your Vtiger and your license is deactivated. To use Delivery Notes again you need to provide installation and validation steps (see chapter 2. How to install Delivery Notes).
Unistalling Outgoing Products
- This module will be unistalled only if you unistall Delivery Notes.
- You can’t unistall this module alone as there is no option for that.
- If you don’t require this module simply deactivate it in the Module manager in CRM Settings
Need help with Delivery Notes?
Our support team answers questions about installation, templates and settings.