

Accessing Module Builder
After successful installation and license validation, you can access Module Builder directly from your CRM settings.
Go to CRM Settings, open Module Management, and select Module Builder.
The Module Builder layout will appear, and you can start creating a new module or manage modules that already exist in your CRM.
Below you can see a preview of Module Builder and also a video showing how Module Builder works. In the next sections, we will explain each part in detail and show you how to create and manage modules step by step.
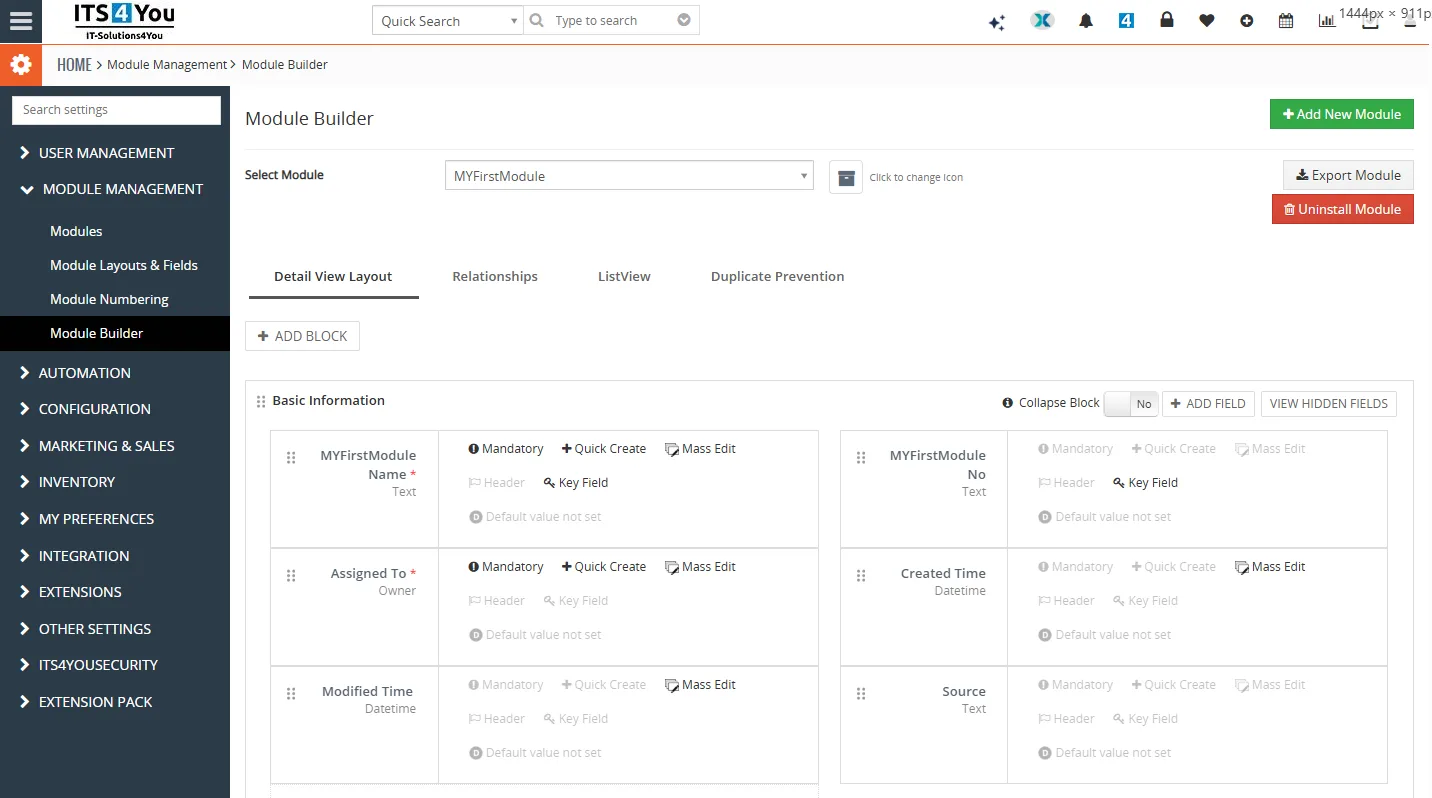
Module Builder video preview
4.1 How to Create Custom Module
How to Create Custom Module
Creating a custom module is simple. You can start by clicking the + Add New Module button in Module Builder.
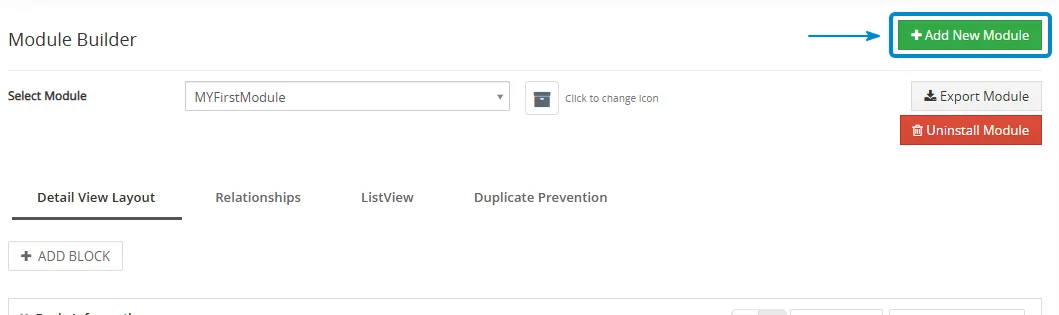
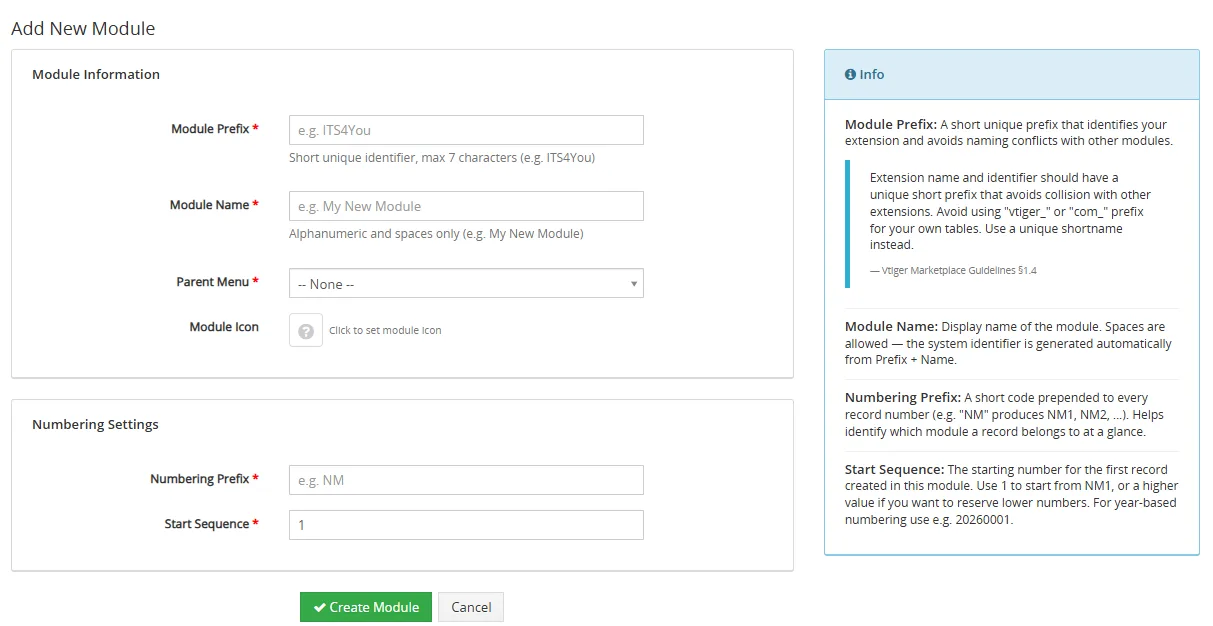
After clicking the button, the Add New Module window will appear. In this window, you need to fill in the required module information:
| Field | Description |
|---|---|
| Module Prefix | A short and unique prefix that identifies your extension and helps avoid naming conflicts with other modules. |
| Module Name | The display name of the module. Spaces are allowed. The system identifier is generated automatically from the module prefix and module name. |
| Parent Menu | Select the menu section where the module should be displayed in your CRM. |
| Module Icon | Click the icon field to see available icons. Choose the icon you want to use and confirm the selection. You can also change the module icon later. |
| Numbering Prefix | A short code added before every record number. For example, if you use NM, the created records will be numbered as NM1, NM2, and so on. This helps users quickly identify which module a record belongs to. |
| Start Sequence | The starting number for the first record created in this module. Use 1 if you want to start from NM1, or use a higher value if you want to reserve lower numbers. For year based numbering, you can use a value such as 20260001. |
After all required information is filled in, click the Create Module button to create the new custom module.
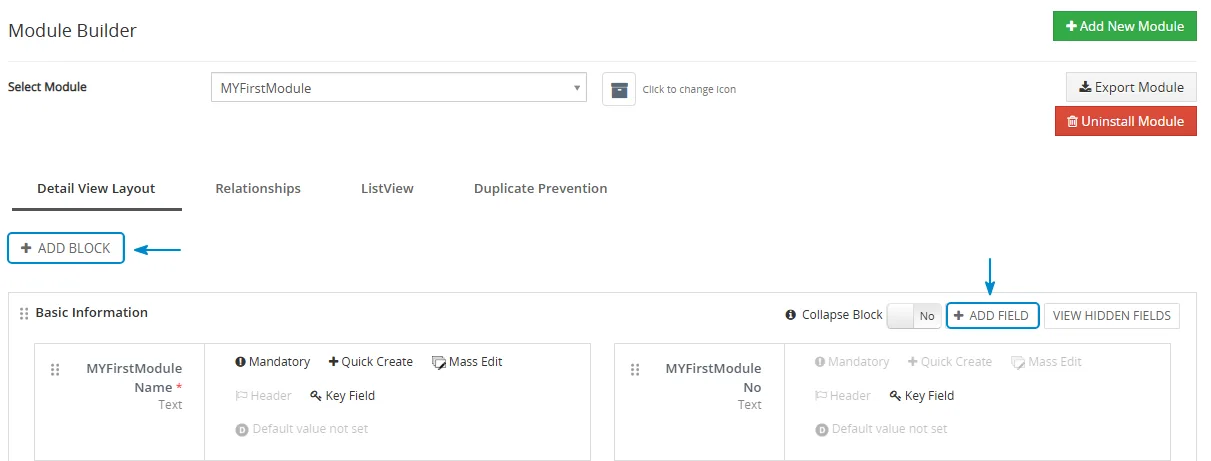
Once the module is created, the Module Builder screen will display the currently selected module together with additional actions.
You can now start adding new fields or blocks to the module by using the Add Field or Add Block buttons.
4.1.1 Add Fields to Custom Module
Add Fields
After creating a module, you can start adding new fields to it. Fields can be added directly inside the selected block by clicking the + Add Field
button.
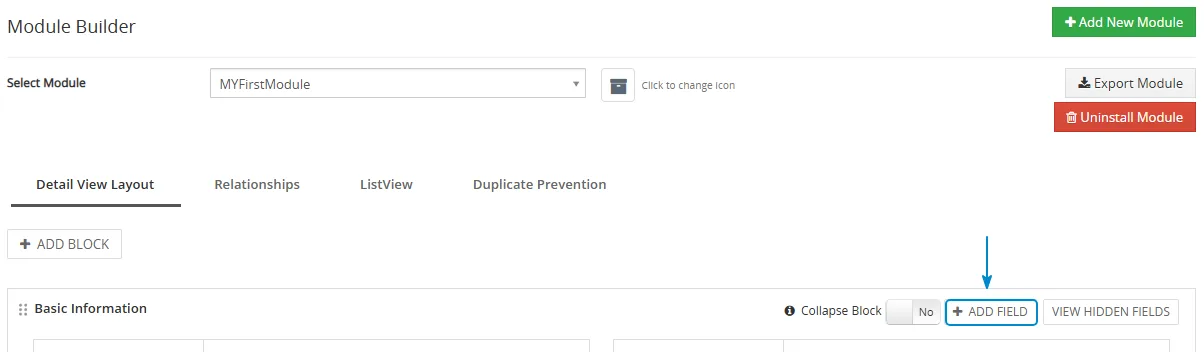
After clicking the + Add Field
button, the Create Custom Field window will open. In this window, you can select the field type, enter the field label, define additional options, and save the new field.
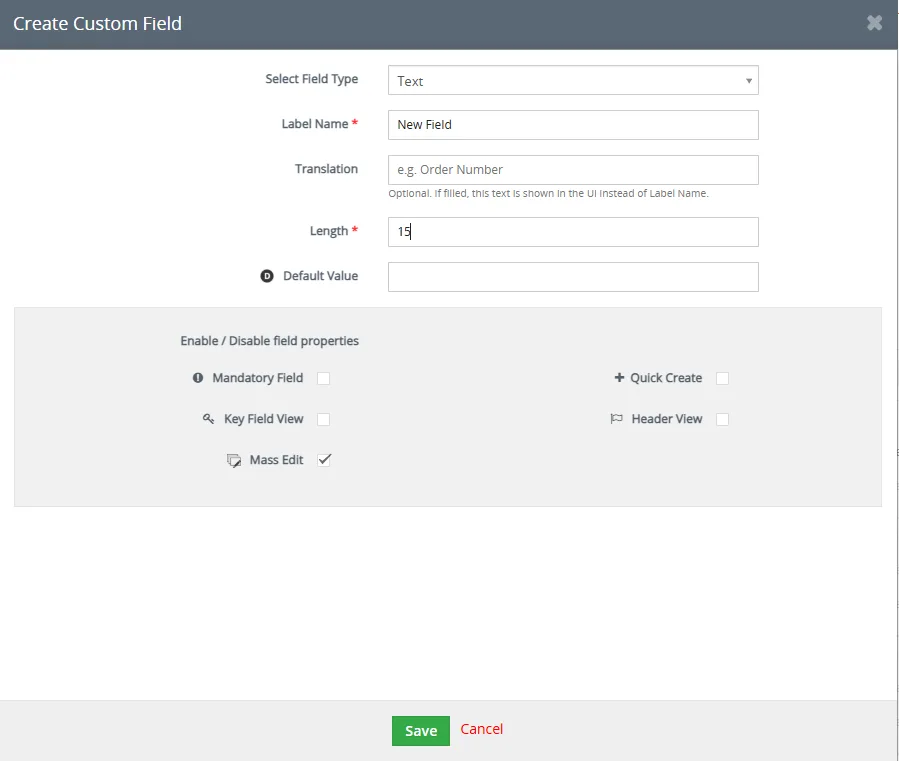
Create Custom Field options
| Option | Description |
|---|---|
| Select Field Type | Select the type of field you want to create, such as text, number, date, email, checkbox, picklist, relation, and others. |
| Label Name | Enter the field name that will be used as the main label of the field. Use alphanumeric characters and spaces only. |
| Translation | Optional text shown in the user interface instead of the label name. This is useful if you want to display a more user friendly field name. |
| Length | Define the maximum length of the field value. This option is mainly used for text based fields. |
| Default Value | Enter a default value that should be automatically filled when a new record is created. |
| Mandatory Field | Enable this option if the field must be filled before the record can be saved. |
| Quick Create | Enable this option if the field should be available in the Quick Create form. |
| Key Field View | Enable this option if the field should be shown as an important key field in the record view. |
| Header View | Enable this option if the field should be displayed in the header area of the record detail view. |
| Mass Edit | Enable this option if users should be able to update this field for multiple records at once. |
Available field types
Module Builder supports several field types. Select the field type according to the kind of data you want to store in the custom module.
| Field Type | Description |
|---|---|
| Text | Standard text input for short text values. |
| Decimal | Number field that supports decimal values. |
| Integer | Number field for whole numbers without decimals. |
| Percent | Field for percentage values. |
| Currency | Field for monetary values. |
| Date | Date field for storing calendar dates. |
| Field for email addresses. | |
| Phone | Field for phone numbers. |
| Picklist | Dropdown field where users select one value from predefined options. |
| URL | Field for website links or other URLs. |
| Checkbox | Yes or no field used for simple true or false values. |
| Text Area | Larger text field for longer notes or descriptions. |
| Multi Select Combo Box | Field where users can select multiple values from predefined options. |
| Skype | Field for storing a Skype contact value. |
| Time | Field for storing time values. |
| Relation | Field used to connect the current module with another CRM module. |
Choose the field type, enter the field label, and fill in the additional options required for the selected field type.
When everything is configured, click the Save
button to create the new field.
After saving, the new field will be created and displayed in the selected module block inside Module Builder.
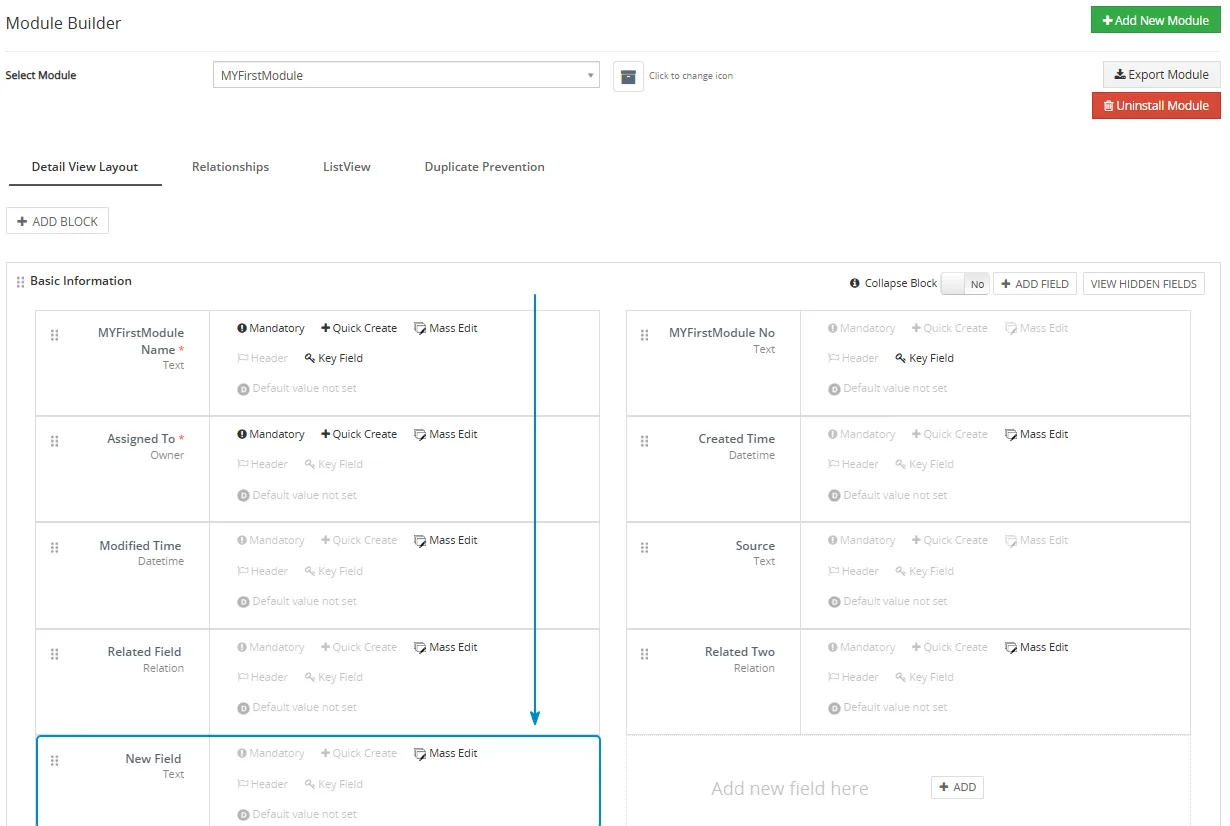
4.1.2 Add Blocks to Custom Module
If you need to organize fields into more sections, you can add a new block by clicking the + Add Block button.
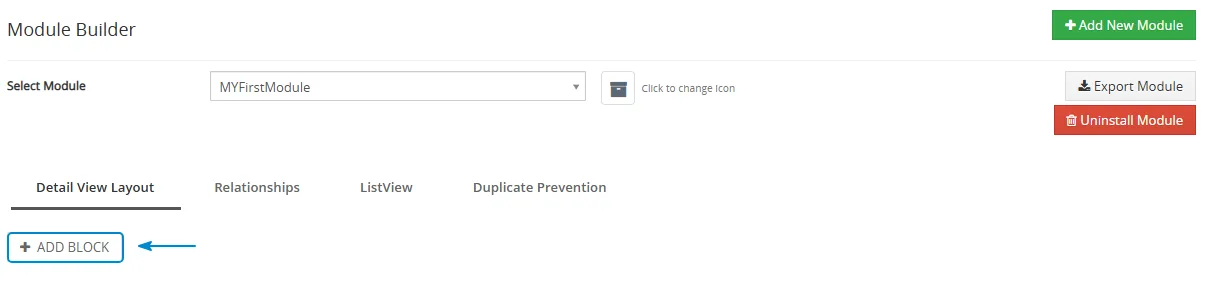
After clicking the + Add Block button, a new window will open. In this window, you can define the new block settings.
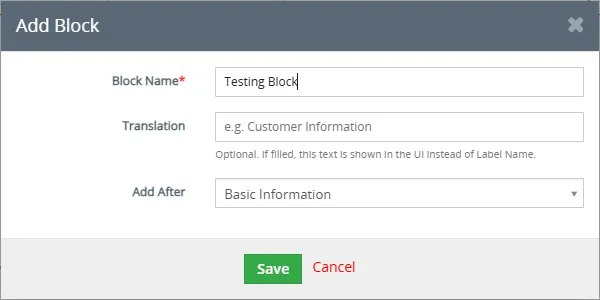
Add Block options
| Option | Description |
|---|---|
| Block Name | Enter the name of the block. This name will be used to identify the block in the module layout. |
| Translation | Optional text shown in the user interface instead of the block name. This is useful if you want to display a more user friendly block title. |
| Add After | Select where the new block should be placed in the module layout. |
After filling in the required information, click the Save button to create the new block.
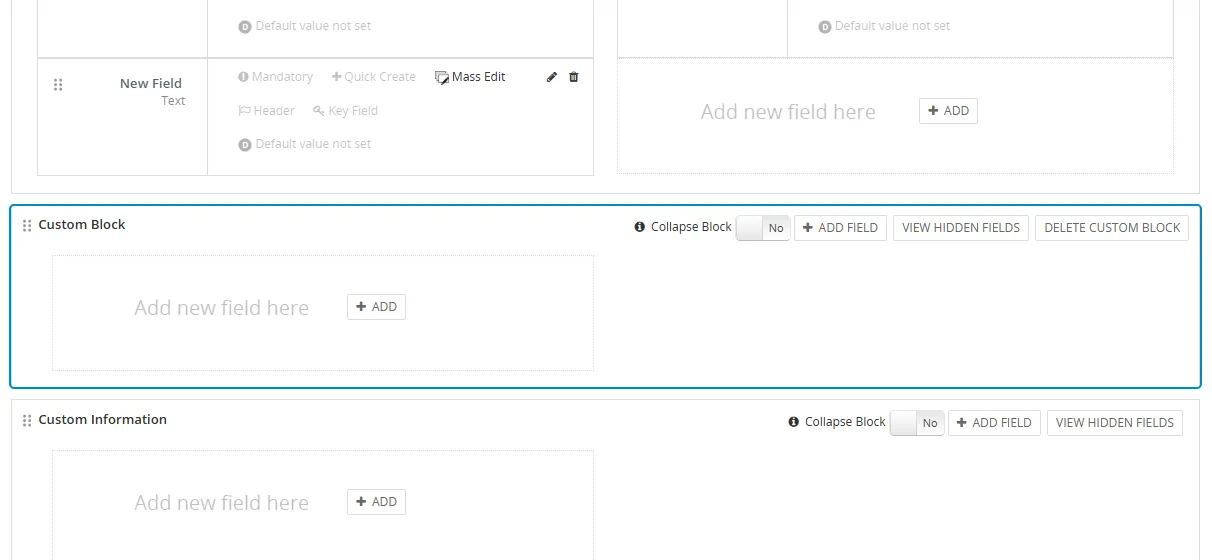
Once the block is created, you can manage it directly in the Module Builder layout. You can set the block as a collapsed block in Detail View, move it higher or lower in the module layout, and add new fields to it using the + Add Field button.
If inactive fields exist for the selected block, you can display them by clicking the View Hidden Fields button.
Need help with Module Builder?
Our support team answers questions about installation, templates and settings.