

1.Introduction
Pre-Invoice / Pro-Forma Invoice / Preliminary Invoice is an abridged or estimated invoice sent by a seller to a buyer in advance of a shipment or delivery of goods. It notes the kind and quantity of goods, their value, and other important information such as weight and transportation charges. Pro forma invoices are commonly used as preliminary invoices with a quotation, or for customs purposes in importation. Pro forma invoices are not recorded as an accounts receivable by the seller nor are they recorded as an accounts payable by the buyer.
- Allows you to create Pre-Invoice from Quotes, Sales Orders & Opportunities
- Create records of payment’s deposits and then create real Invoice
- Pre-Invoice Information block in Detail view of records
- Easy installation & usage
- Support of PDF Maker
- Support of EMAIL Maker
- Compatible with Vtiger 7.x/6.x
![]() Note: This extension also included in our Extension Packages: Extended & All Access.
Note: This extension also included in our Extension Packages: Extended & All Access.
![]() Note: For versions ITS4YouPreInvoice_4_0 and higher, you will be needing to have installed our Installer in order to activate license keys.
Note: For versions ITS4YouPreInvoice_4_0 and higher, you will be needing to have installed our Installer in order to activate license keys.
2.How to Install PreInvoice
There are currently two options how to install extension:
- (Recommended) Using our Free extension Installer
(Please visit the Installer page for more info) - Manually installation using a .zip file
(You still need to have Installer in order to activate license)
![]() Note: For versions ITS4YouPreInvoice_4_0 and higher, you will be needing to have installed our Installer in order to activate license keys.
Note: For versions ITS4YouPreInvoice_4_0 and higher, you will be needing to have installed our Installer in order to activate license keys.
Since December 2019 we launched our extended version of Installer which helps you install modules and manage extensions.
2.1.Installation via Installer
Make sure you have Installer installed, you can download Installer via our E-shop when you log in under Free Downloads section.
Next, simply install Installer via Module Management in Vtiger CRM by importing the .zip file you downloaded.
After successful installation, you can access Installer in two ways:
- by a click on Notifications Icon
 and then on the button
- or via Main Menu – Settings – CRM Settings – Extensions – ITS4YouInstaller.
![]() Note: To see modules and manage licenses you have to log in to our e-shop with @email and password via
Note: To see modules and manage licenses you have to log in to our e-shop with @email and password via ![]() button (top right screen side in Installer module).
button (top right screen side in Installer module).
After log in, you can activate Extensions or our Packages licenses associated to your account via ![]() button.
button.
When the license was activated you can see module available in the Modules tab below.
Simply hit the ![]() button and Extension is installed now.
button and Extension is installed now.
![]() You can only Activate these licenses, which are assigned to your Email Account you made purchase with and with which you are logged to the Installer.
You can only Activate these licenses, which are assigned to your Email Account you made purchase with and with which you are logged to the Installer.
3.How to update Pre-Invoice
The upgrade of the module is initiated manually or via our Installer.
Updating via Installer:
- open the Installer in the CRM
- in the Modules tab find your installed module and you should see the
 button available
 - If the new version is available, you will be notified via Installer Notifications icon

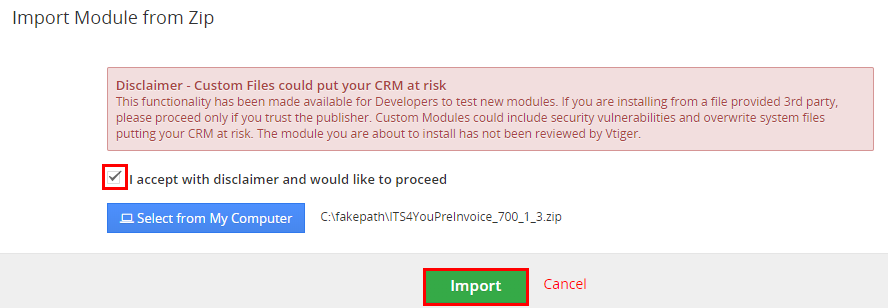
Updating Pre-Invoice manually:
Click on Upgrade link in List view of PreInvoice. Please refer to below installation part for details how to initiate the import of the module from the .zip file.

As you can be seen on the picture below you will be notified that the PreInvoice extension already exists. Confirm License agreement and upgrade will start immediately when you click on the ![]() button.
button.
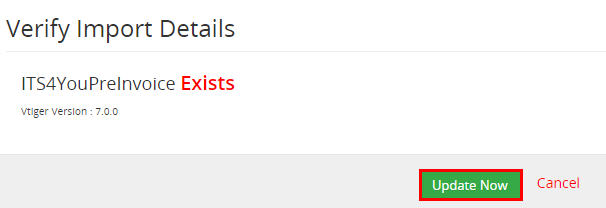
After upgrade the notification about successful upgrade is shown.
4.Work area
The Work area of the PreInvoice consists of:
- List view – used for common tasks like add new, edit and delete PreInvoice, import and export PreInvoice and access to other tools
- Detail view – shows already created PreInvoice in details
- Edit view– allows to edit already created records
- References – show references to another Modules
 – used for License settings, Upgrade module, Uninstall module, Access to change System Services & change or edit Numbering, Fields & Layouts + Workflows
 – used to import records from the other Vtiger systems if needed
 – used to add new PreInvoice
For more details about List view, Detail view, Edit view & References please see next sections.
4.1.List view
The common tasks like add/delete/find duplicates, import/export records or start editing has to be initiated via PreInvoice List view. Go Menu —> Sales and click on Proforma Invoice link and PreInvoice List view will appear on your screen.
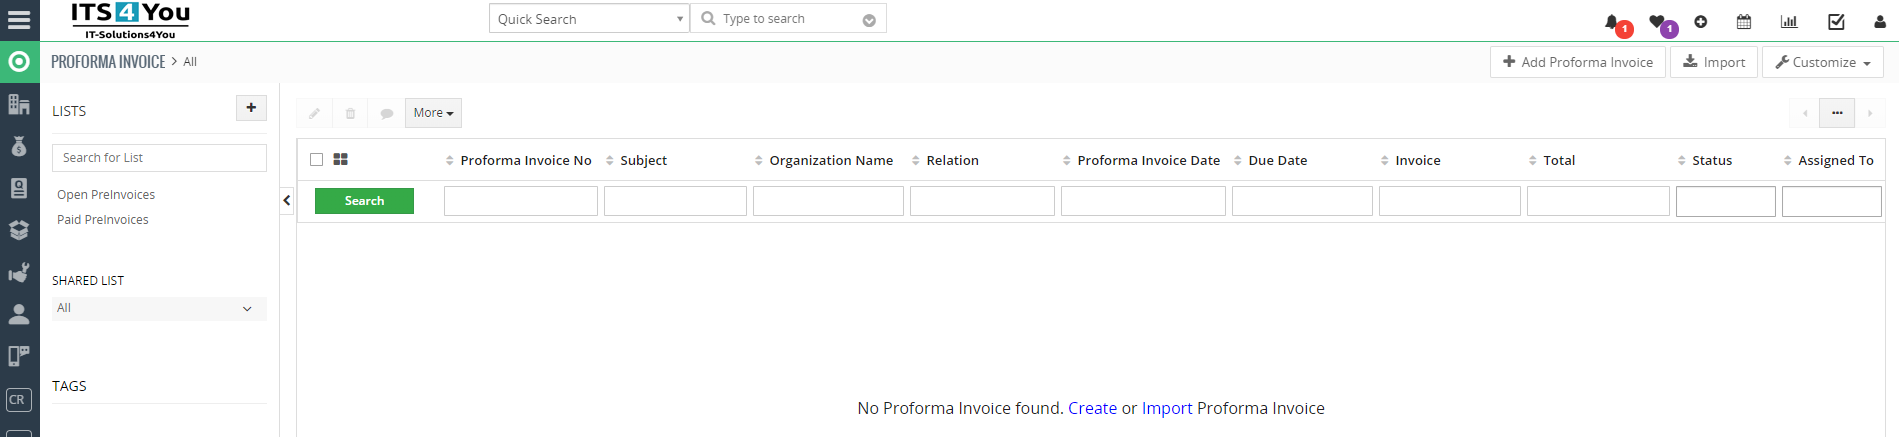
The main part of the PreInvoice List view consists of the list of the PreInvoice records, which gives you information about a PreInvoice number, subject, organization, relation and even more. From the list you can also select one or more records and consequently delete or export the selected group of PreInvoice records or do additional tasks.
You can also have the option to create own List of PreInvoice records and set own fields. You can do it via ![]() button on the left side of the screen. (Open and Paid list is already created by default)
button on the left side of the screen. (Open and Paid list is already created by default)
List view of PreInvoice consists of:
 – to search records based on the field,
- – is used to add new PreInvoice,
- – is used to import records from other Vtiger CRM systems,
 – allow you to customize fields, numbering, workflows & access settings like: license, upgrade, uninstall. Also access feature Change System Services,
 – if you select records this option becomes available and you can edit or delete selected records,
 – used to perform additional actions like: follow, unfollow, add tag, merge records, find duplicates and export,
 – next/previous page of records.
4.2.Detail view
From list view you can directly open any PreInvoice in the detail view. The detail view consists of:
- PreInvoice details block
- Group of action buttons
- – add Proforma Invoice
 – import records
 – Vtiger related tools, License, Upgrade and Uninstall of PreInvoice and option to Change System Services
 – follow button
 – switch to Edit view and start editing
 – allows to delete, duplicate PreInvoice and create an Invoice from current opened PreInvoice
 – navigation buttons (previous/next PreInvoice)
- PDF Maker area – allows to create PDF file (Additional features)
- EMAIL Maker area – allows to send email via EMAIL Maker (Additional features)
- Item details block – the items contained in the PreInvoice

4.3.Edit view
The edit view shown in the picture below allows the preparation of the new PreInvoice or editing existing one. The edit view is divided into few parts:
- Proforma Invoice details – main block, where some of the fields are mandatory
- Address Details – Billing Address and Shipping Address
- Terms and Conditions
- Description details – can be used for more detailed description or important notes
- Item Details – Product/Services block

4.4.Reference
Every PreInvoice, you have created and is assigned to Sales Order, Quotes or Opportunities you can find in detail view of Sales Order, Quotes and Opportunities.
To show PreInvoice assigned to the one of these modules, for example Quotes module:
- Have PreInvoice relation to any Quote
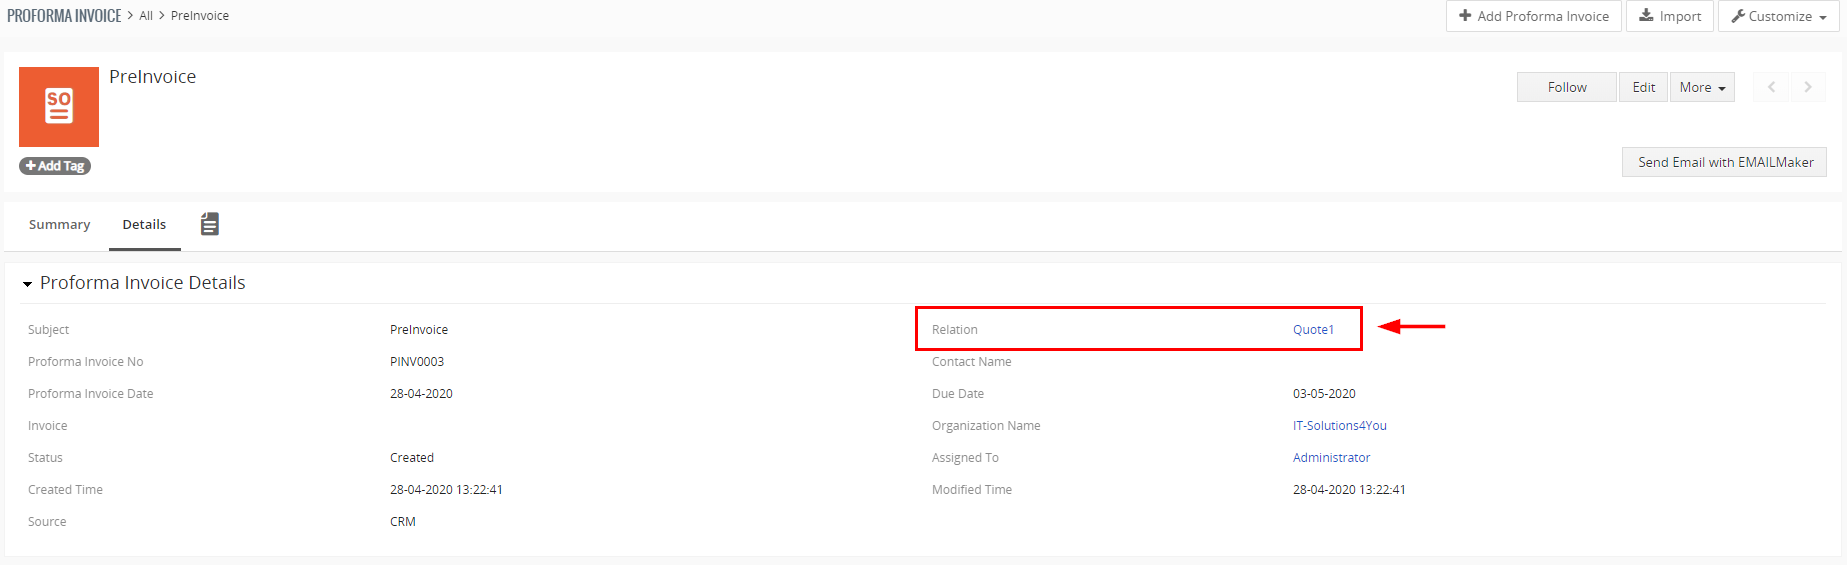
PreInvoice – Relation to Quotes module - Go to Quotes module, select the Quote and open it
- In the detail view you can see there is assigned PreInvoice to it, its shown via Reference icon:
5.How to create PreInvoice
There are few options how you can create PreInvoice:
- Create PreInvoice from Sales Order
- Create PreInvoice from Quotes
- Create new PreInvoice
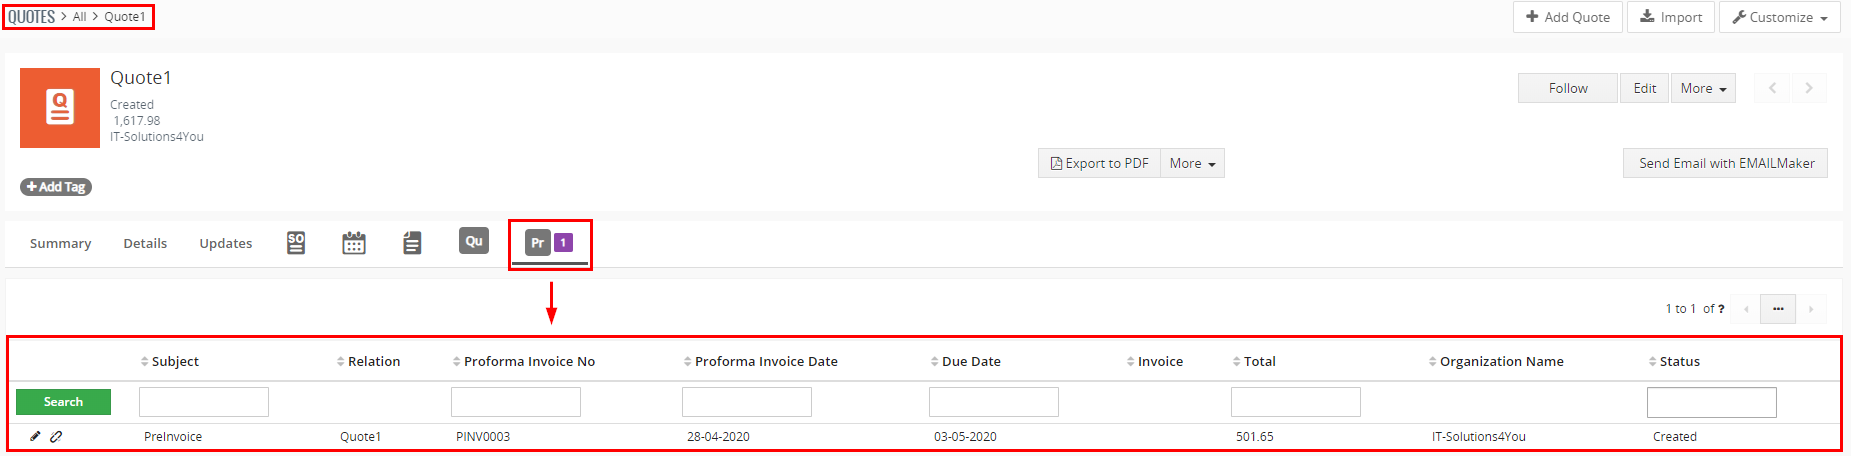
5.1.Create PreInvoice from Sales Order
The mostly way to create PreInvoice, is generate PreInvoice from the existing Sales Order.
To createPreInvoice from Sales Order you have to provide following steps:
-
- Go to Sales Order List and choose a Sales Order:

Proforma Invoice creating from Sales Order - Click on
 button and now you have 2 options:
- Create PreInvoice – if you do not need products from Sales Order in PreInvoice (e.g. Percentage PreInvoice of Sales Order, … )
- Create PreInvoice with Products – if you want to make PreInvoice with products and services from Sales Order
Proforma Invoice creating from Sales Order
- In appeared window, please specify PreInvoice details according to your needs and click on
 button.
- Go to Sales Order List and choose a Sales Order:
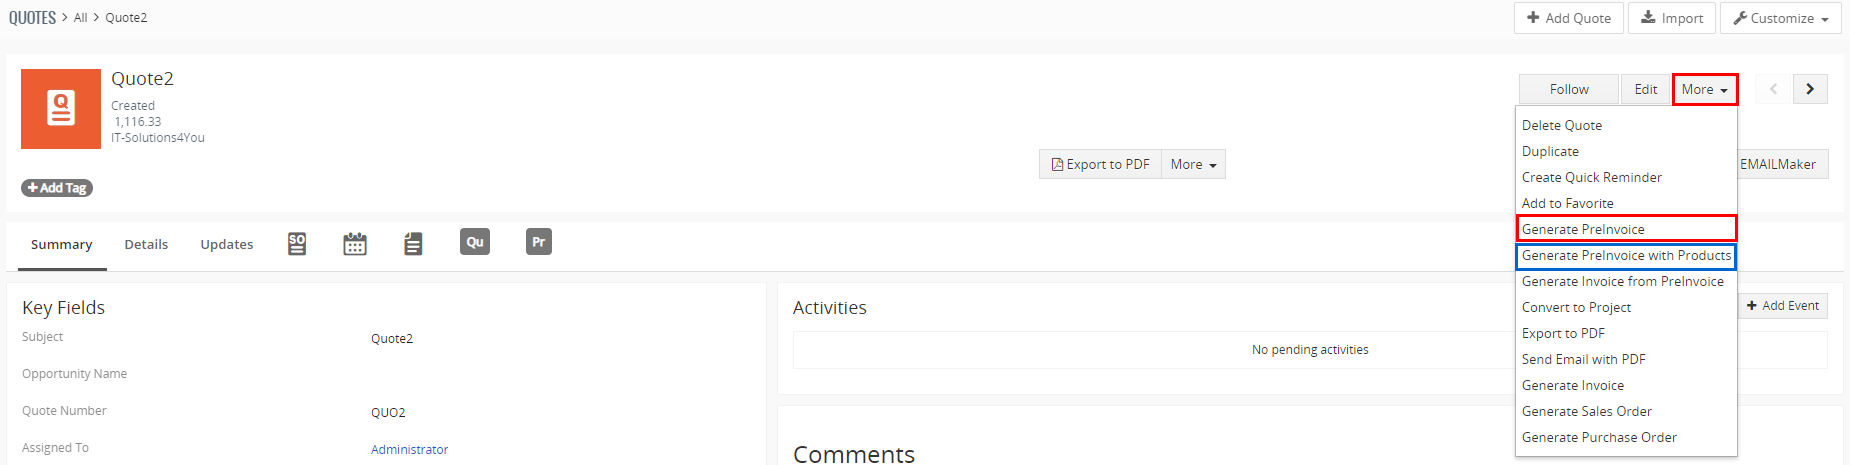
5.2.Create PreInvoice from Quotes
Next option to create PreInvoice is from existing Quotes.
To create PreInvoice from Quote you have to provide following steps:
-
- Go to Quotes List and choose a Quote:

Proforma Invoice creating from Quotes - Click on button and now you have 2 options:
- Create PreInvoice – if you do not need products from Quote in PreInvoice (e.g. Percentage PreInvoice from Quote, … )
- Create PreInvoice with Products – if you want to make PreInvoice with products and services from Quote
Proforma Invoice creating from Quotes
- In appeared window, please specify PreInvoice details according to your needs and click on button.
- Go to Quotes List and choose a Quote:
5.3.Create new PreInvoice
Alternately, you can create new PreInvoice by using ![]() button in the List view of PreInvoice extension.
button in the List view of PreInvoice extension.
To create PreInvoice please provide following steps:
- Click on button.
- In appeared window, please specify PreInvoice details according to your needs.
- Click on button.
6.Additional features
Additional features for PreInvoice are:
- Create Invoice from PreInvoice
- Create Invoice from Relation
- Change System Services
- Support of PDF Maker
- Support of EMAIL Maker
6.1.Create Invoice from PreInvoice
You can create Invoice from PreInvoice via detail view or via list view.
Creating Invoice via Detail view
- In the detail view of PreInvoice you are able to create Invoice, click on button
and select “Create Invoice”: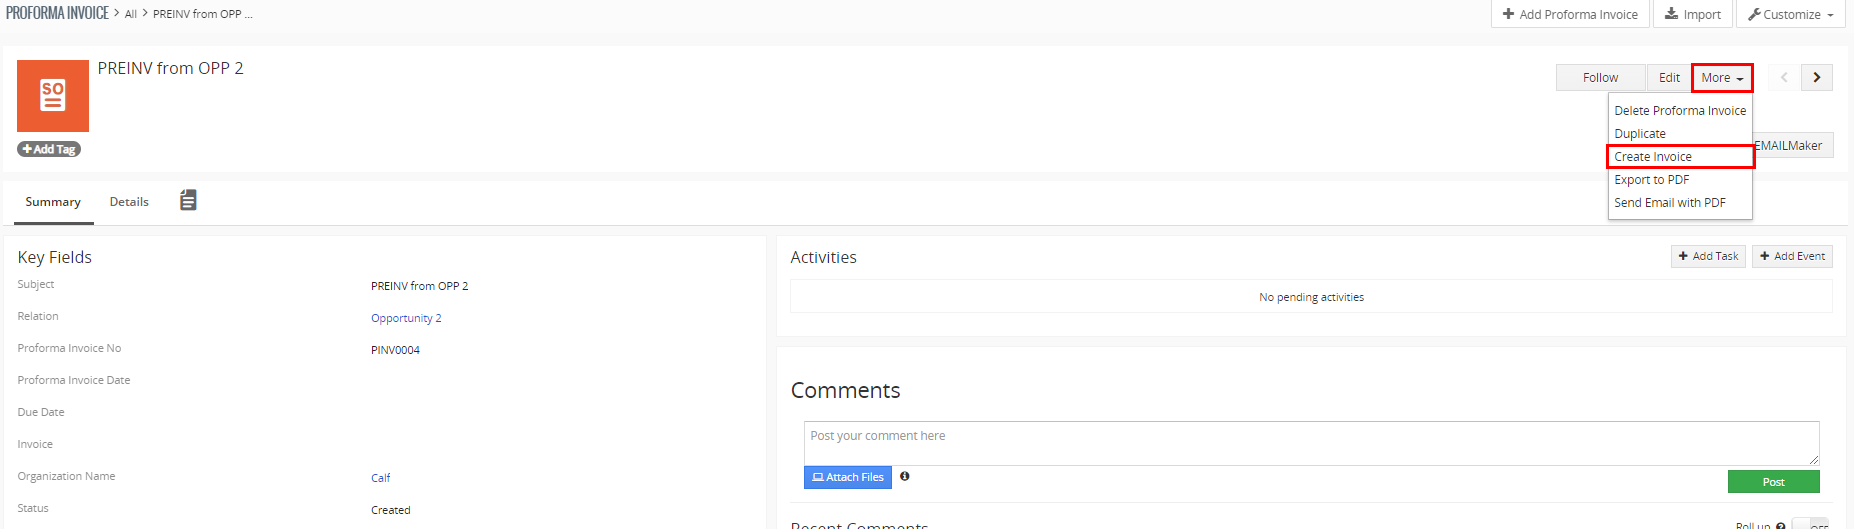
Creating Invoice from Proforma Invoice via Detail view - In appeared window please specify PreInvoice details according to your needs and click on
 button.
Creating Invoice via List view
- To create Invoice you need to choose one or more Preinvoice(s).
*Please note that the organization must be the same. - Click on button and then “Create Invoice from PreInvoice”.

Createing Invoice from Proforma Invoice via List view - In appeared window please specify PreInvoice details according to your needs and click on button.
![]() In the created Invoice will be (all) product(s) and service(s) from Preinvoice(s) included.
In the created Invoice will be (all) product(s) and service(s) from Preinvoice(s) included.
6.2.Create Invoice from Relation
You are able to create Invoice from Relation.
Before creating Invoice from Relation, make sure your PreInvoice records are related to Quotes or Sales Orders (Relation field).
- To create Invoice please choose one or more Preinvoice(s) via list view.
- Click on button and then Create Invoice from Relation.
- In appeared window please specify PreInvoice details according to your needs and click on button.
![]() In the created Invoice will be (all) product(s) and service(s) assigned to Relation(s) included.
In the created Invoice will be (all) product(s) and service(s) assigned to Relation(s) included.
6.3.System Services
With these Settings you are able to manage Services used for Proforma Invoice.
By default, all services are in English Language, but you can edit them to your own Language or create additional Services and use them.
To access System Services, go to Proforma Invoice module, then click on ![]() button and next on “Change System Services”:
button and next on “Change System Services”:

The following window will appear:
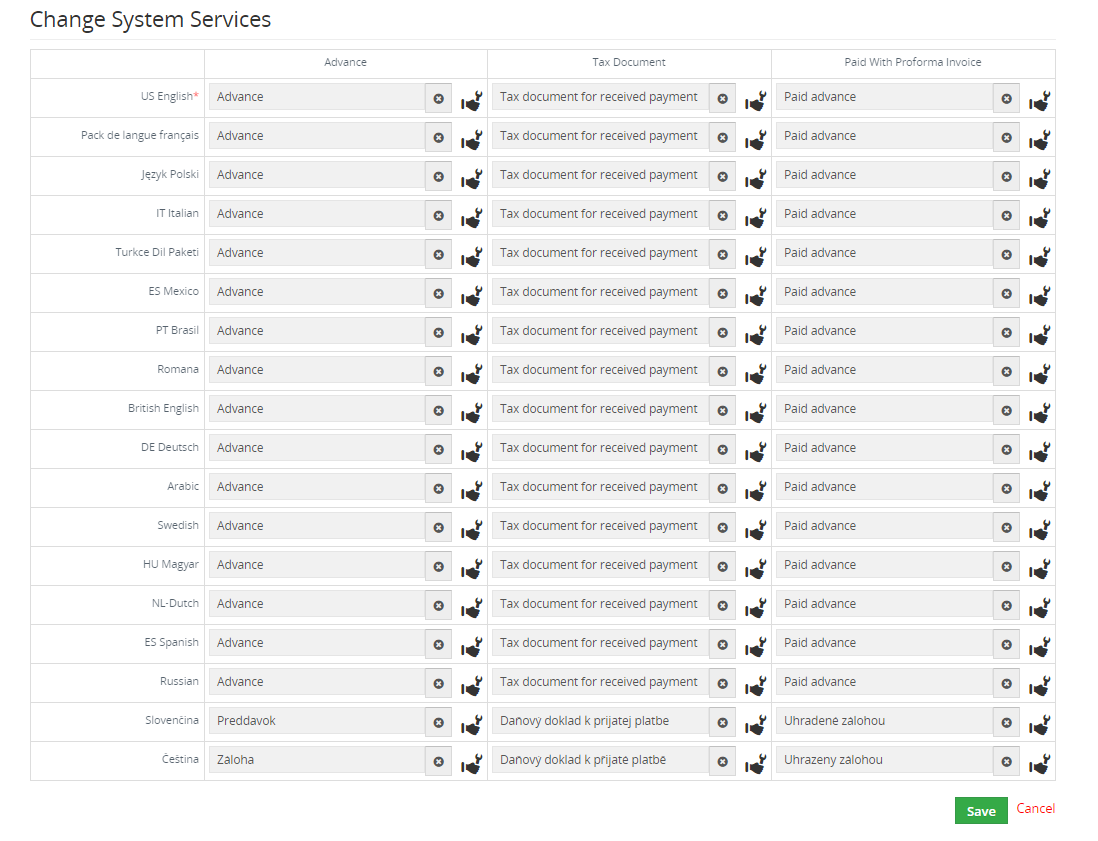
If you require to change the Service for Tax Document or Paid With Proforma Invoice, click on the Services Icon ![]() and select the Service from the list.
and select the Service from the list.
Then confirm via ![]() button.
button.
6.4.Support of PDF Maker
The PDF Maker is extension tool designed by ITS4You for Vtiger CRM.
It is powerful and flexible tool which allows users of Vtiger CRM to create own PDF templates.
Before creating PDF file you need to create template of PDF Maker. To create template please check manual for PDF Maker:
Manual for PDF Maker Vtiger 7.x
![]() Please note that this will work only with PDF Maker Professional.
Please note that this will work only with PDF Maker Professional.
6.5.Support of EMAIL Maker
The Email Maker is extension tool designed for the Vtiger CRM.
Using EMAIL Maker, you can create email templates with predefined information and send them from all the modules. There are available all the fields from source and related modules, the fields related to recipients, the company information and many more. The intention was to provide powerful and flexible tool which allows users of vtiger CRM to create own email templates. Using the email templates you can send mass emails from list view (e.g. Invoices, Quotes, Products, etc.) and finally save a lot of your time.
Manual for Email Maker Vtiger 7.x

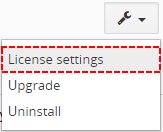
7.1.License Settings
Since December 2019/January 2020 all our modules will be using Installer to manage licenses. Please check our Installer pages for more information.
You can access the License settings like its shown below:
(there can be more options from the pick-list, depends on the module)
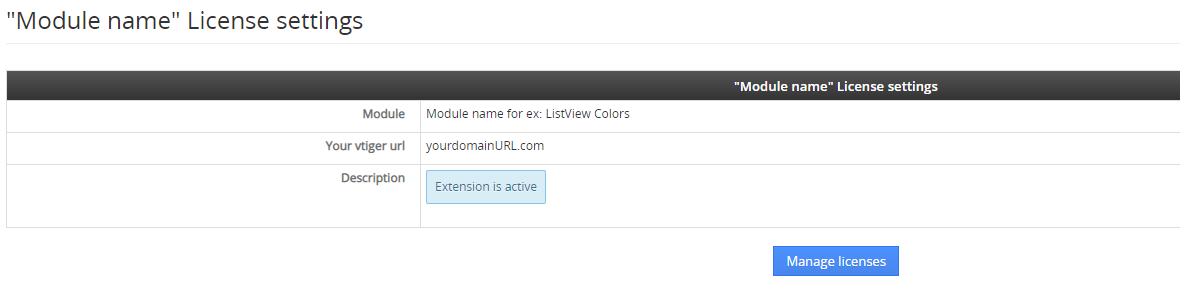
After accessing the License window you can see screen bellow with following information:
- Module name, Your Vtiger domain URL
- Description, if license is activate or not:
 – your license is currently active,
 – your license is not active and you need active it via Installer.
To activate or manage license, click on the ![]() button.
button.
7.1.1.Deactivate license
If you want to deactivate your license, please provide following steps:
- Go to your Installer, by a click on Notifications Icon and then on the button ,
or via Main Menu – Settings – CRM Settings – Extensions – ITS4YouInstaller - The following screen will appear (see below):

Installer – deactivation of license You can deactivate license by click on the button

![]() Note: The module will be deactivated but not uninstalled and license will be removed from the Activated Licenses tab.
Note: The module will be deactivated but not uninstalled and license will be removed from the Activated Licenses tab.
7.1.2.Reactivate license
To reactivate a license after deactivation, you need to follow the same process as you activated it first time:
- Click on the
 button and enter your license key.

- Confirm with
 button.
When the license was activated you can see module available in the Modules tab below.
![]() Note: To see modules and manage licenses you have to log in to our e-shop with @email and password via
Note: To see modules and manage licenses you have to log in to our e-shop with @email and password via ![]() button (top right screen side in Installer module).
button (top right screen side in Installer module).
7.2.How to update Pre-Invoice
The upgrade of the module is initiated manually or via our Installer.
Updating via Installer:
- open the Installer in the CRM
- in the Modules tab find your installed module and you should see the button available
- If the new version is available, you will be notified via Installer Notifications icon
Updating Pre-Invoice manually:
Click on Upgrade link in List view of PreInvoice. So please refer to above installation part for details how to initiate the import of the module from the .zip file.
As you can be seen on the picture below you will be notified that the PreInvoice extension already exists. Confirm License agreement and upgrade will start immediately when you click on the ![]() button.
button.
After upgrade the notification about successful upgrade is shown.
7.3.Uninstall
If you need to remove the module from your Vtiger you have two options:
- Uninstall via Installer.
- Manually via going to module Settings and choose Uninstall option.
7.3.1.Uninstall via Installer
You have also option to remove the module via Installer window by accessing the Settings – Uninstall window:
- Go to your Installer, by a click on Notifications Icon and then on the button ,
or via Main Menu – Settings – CRM Settings – Extensions – ITS4YouInstaller - Find the module you need to uninstall in the Modules tab
- Via
 pick list button choose the Uninstall option, you will be redirected to the Uninstall window.
 - Click on
 button

- Confirm uninstall with
 button
Now, the module has been removed from your Vtiger and your license has been deactivated. To use this module again, you need to provide installation and validation steps (see Installation chapter).
7.3.2.Manual Uninstall
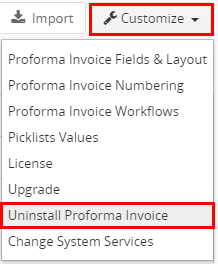
There is also available option to remove Pre-Invoice from your Vtiger manually. To uninstall please provide following steps:
- Go to the List view of Pre-Invoice and in Settings choose option Uninstall
Uninstall PreInvoice - Click on button

Uninstall PreInvoice - Confirm uninstall with
 button
Now, Pre-Invoice is removed from your Vtiger and your license is deactivated. To use Pre-Invoice again you need to provide installation and validation steps (see chapter 2. How to install PreInvoice).
 Unistalling PreInvoice
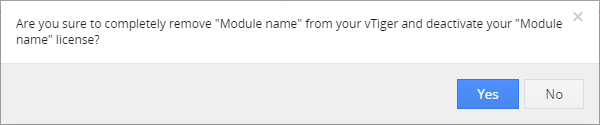
- Please consider uninstalling the Pre-Invoice first, make sure you will not need it anymore. Uninstalling can make some records not available, especially if Pre-Invoice is linked to other modules. Some data and calculations may be lost after uninstalling.
8.Change Log
- Check latest versions available and fixes applied
- What was changed/added to manual
8.1.PreInvoice
- 15 January 2021: 4.5
- fixed issue where Items Details block had a wrong layout during creation of Invoice from PreInvoice
- fixed issue where deleting related PreInvoice record caused the problem in related Sales Order record
- 16 November 2020: 4.4
- fixed issue where Customize button with other features was missing in the module
- fixed issue where PreInvoice relation’s tab was missing in the Organization module
- 24 September 2020: 4.3
- added new icon for PreInvoice in the Menu
- 21 April 2020: 4.2
- fixed issue where creating Invoice from Relation was not working in Pre-Invoice list view
- fixed issue where creating Invoice from single or multiple Pre-Invoices was not working in Pre-Invoice list view
- January 2020: 4.0
- new validation system via our FREE extension Installer
- October 2019: 700.1.1 – 700.1.3
- minor bug fixes
- same installation package for Vtiger 7.x & Vtiger 6.x
- September 2019: 700.0.1
- extension release for Vtiger 7.x
8.2.Manual of PreInvoice
- 28 April 2020: manual based on Pre-Invoice version: 4.2
- updated main sections and their subsections: How to create PreInvoice, Additional features, Work area
- January 2020: manual based on Pre-Invoice version: 4.0
- updated chapters: Installation, Updates, License settings, Uninstall
- new licensing via Installer – additional chapters added
- Octobert 2019: manual based on PreInvoice 700.0.1 – 700.1.3
- first initiate for Vtiger 7.x