

1.Introduction
The Multi SMTP extension for Vtiger CRM enhance your email delivery with our flexible SMTP configuration options. Easily configure one or more outgoing email servers for each user to ensure reliable message delivery.
Moreover, our Multi SMTP extension allows users to conveniently send emails from multiple addresses.
SMTP (Simple Mail Transfer Protocol) is a TCP/IP protocol used in sending and receiving email. SMTP is used most commonly by email clients, including Gmail, Outlook, Apple Mail and Yahoo Mail. SMTP can send and receive email, but email clients typically use a program with SMTP for sending email..
Main features of Multi SMTP extension:

2.How to install Multi SMTP
There are currently two options how to install extension:
- (Recommended) Using our Free extension Installer
(Please visit the Installer page for more info) - Manually installation using a .zip file
(You still need to have Installer in order to activate license)
Since December 2019 we launched our extended version of Installer which helps you install / update modules and manage license keys.
⚠️ Uninstalling Multi SMTP will remove all saved Settings!
2.1.Installation via Installer (default)
Make sure you have Installer installed, you can download Installer via our E-shop when you log in under Free Downloads section.
Next, simply install Installer via Module Management in Vtiger CRM by importing the .zip file you downloaded.
After successful installation, you can access Installer in two ways:
- by a click on Notifications Icon
 and then on the button
- or via Main Menu – Settings – CRM Settings – Extensions – ITS4YouInstaller
![]() Note:
Note:
- To see modules and manage licenses you have to log in to our Installer with @email and password via
 button (top right screen side in Installer module).
 - Login is same for Installer and for our E-Shop.
After log in, you can activate Extensions or our Packages licenses associated to your account via ![]() button.
button.
When the license was activated you can see module available in the Modules tab below.
Simply hit the ![]() button and Extension is installed now.
button and Extension is installed now.
![]() You can only activate Single-key licenses, which are assigned to your Email Account you made purchase with and with which you are logged to the Installer.
You can only activate Single-key licenses, which are assigned to your Email Account you made purchase with and with which you are logged to the Installer.
Package licenses can be logged in via Access Key (license key) following also activation via ![]() button.
button.
2.2.Manual installation
There is also a way to install / update the extension manually in some scenarios:
- Manual installation or update of the extension can be requested if you contact our support because you are facing some issues with extension.
- Standard way of installation and update is using our Installer. In some rare cases we can send you .zip file to update the extension manually.
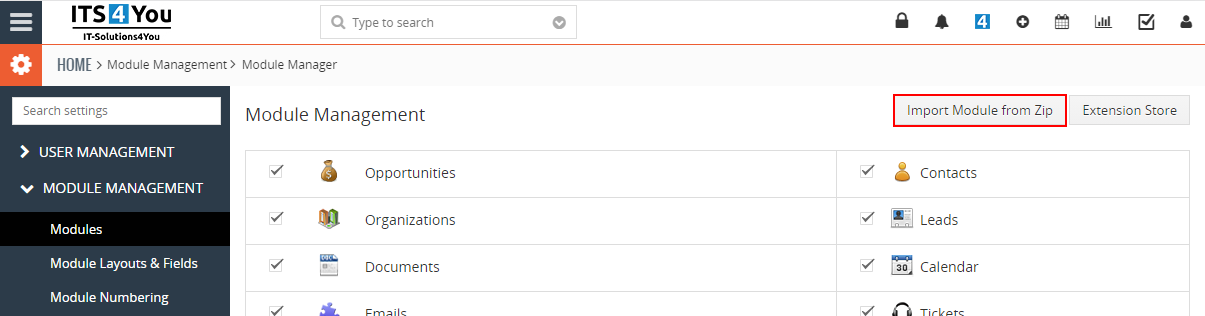
Installation can be done via Module Manager by clicking on the button ![]() and selecting the .zip file.
and selecting the .zip file.
3.How to start using Multi SMTP
In the following chapters, we will show you how to use Multi SMTP extension step by step.
3.1.Add new SMTP
First step to start using Multi SMTP is to create new SMTP/s you will be using.
the SMTP extension allows you to have multiple SMTP/s.
Follow the steps below to add new SMTP:
- Select SMTP from the menu:
 ——>
——> 
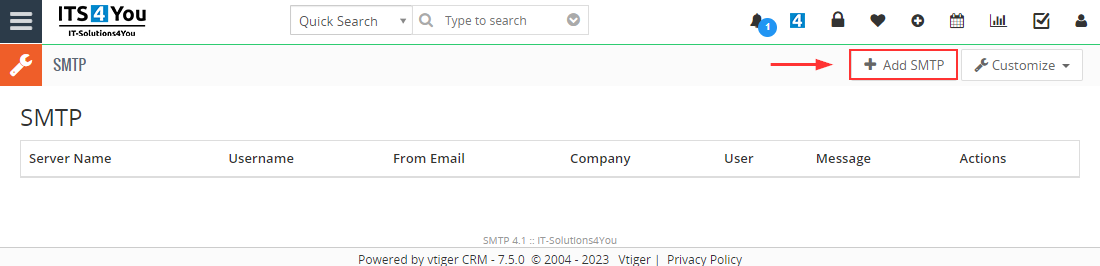
- Here you can see your SMTP(s) list view. To add new please click on
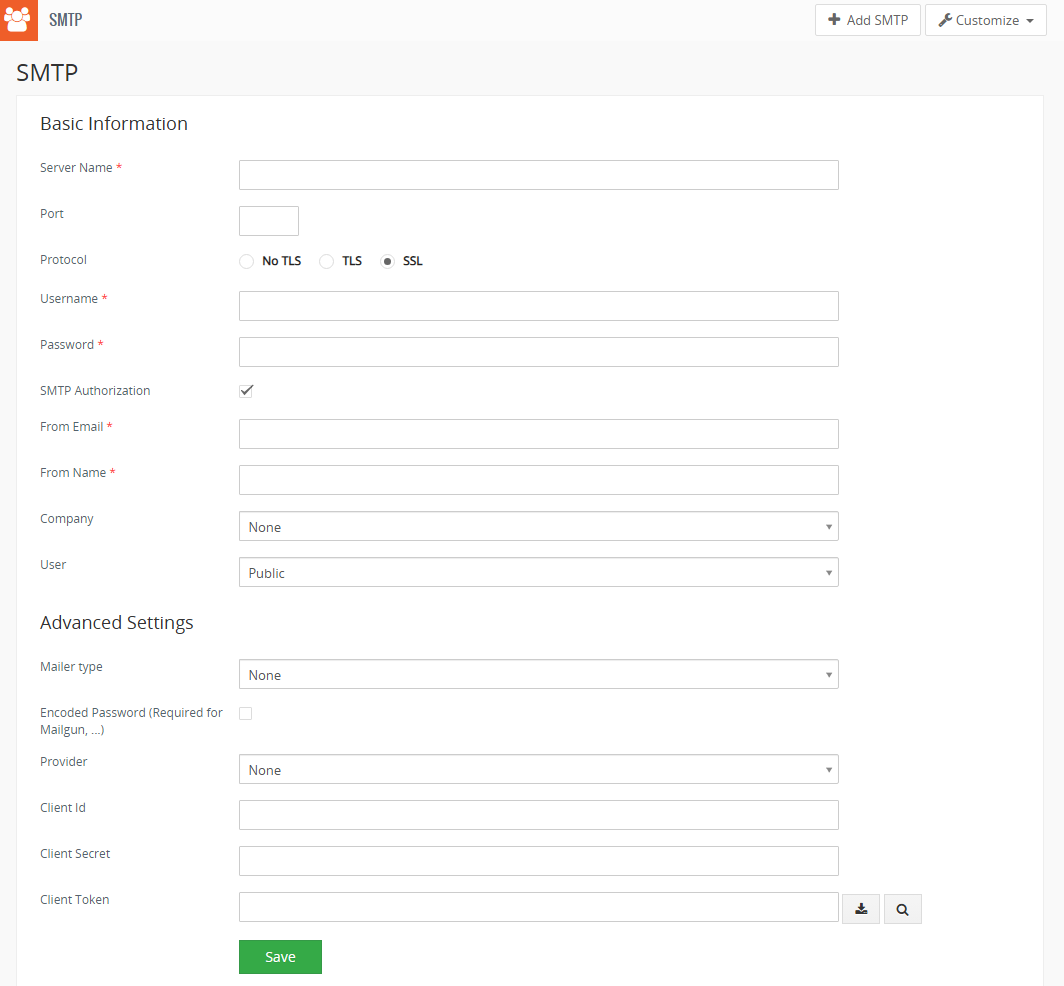
How to add new SMTP - Now, fill information needed to add SMTP.
- Proceed via
 to add SMTP.
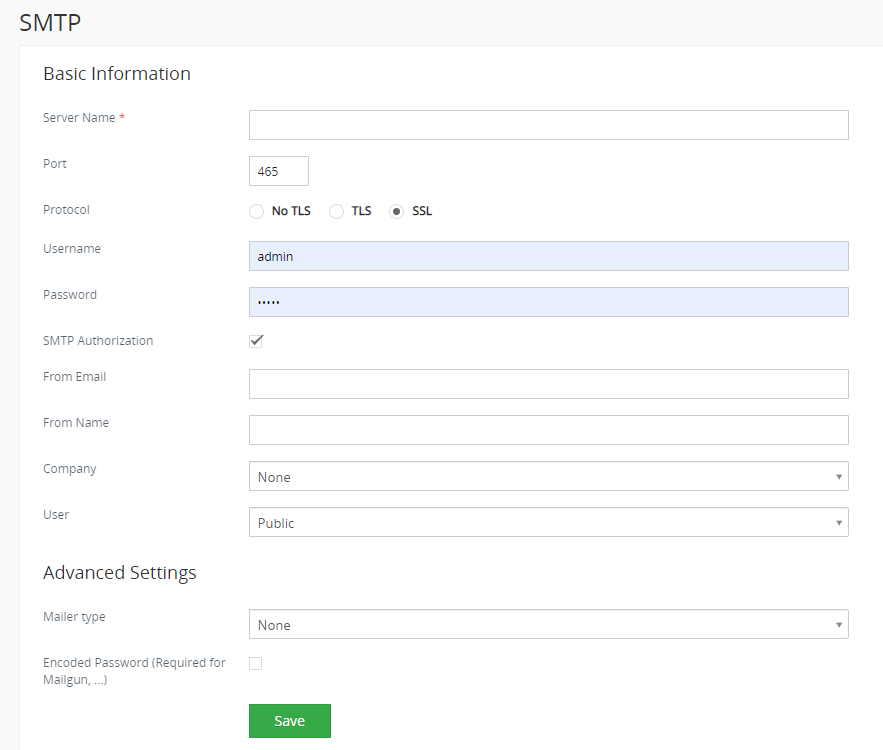
The fields specific for our SMTP extension are explained below:
- From Email – email which will be shown as From if a recipient receives it
- From Name – name which in most cases is shown with an From Email to the recipient
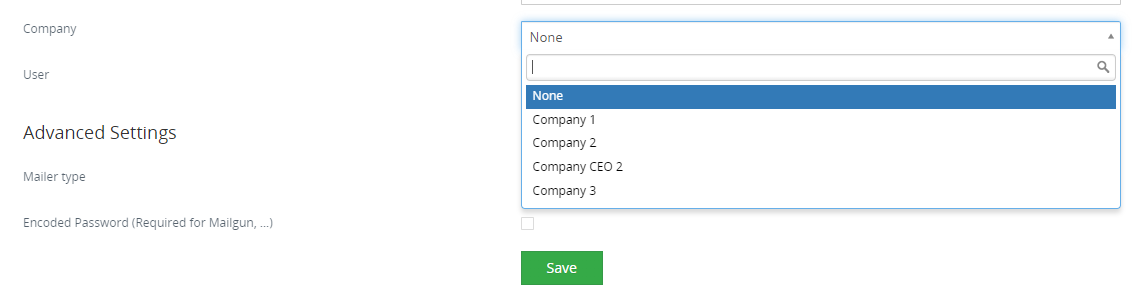
- Company – here you will select a Multi-Company record which is created by our Multi-Company extension (if installed)
(this Company will be using this SMTP for mailing) - User – define for which user SMTP is, it can be also as Public for all users free to use
Advanced Settings:
- Mailer type – select the type of mailer used:
none – by default, if the PHPMailer library has smtp, it is smtp, if it has sendmail, it is sendmai
smtp – set PHPMailer to smtp when the customer has default sendmail
sendmail – it is for those users who do not have smtp - Encoded Password (Required for Mailgun, …) – used for a password like Mailgun has, that the password has special characters, or is too long, in which case it is not saved properly, and this function is used then, so it should be checked
- Provider – option to select Google provider and setup a Outgoing server
- Client id – required id
- Client Secret – required secret code
(Google Client ID and Client Secret are required for authentication and authorization purposes when integrating applications with Google services, such as Google APIs or OAuth-based authentication. The Client ID and Client Secret are obtained from the Google Developers Console when you create a new project and enable the corresponding APIs.) - Client Token – access token from the Google Authorization Server, extracts a token from the response, and sends the token to the Google API that you want to access. For an interactive demonstration of using OAuth 2.0 with Google (including the option to use your own client credentials), experiment with the OAuth 2.0 Playground.
All fields marked with * are mandatory fields and needs to be filled.
3.2.Usage of SMTP
The Multi SMTP extension offers versatile functionality within Vtiger CRM.
This extension seamlessly integrates with our existing extensions, which are listed in the “Compatibility with ITS4You extensions” section.
- Users can define the SMTP settings when sending emails, working with campaigns, and more.
- In most cases, it is a straightforward process where users simply select the desired From Name + From Email for specific actions.
- The values from the SMTP configuration are automatically loaded into the From Email and From Name fields, including the email address and name associated with the selected SMTP.
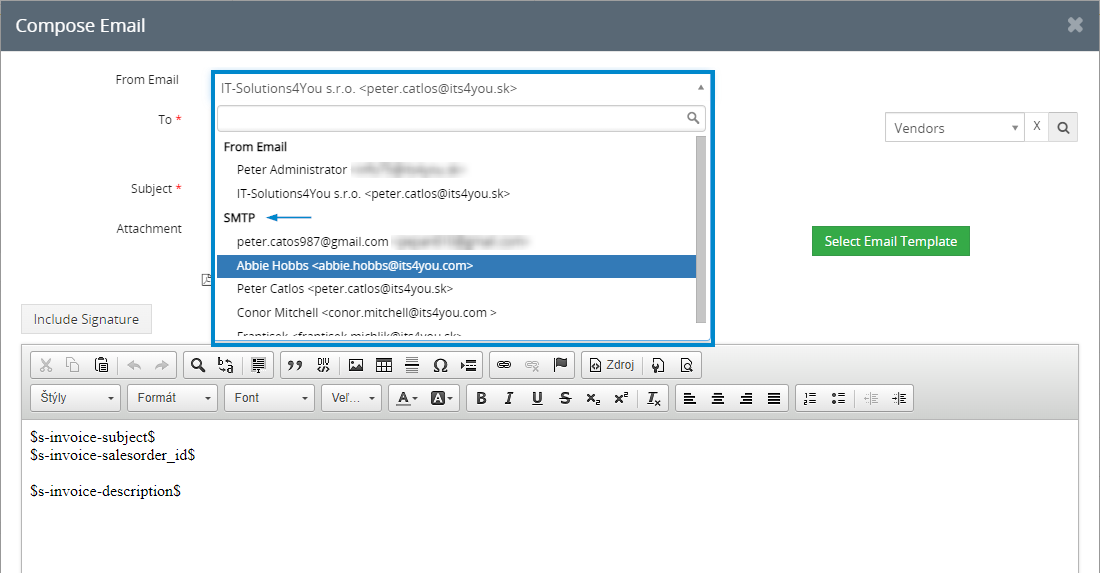
Below, we provide an example of how to use SMTP in combination with Email Maker.
Users can select any desired record and follow the steps to reach the Compose window. In this window, they will see the loaded list of available SMTP configurations, as well as the default options provided by Vtiger.
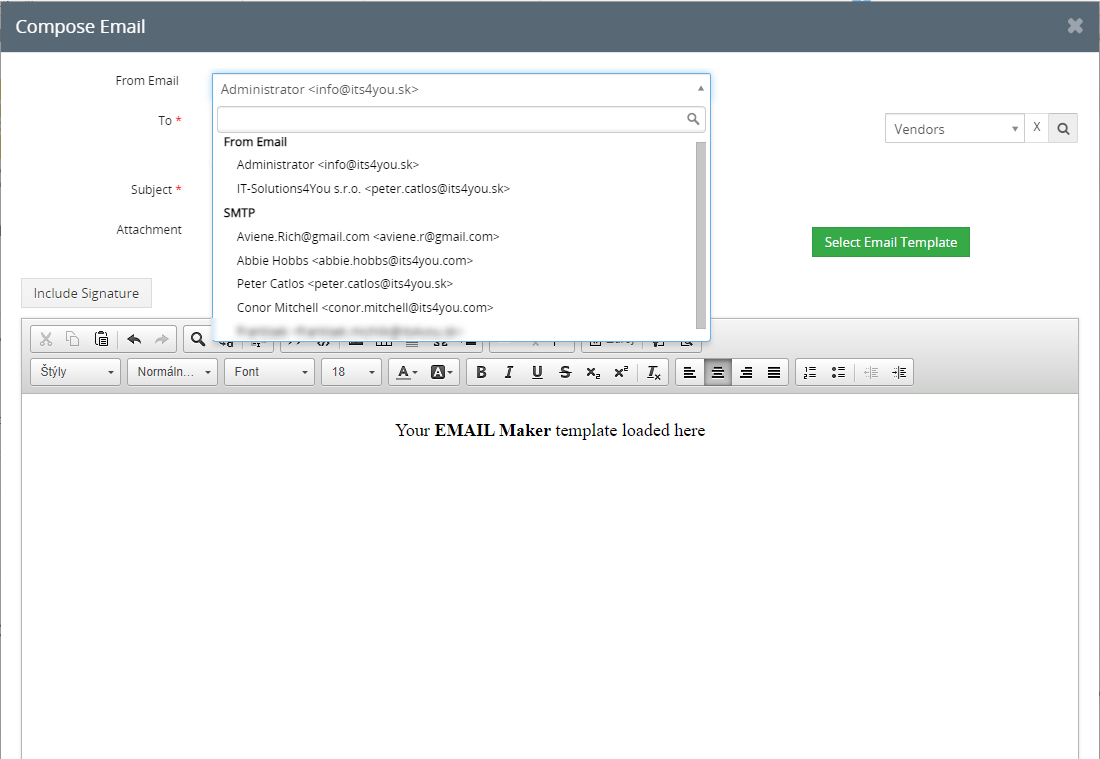
- From Email – shows user name + user Primary email and Company details + Outgoing Server From email
- SMTP – shows all SMTP/s available for specific users, where are defined From Name and From Email
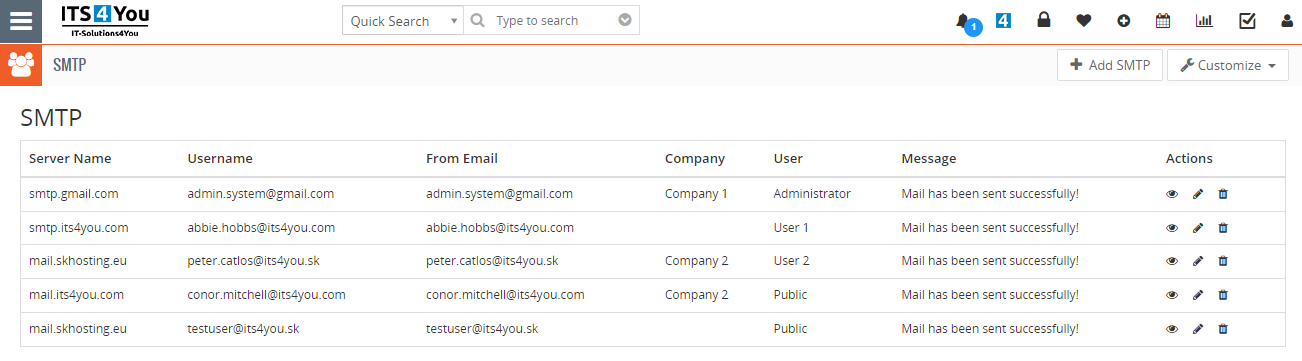
3.3.List view & Management
In the list view of Multi SMTP, users have the ability to perform various actions.
These include creating a new SMTP, previewing already created SMTPs, and accessing additional actions such as viewing, editing, and deleting SMTPs through the Actions icons.

Below is preview of Multi SMTP extension List view:
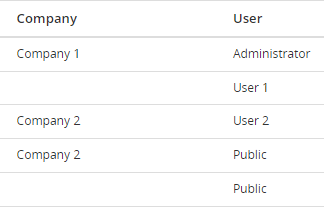
3.4.Sharing & Visibility of SMTP
Multi SMTP can be used by all users of our Extensions and the Vtiger CRM system.
However, there is also an option to restrict the usage of SMTP to certain users based on the Company and User fields in the SMTP configuration.
This allows assignment of specific SMTPs to specific users.
Lets explain the main fields for this below:
Company field
This field is used when Vtiger CRM have our Multi-Company extension installed.
Users which are assigned to the Multi Company based on Role or direct Assigment can see and use this SMTP when field Company is defined.
![]() Users assigned to different Multi Companies are restricted from viewing SMTP configurations belonging to other Multi Companies.
Users assigned to different Multi Companies are restricted from viewing SMTP configurations belonging to other Multi Companies.
Example:
- User 1 has Role 1 and is also assigned to MC 1 – this user can use use SMTP and also edit the SMTP
- User 1 has Role 1 but is not directly assigned to MC 1 – this user can only use and see SMTP from the selection list but can’t edit it and see it in the SMTP extension
User field
Each user who is assigned to the SMTP based on this field can use, edit and delete the SMTP.If User is not defined and it is set to Public, only admin can edit this SMTP but other users can use it.
Example:
- SMTP 1 has User field as User 1 – User 1 can see the SMTP in the list view, edit it, delete it and use it
- SMTP 2 has User field as Public – All users can use it but only Admin can edit it, delete it and use it
Example with combination User and Company fields:
Example 1:
User 1 has Role 1 and is directly assigned to MC 1 as “administrator” via Assigned to field.
In the SMTP 1 there are fields as User: User 1 and Company: MC 1 – User 1 can use SMTP and also Edit.
Example 2:
User 1 has Role 1 and is not directly assigned to MC 1 as “administrator” via Assigned to field.
In the SMTP 1 there are fields as User: User 1 and Company: MC 1 – User 1 can use SMTP and also Edit.
Example 3:
User 1 has Role 1 and is not directly assigned to MC 1 as “administrator” via Assigned to field.
In the SMTP 1 there are fields as User: Public and Company: MC 1 – User 1 can use SMTP but can’t Edit it or see it in the list view of SMTP.
Example 4:
User 2 has Role 2 and is not directly assigned to any MC.
In the SMTP 2 there are fields as User: Public and Company: None – User 2 can use SMTP but can’t Edit it or see it in the list view of SMTP.
4.Additional features
The Multi SMTP extension offers additional features and ensures compatibility with our other extensions. We will get into the details of each compatible extension in the following topics.
4.1.Compatibility with ITS4You extensions
Multi SMTP is compatible with a few of our extensions.
More information can be found in the sections below for each extension.
So which extensions are compatible with Multi SMTP? See below:
- Email Marketing
- Multi-Company
- PDF Maker
- EMAIL Maker
4.1.1.Email Marketing
Our Multi SMTP extension is as well compatible with our other extensions, one of them is Email Marketing.
This all together works perfectly and it is really easy to setup, no need to adjust lots of settings.

![]() Note: Once you select a Multi SMTP in the first step of creating Email Marketing campaign, the Multi SMTP values From Name and From Email will be transfered to same Email Marketing fields.
Note: Once you select a Multi SMTP in the first step of creating Email Marketing campaign, the Multi SMTP values From Name and From Email will be transfered to same Email Marketing fields.
(Default Email Marketing From Name and From Email fields will be hidden if SMTP is selected)
See below how adding SMTP servers/emails works:
Selecting the SMTP in the first step of Email Marketing campaign:
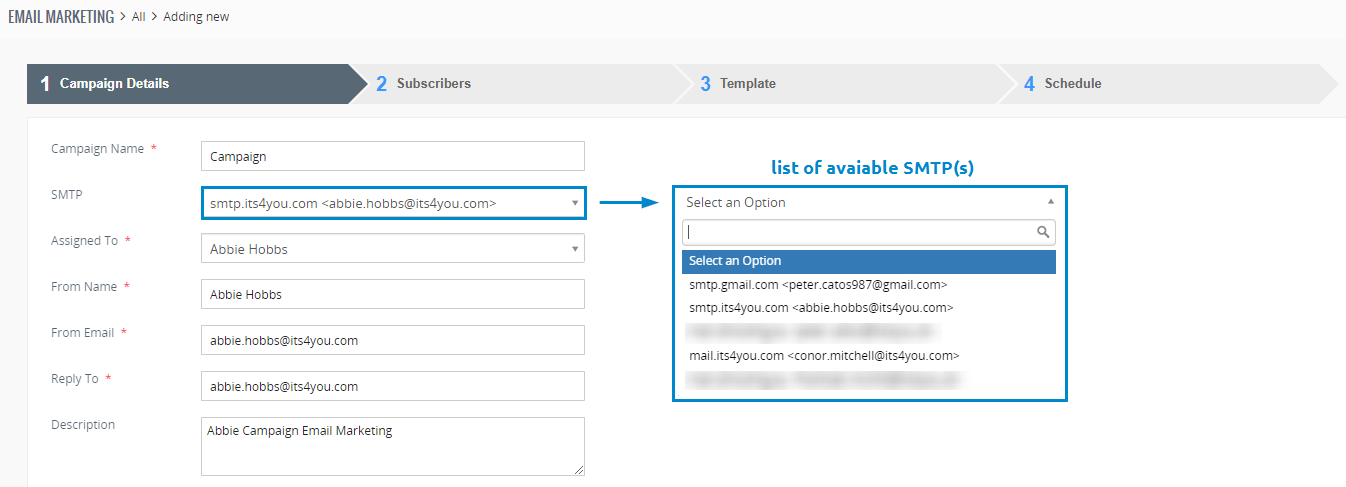
- As mentioned earlier, the Multi SMTP parameters are now loaded for the Email Marketing campaign.
This means fields like From Name and From Email are loaded from Multi SMTP extension settings. - From Name and From Email showing in the first step above is ignored and overwritten by Multi SMTP.
- Reply To field normally and should be always filled as mandatory.
4.1.2.Multi - Company
The Multi-Company extension is capable of working in conjunction with Multi SMTP.
When creating an SMTP, users have the option to select the already created Multi-Company and specific users.
As we know Multi-Company is based on Roles and Users, that’s how the assignment of the records works. This is aswell the same for SMTP.
We can explain some situations down below when specific SMTP/s can be selected:
(MC – Multi Company)
![]()
SMTP 1 is assigned to MC 1 and User 1 – User 1 can only see his assigned SMTP 1 and can’t see User 2 SMTP
![]()
SMTP 2 is assigned to MC 2 and User 2 – User 2 can only see his assigned SMTP 2 and can’t see User 1 SMTP
![]()
SMTP 3 is assigned to MC 3 but is Public – Shows the SMTP 3 to all Users which belong to Company 3 (Users which have the same role as MC 3), but only user which is Assigned to MC 3 can edit SMTP 3
![]()
SMTP 4 is not assigned to any MC and it is Public – SMTP 4 can be used by all users as it is defined as a Public, but can be edited only by Admin

4.1.3.PDF Maker
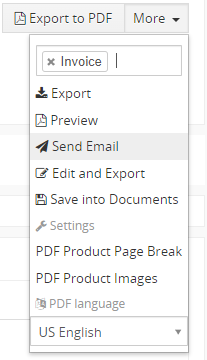
When utilizing the Send Email function to send emails, PDF Maker has the capability to utilize SMTP as well. We have the option to select either standard default Emails or our own SMTPs for the From Email.
4.1.4.EMAIL Maker
Just like PDF Maker, EMAIL Maker also has the ability to utilize SMTP.
When using the EMAILMaker button to send emails, we can choose between standard default Emails or our own SMTPs for the From Email.
Everything else remains the same as in PDF Maker, with the only difference being that we are sending emails via ![]() button in the Detail view or via Actions in the List view.
button in the Detail view or via Actions in the List view.
5.Settings
Multi SMTP settings can be accessed via the list view ![]() button.
button.

In the Settings, you can find:
- Integration – this button just brings you back to your list view of SMTP
- Module Requirements – check if the all Requirements are met for your module (like Custom links, Event handlers, etc..,)
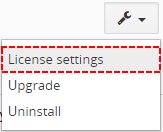
- License settings – see if a license is currently active
- Upgrade – updates extension if needed
- Uninstall – remove extension from your CRM
5.1.License Settings
All our modules are using Installer to manage licenses. Please check our Installer pages for more information.
You can access the License settings like its shown below:
(there can be more options from the pick-list, depends on the module)
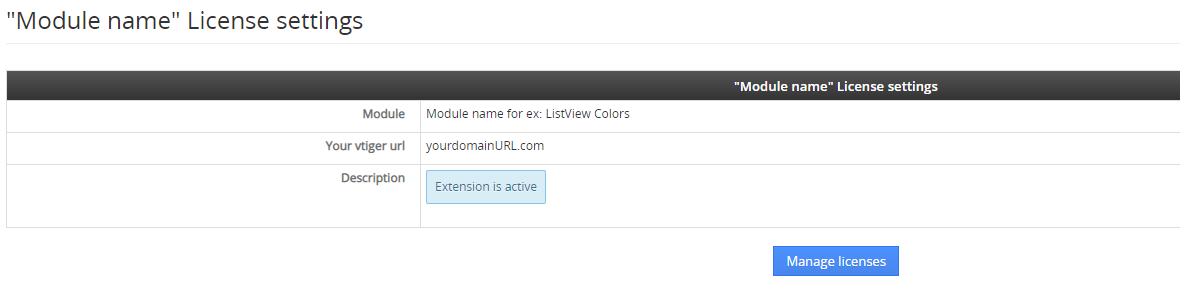
After accessing the License window you can see screen bellow with following information:
- Module name, Your Vtiger domain URL
- Description, if license is activate or not:
 – your license is currently active,
 – your license is not active and you need active it via Installer.
 – the Installer FREE extension is missing on your CRM, please download it.
To activate or manage license, click on the ![]() button.
button.
5.1.1.Deactivate license
If you want to deactivate your license, please provide following steps:
- Go to your Installer, by a click on Notifications Icon
 and then on the button
or via Main Menu – Settings – CRM Settings – Extensions – ITS4YouInstaller - The following screen will appear (see below):

Installer – deactivation of license You can deactivate license by click on the button

![]() Note: The module will be deactivated but not uninstalled and license will be removed from the Activated Licenses tab.
Note: The module will be deactivated but not uninstalled and license will be removed from the Activated Licenses tab.
5.1.2.Reactivate license
To reactivate a license after deactivation, you need to follow the same process as you activated it first time:
- Click on the
 button and enter your license key.
- Confirm with
 button.
When the license was activated you can see module available in the Modules tab below.
![]() Note: To see modules and manage licenses you have to log in to our e-shop with @email and password via
Note: To see modules and manage licenses you have to log in to our e-shop with @email and password via ![]() button (top right screen side in Installer module).
button (top right screen side in Installer module).
5.2.How to update Multi SMTP
The upgrade of the module is initiated via our Installer or manually.
Updating via Installer (recommended):
- open the Installer in the CRM
- in the Modules tab find your installed module and you should see the
 button available
 - If the new version is available, you will be notified via Installer Notifications icon
Updating Multi SMTP manually:
Updating module manually is sometimes required when our support team sends you .zip package, if you are having some issues or there is any update or customization available.
Otherwise, we always recommend to use update via Installer.
Update can be done via Module Manager by clicking on the button ![]() and selecting the .zip file.
and selecting the .zip file.
5.3.Uninstall
If you need to remove the module from your Vtiger you have two options:
- Uninstall via Installer.
- Manually via going to module Settings and choose Uninstall option.
⚠️ Uninstalling Multi SMTP will remove all saved Settings!
5.3.1.Uninstall via Installer
You have also option to remove the module via Installer window by accessing the Settings – Uninstall window:
- Go to your Installer, by a click on Notifications Icon and then on the button ,
or via Main Menu – Settings – CRM Settings – Extensions – ITS4YouInstaller - Find the module you need to uninstall in the Modules tab
- Via
 pick list button choose the Uninstall option, you will be redirected to the Uninstall window.
 - Click on
 button

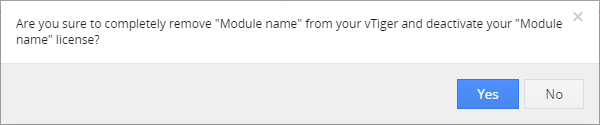
- Confirm uninstall with
 button
Now, the module has been removed from your Vtiger and your license has been deactivated. To use this module again, you need to provide installation and validation steps (see Installation chapter).
5.3.2.Manual Uninstall
There is also available option to remove Multi SMTP from your Vtiger manually.
To uninstall please provide following steps:
- Go to the List view of Multi SMTP and via Customize option select Uninstall.
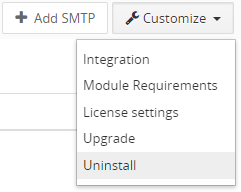
Manual Uninstall of Multi SMTP extension - Click on button.
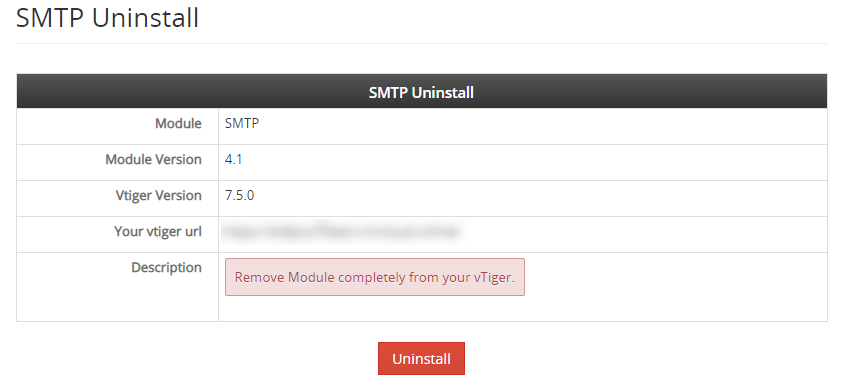
Manual Uninstall of Multi SMTP extension Confirm uninstall with
 button.

Now, Multi SMTP is removed from your Vtiger and your license is deactivated.
To use Multi SMTP again, you need to provide installation and validation steps (see chapter 2. How to install Multi SMTP).
6.Change Log
- Check latest versions available and fixes applied
- What was changed/added to manual
6.1.Multi SMTP
- 1 June 2023: 4.1
- release version
6.2.Manual of Multi SMTP
- June 2023: manual based on Multi SMTP 4.1 version
- first initiate for Vtiger 7.x