

1.Introduction
The XLS Import is the tool which allows you to import data from the .xls .xlsx .vcf .csf files to your Vtiger CRM system.
This is very useful if you have many records in the formats mentioned above and you need to import them into Vtiger system. Our extension allows you to import records for any modules and also create custom mapping for the fields.
The XLS Import features are:
![]() Note: For versions 4.0 and higher, you will be needing to have installed our Installer in order to activate license keys.
Note: For versions 4.0 and higher, you will be needing to have installed our Installer in order to activate license keys.
2.How to Install XLS Import
There are currently two options how to install extension:
- (Recommended) Using our Free extension Installer
(Please visit the Installer page for more info) - Manually installation using a .zip file
(You still need to have Installer in order to activate license)
![]() Note: For versions 4.0 and higher, you will be needing to have installed our Installer in order to activate license keys.
Note: For versions 4.0 and higher, you will be needing to have installed our Installer in order to activate license keys.
Since December 2019 we launched our extended version of Installer which helps you install modules and manage extensions.
2.1.Installation via Installer
Make sure you have Installer installed, you can download Installer via our E-shop when you log in under Free Downloads section.
Next, simply install Installer via Module Management in Vtiger CRM by importing the .zip file you downloaded.
After successful installation, you can access Installer in two ways:
- by a click on Notifications Icon
 and then on the button
- or via Main Menu – Settings – CRM Settings – Extensions – ITS4YouInstaller.
![]() Note: To see modules and manage licenses you have to log in to our e-shop with @email and password via
Note: To see modules and manage licenses you have to log in to our e-shop with @email and password via ![]() button (top right screen side in Installer module).
button (top right screen side in Installer module).
After log in, you can activate Extensions or our Packages licenses associated to your account via ![]() button.
button.
When the license was activated you can see module available in the Modules tab below.
Simply hit the ![]() button and Extension is installed now.
button and Extension is installed now.
![]() You can only Activate these licenses, which are assigned to your Email Account you made purchase with and with which you are logged to the Installer.
You can only Activate these licenses, which are assigned to your Email Account you made purchase with and with which you are logged to the Installer.
3.How to Update XLS Import
The upgrade of the module is initiated manually or via our Installer.
Updating via Installer:
- open the Installer in the CRM
- in the Modules tab find your installed module and you should see the
 button available
 - If the new version is available, you will be notified via Installer Notifications icon

Updating XLS Import manually:
Updating module manually is sometimes required when our support team sends you .zip package, if you are having some issues or there is any update or customization available.
Otherwise, we always recommend to use update via Installer.
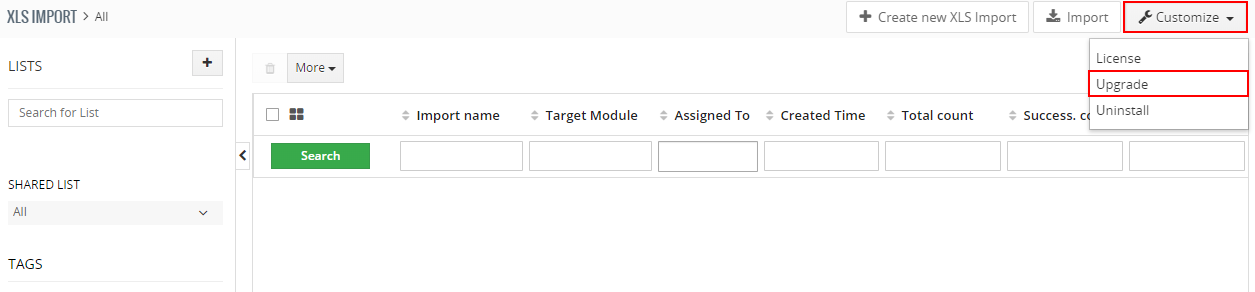
Go to Menu – Tools – XLS Import, in the list view click on the ![]() button and choose “Upgrade” option.
button and choose “Upgrade” option.
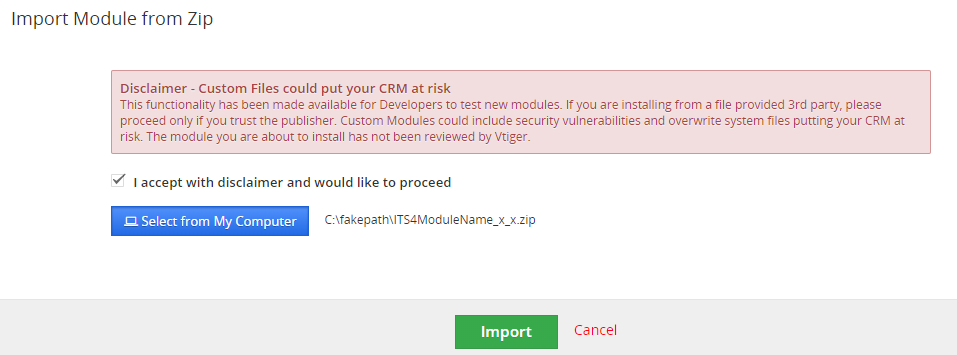
Please refer to below installation part for details how to initiate the import of the module from the .zip file.
As you can be seen on the picture below you will be notified that the XLS Import extension already exists. Confirm License agreement and upgrade will start immediately when you click on the ![]() button.
button.
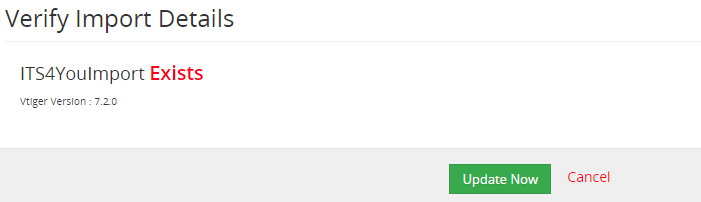
After upgrade the notification about successful upgrade is shown.
4.Work area
The Work Area of the XLS Import consists of:
- List view – shows the list of created XLS Imports with additional actions
- Create view – consists of 3 steps: Definition, Processing and Results
- Detail view – detail of the import with detailed information like: Target Module, Success. count, Total count, Failed count and more
4.1.List view
In the List view of XLS Import you are able to:
- Create new XLS Import via
 button
 - Access Settings where you can:
Access License Settings
Update module manually
Uninstall module - Enter to Detail view by clicking on Import Name
- Delete the already created Imports
- Perform additional actions via
 button like: Follow, Unfollow, Add Tag

4.2.Create view
When you click on the ![]() you will enter to Create view, this view consist of:
you will enter to Create view, this view consist of:
- Definition – first step where you need to select a module, load the supported files, set the duplicates handling, additional settings and set the mapping for the fields
- Processing – the process when the records are imported into your Vtiger CRM System
- Results – the final screen with the results of your import
(Click on the image to enlarge)
(Click on the image to enlarge)
(Click on the image to enlarge)

4.3.Detail view
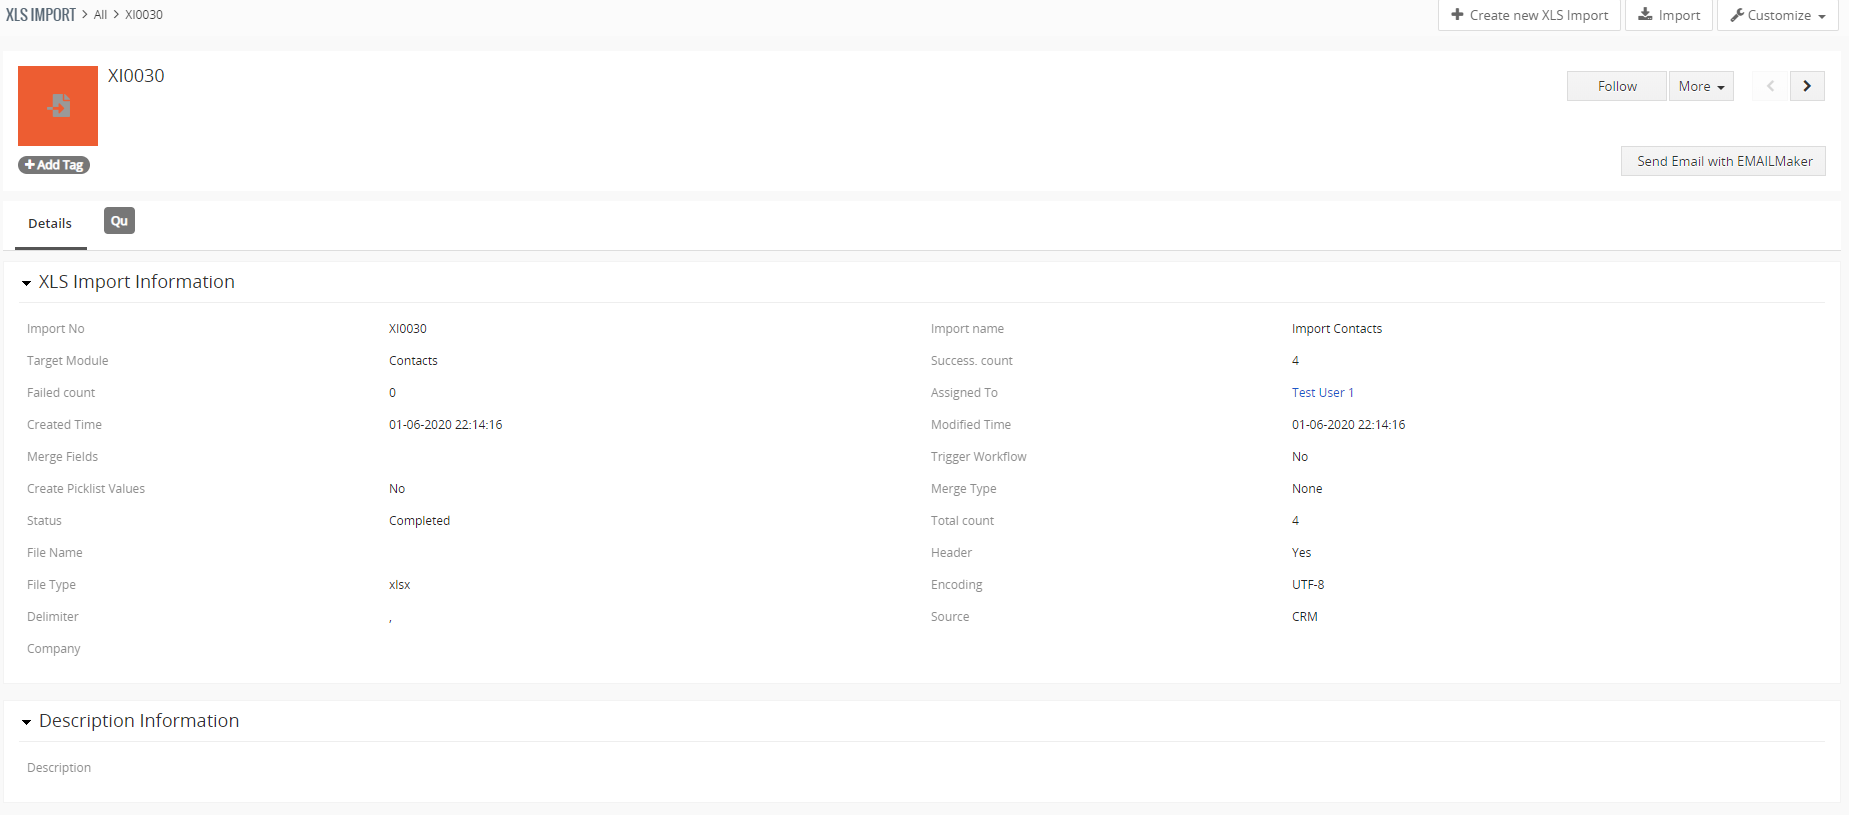
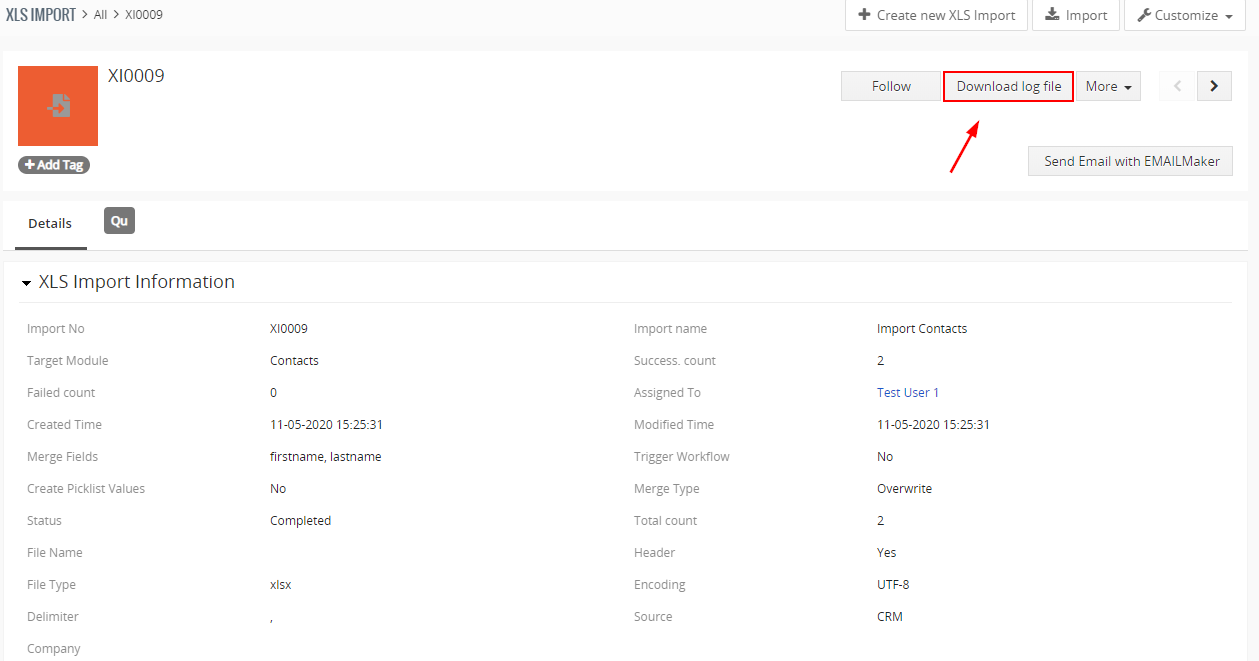
There is also an option to see the Detail view of specific import, simply go to Menu – Tools – XLS Import.
From the list view, click on any import name and you will be redirected to the Detail view of the specific import.
In the detail view of import you can check useful information like:
- Target module – module to which you were importing the records
- Failed count – number of records which failed to import
- Success count – number of records which were successfully imported
- Trigger Workflow – if you used this feature for this Import
- Create Piclist Values – if there were any values created from this Import
- Total count – number of records in the file in total
- File Type – the type of file which was used for this Import
5.How to use XLS Import
After successful installation of XLS Import you are able to access module and start using it.
To access the XLS Import extension, navigate via the menu to the XLS Import module: TOOLS — XLS Import:

5.1.Create new XLS Import
We will show you how you can easily import any records for any module you need, we will use module Contacts as an example in next steps.
First, you will be needed to prepare .xls file with your records, second part is to load file via XLS Import extension, so let’s divide it into two parts:
- XLS (.xls) file preparation for Import
- Importing the .xls file via XLS Import extension
5.1.1.XLS (.xls) file preparation for Import
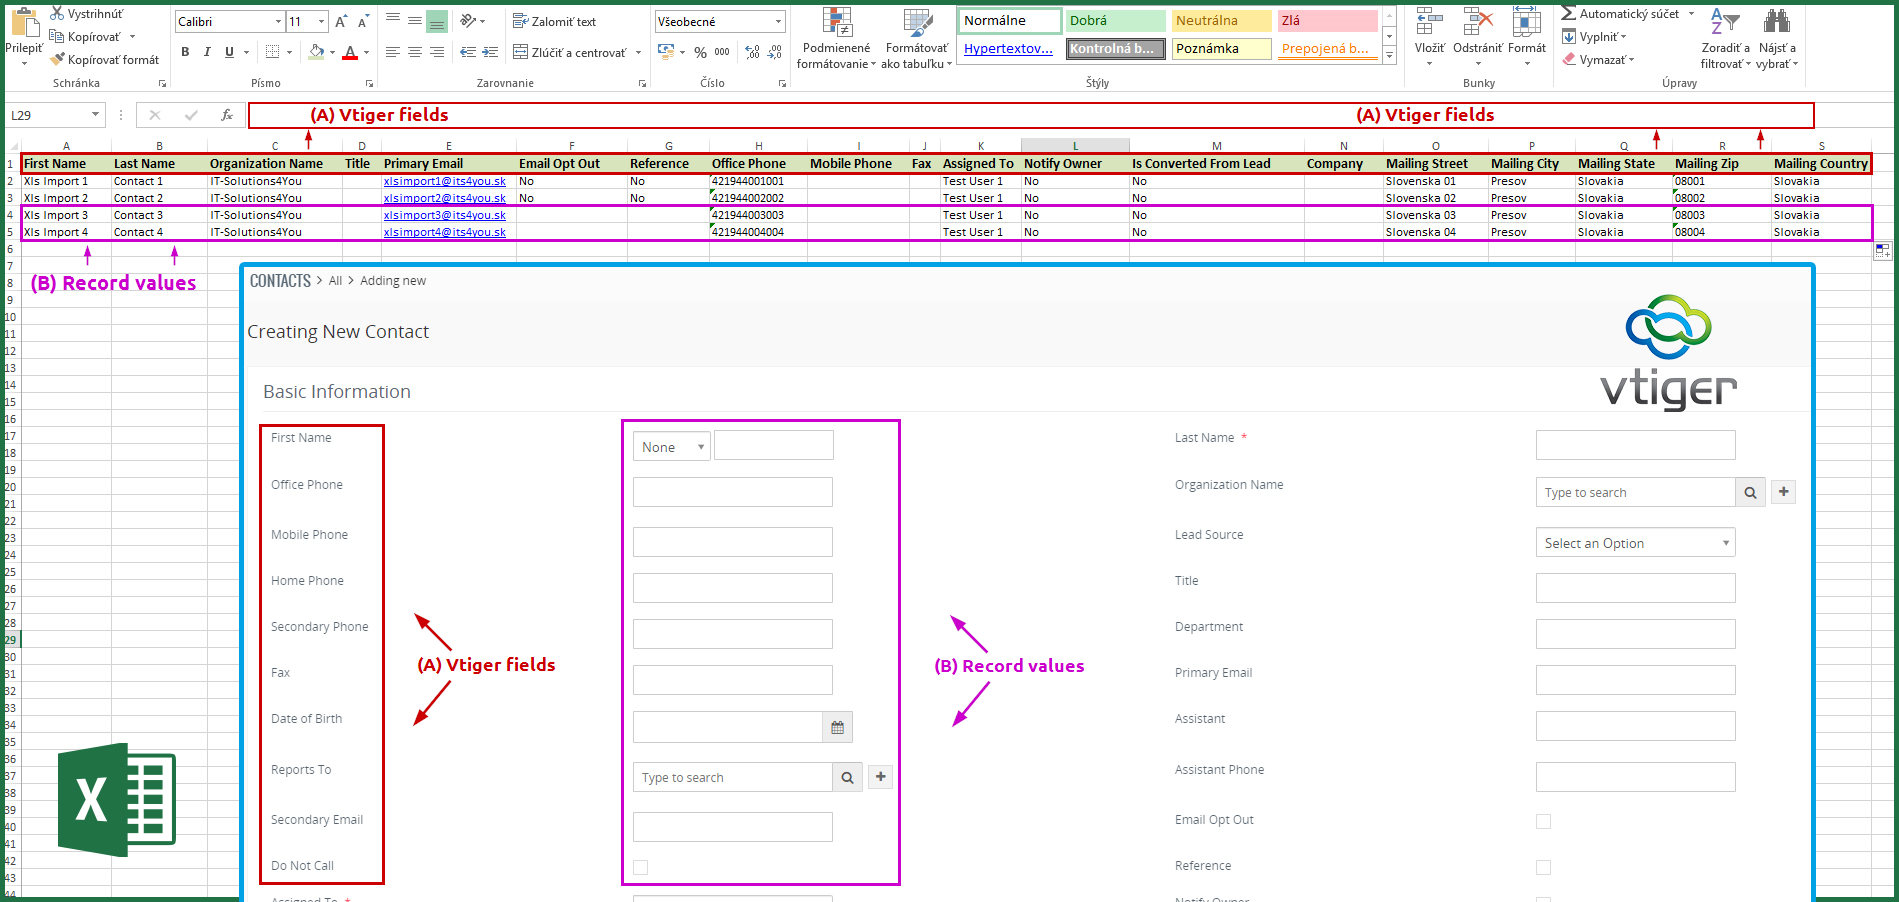
The .xls file should contain:
- (A) Vtiger fields – default or custom fields created in Vtiger
- (B) Record values – details for specific field in the record
Below you can see a simple example where we want import 4 records for Contacts module:
- (A) Vtiger fields will be filled with the (B) Record values
(Click on the image to enlarge)
5.1.2.Importing the .xls file via XLS Import extension
When you have already .xls file ready, we can proceed with Importing.
In order to start import please provide following steps:
-
- Go to the XLS Import module (Menu – Tools – XLS Import).
- Click on the button
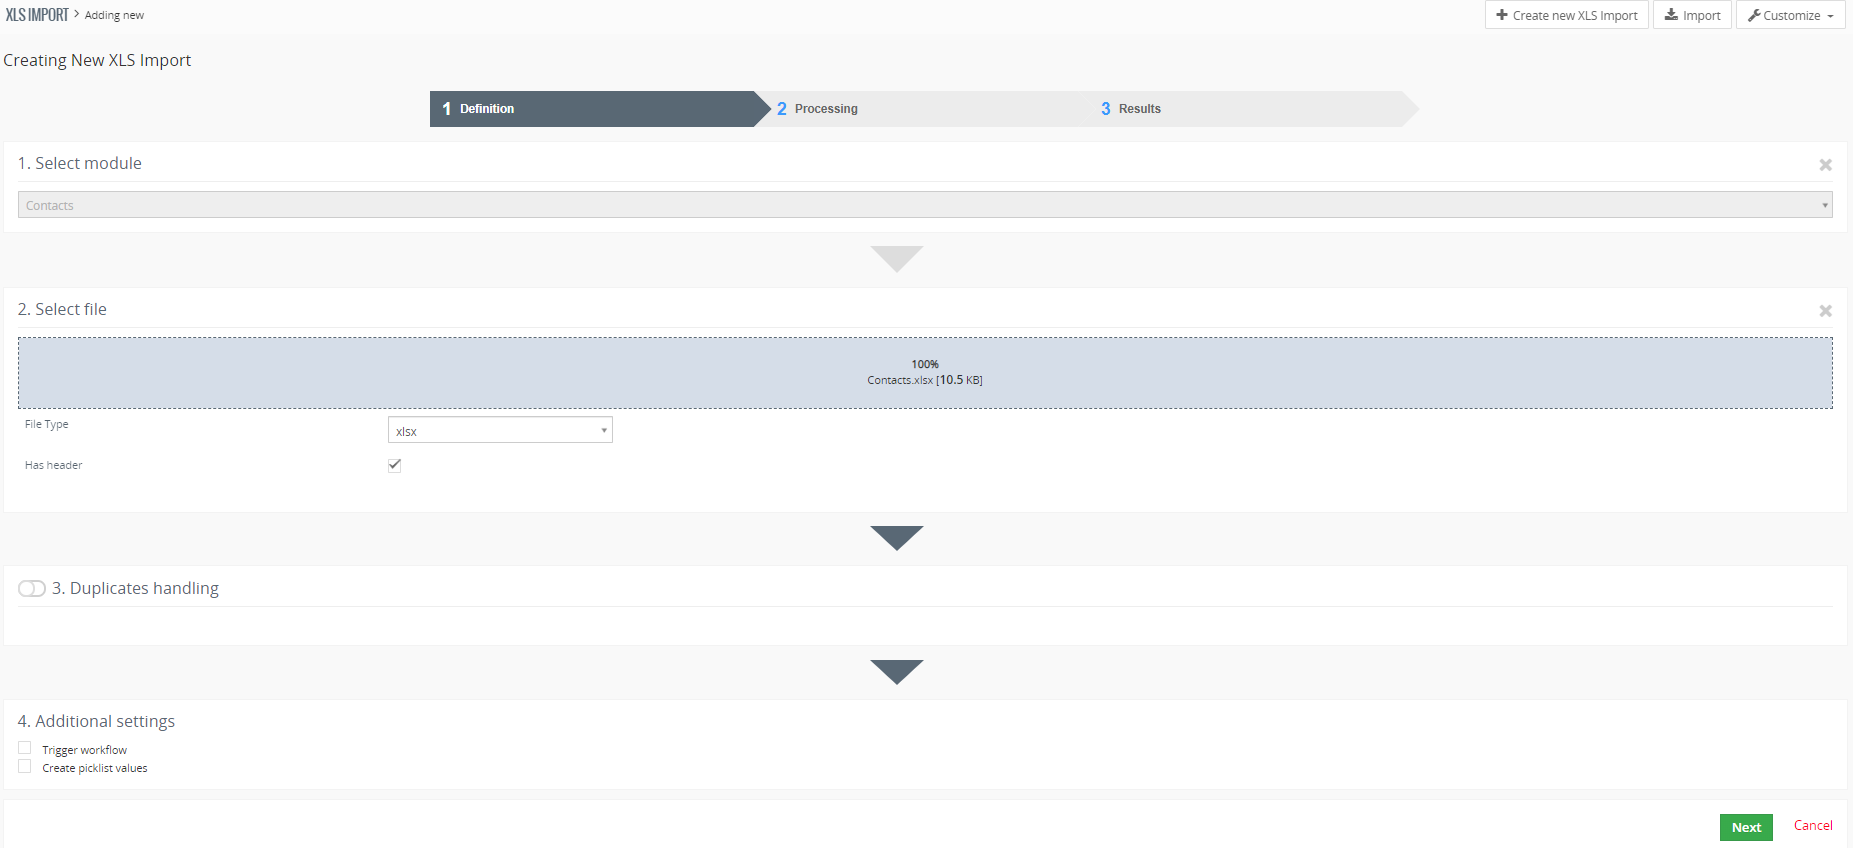
- A new window will appear, select the module (we will be doing Contacts module) and load the .xls file by clicking on “Drop file here or click to upload”.
XLS Import – How to import file - When the .xlsx file is loaded, new features, options are available:
- File Type – the type of file you loaded
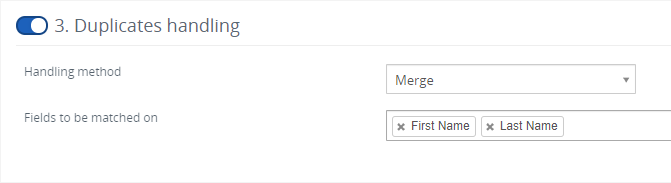
(mostly this is selected automatically based on the file type you loaded). - Duplicates handling – you can choose the duplicates handling methods like Skip, Overwrite, Merge based on selected fields.
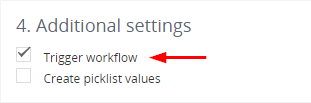
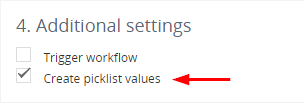
- Additional settings – Trigger workflow (counts as record create/update)
Create picklist values (create a picklist if there are more values,
for example: First name: Martin, Peter).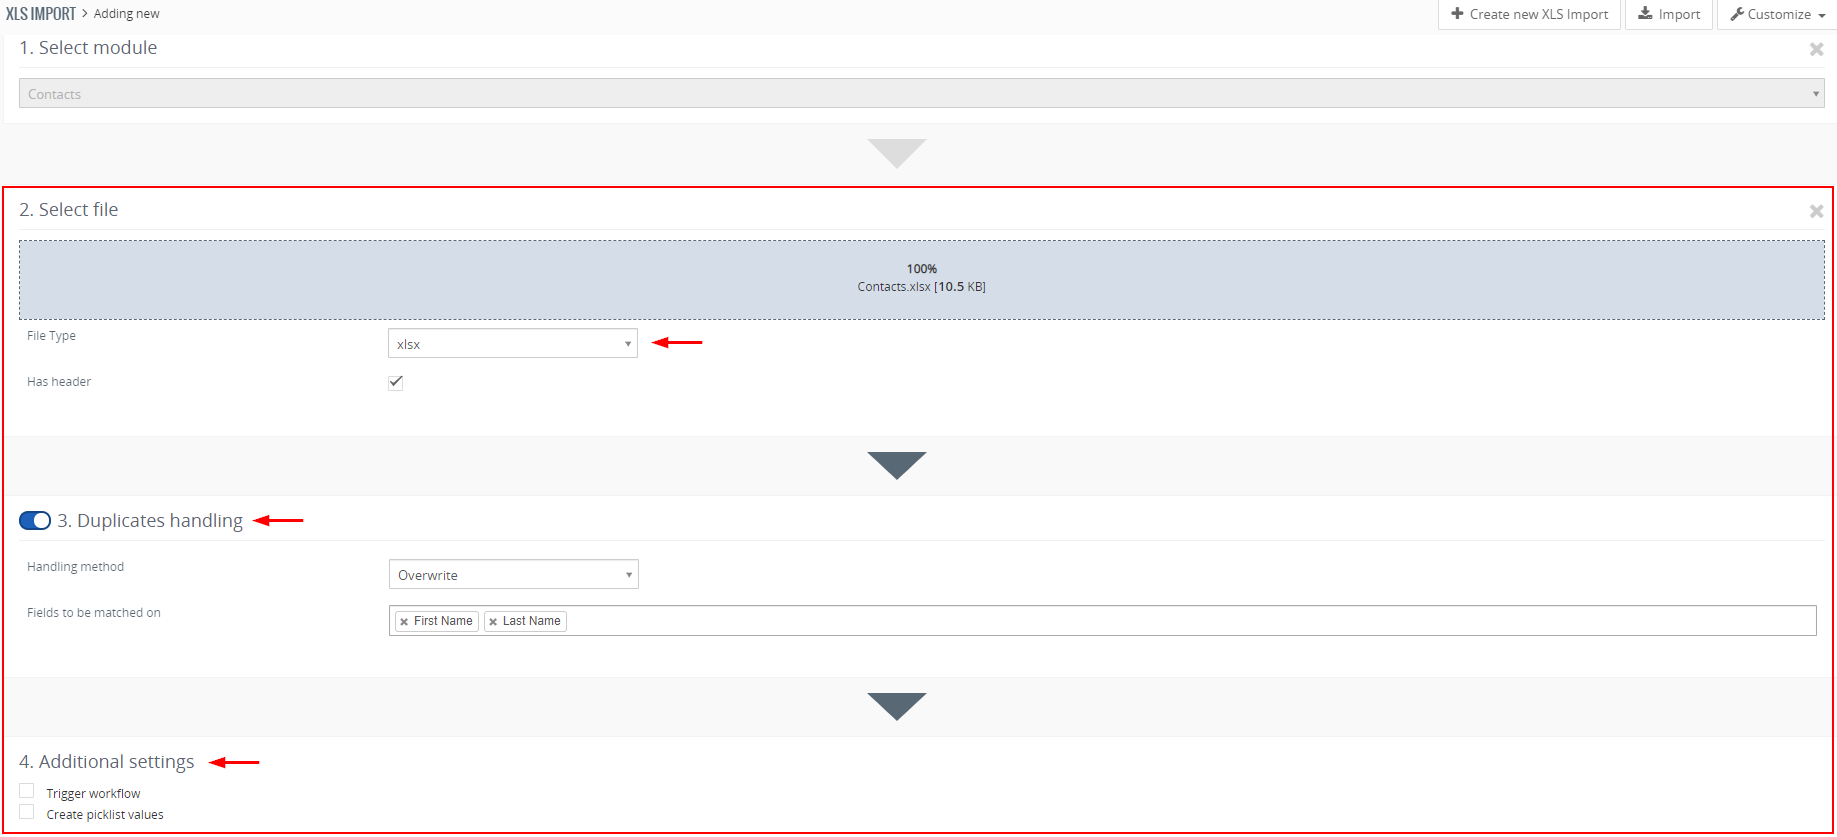
XLS Import – How to import file, features Proceed via
 button.
- File Type – the type of file you loaded
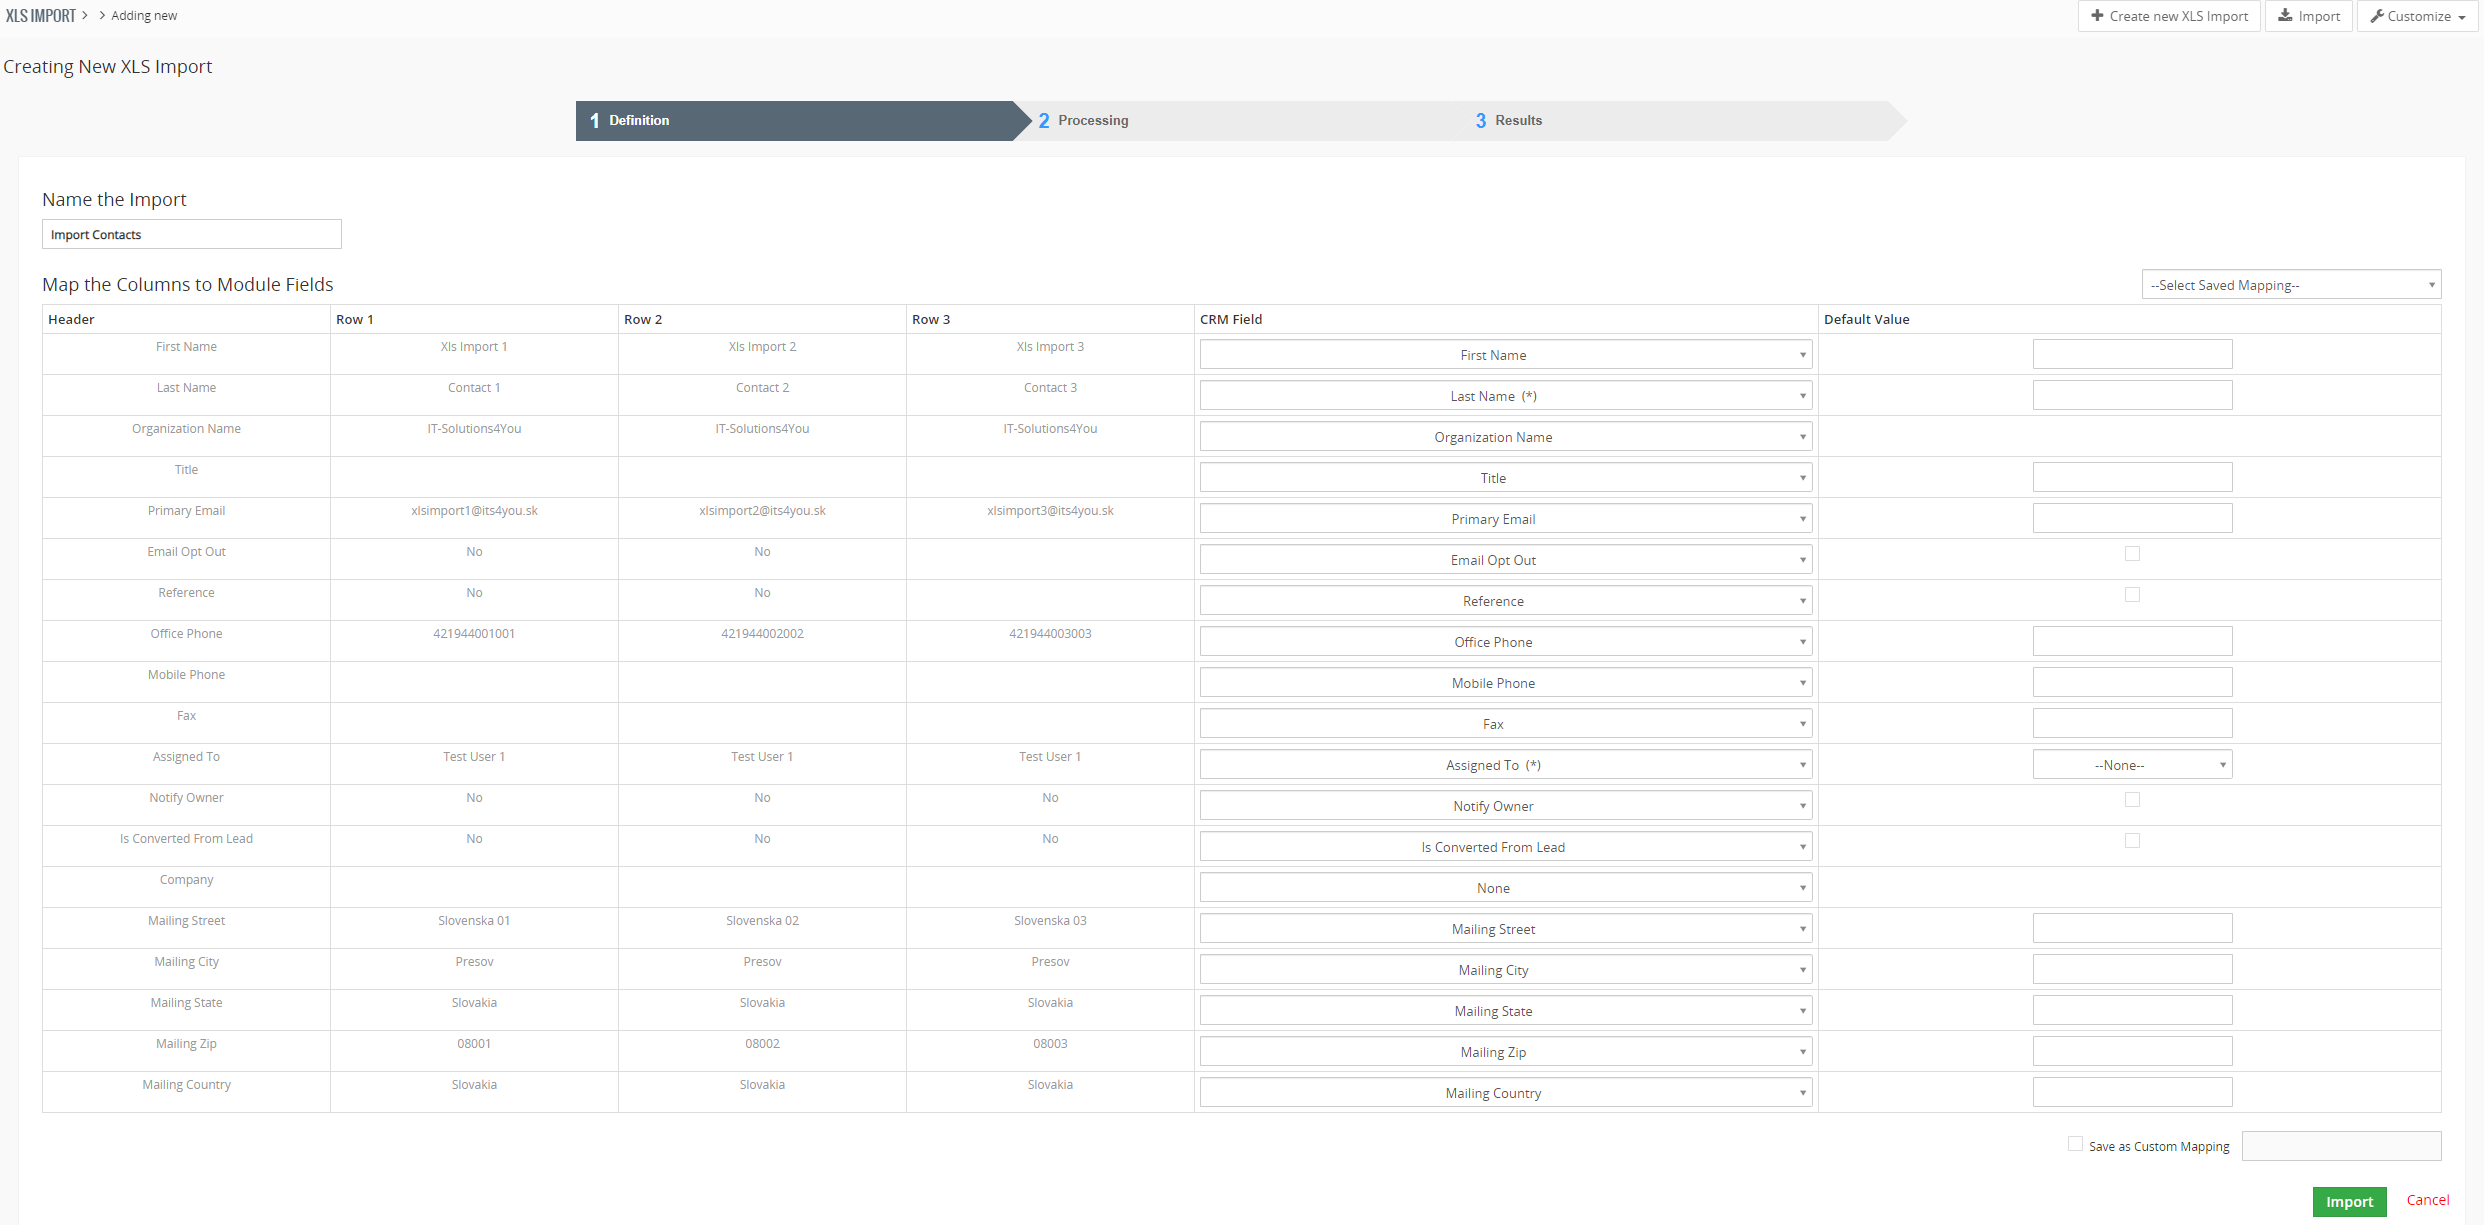
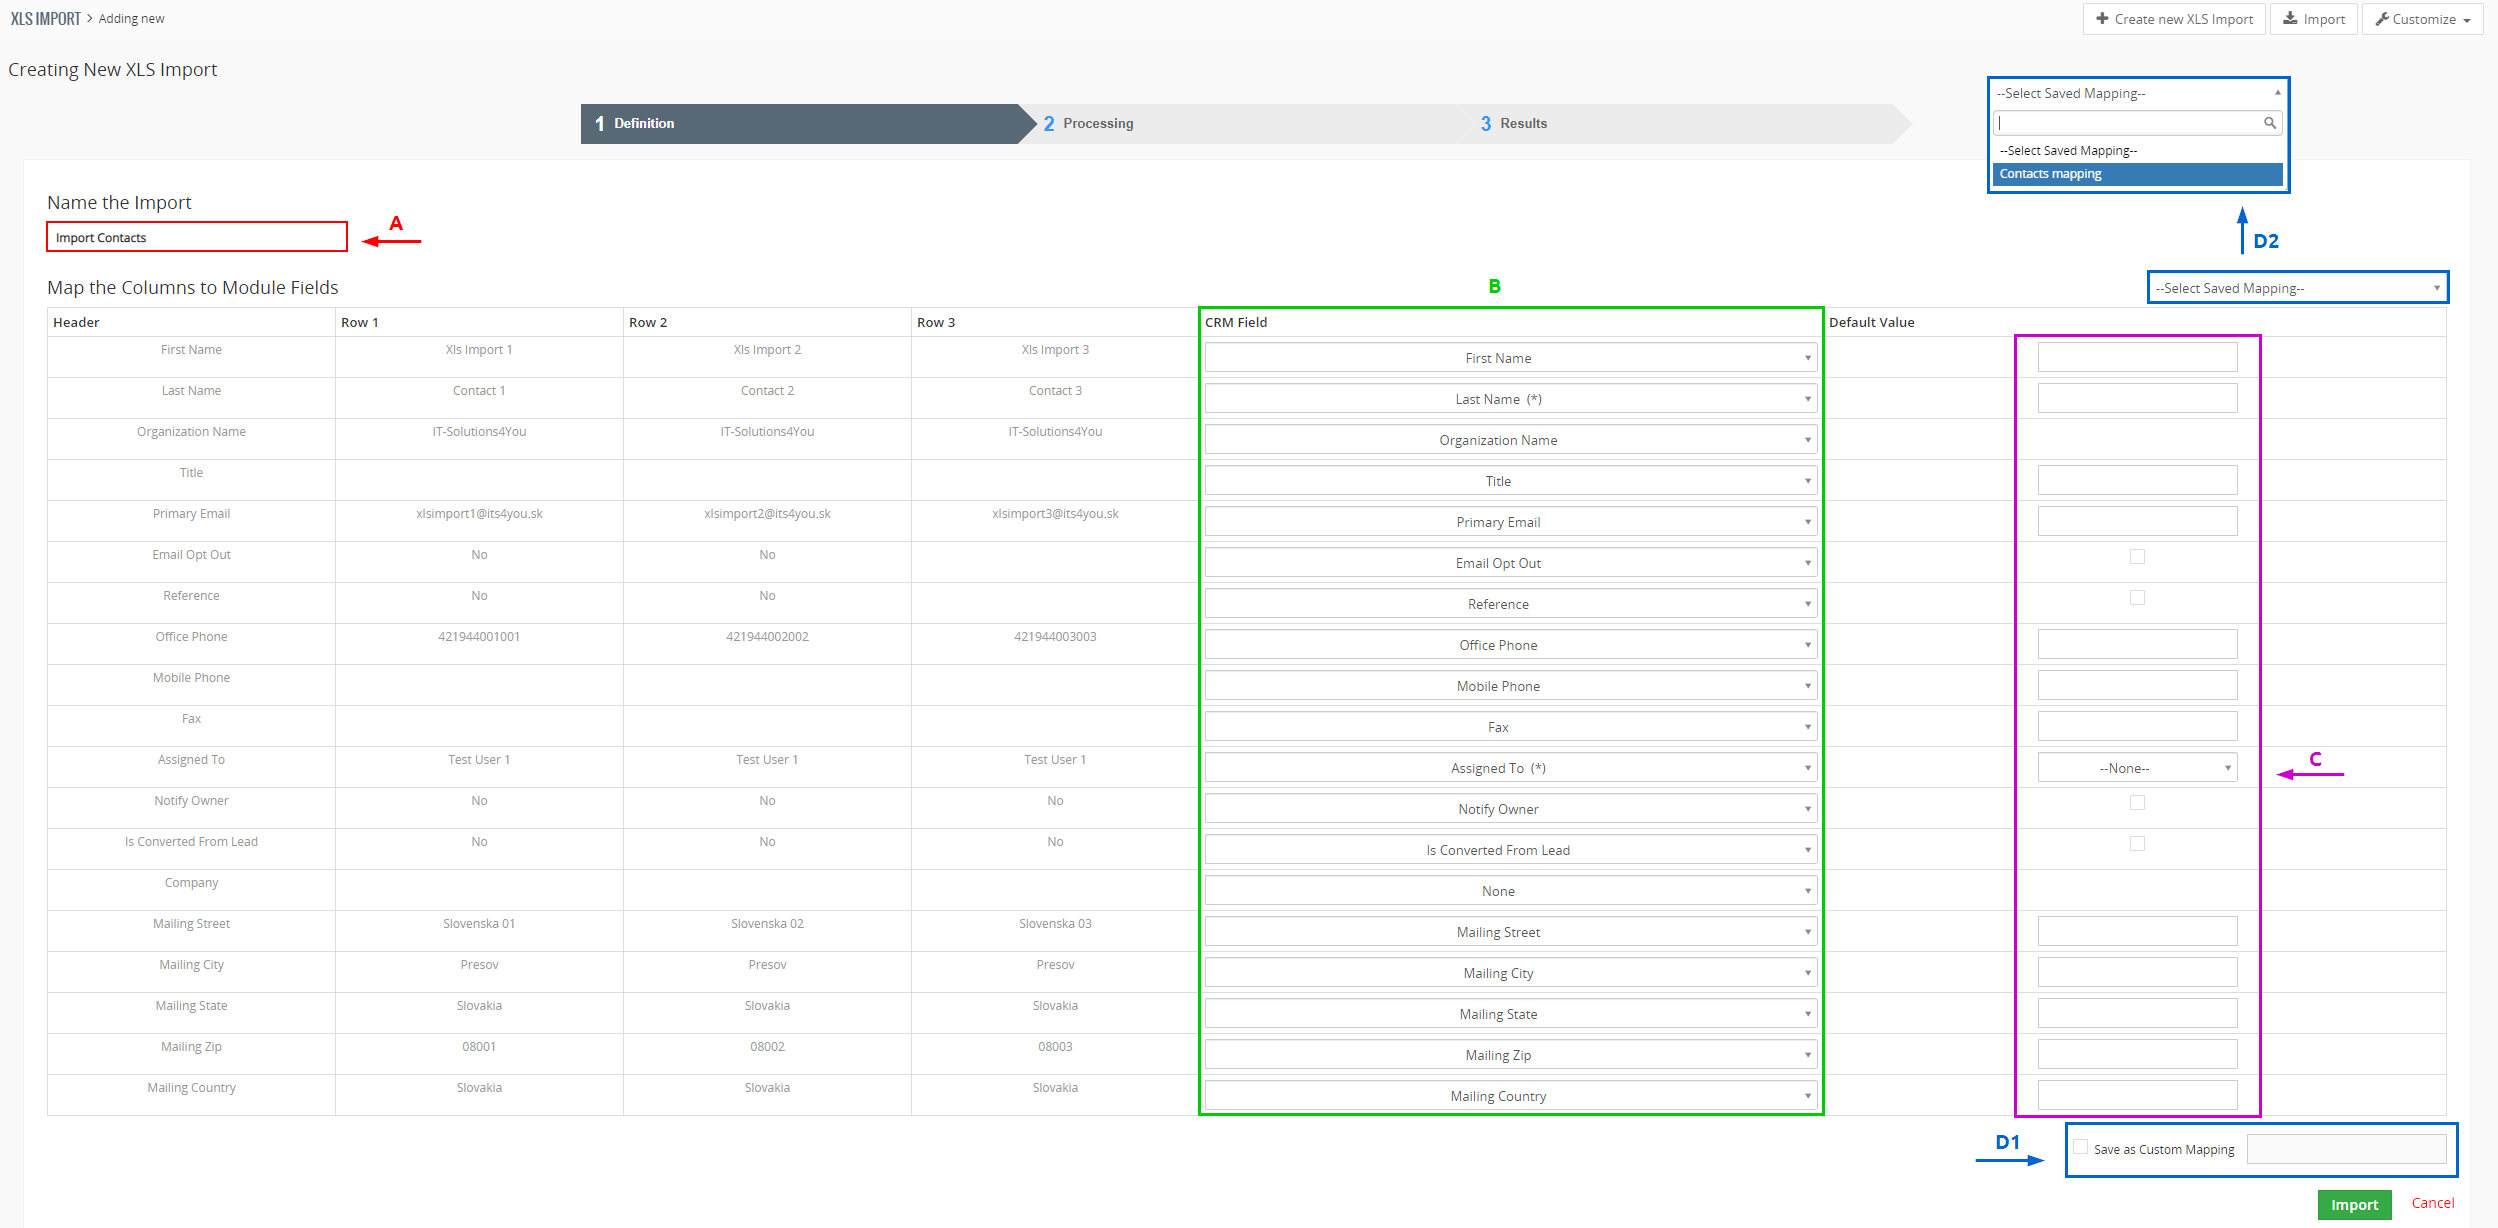
- The next step is mainly about field mapping, you can change the field mapping or save custom mapping.
You have the option to change the name of the Import (A).
Change the mapping for specific fields (B).
Set Default value (C).
Create own custom mapping (D1) and use it for future imports (D2).(Click on the image to enlarge)
XLS Import – How to import file, mapping step overview Proceed via
 button.
 - The last step is where you can see the results of the import, you can see how many records were imported/created in total and if any of records failed to import.
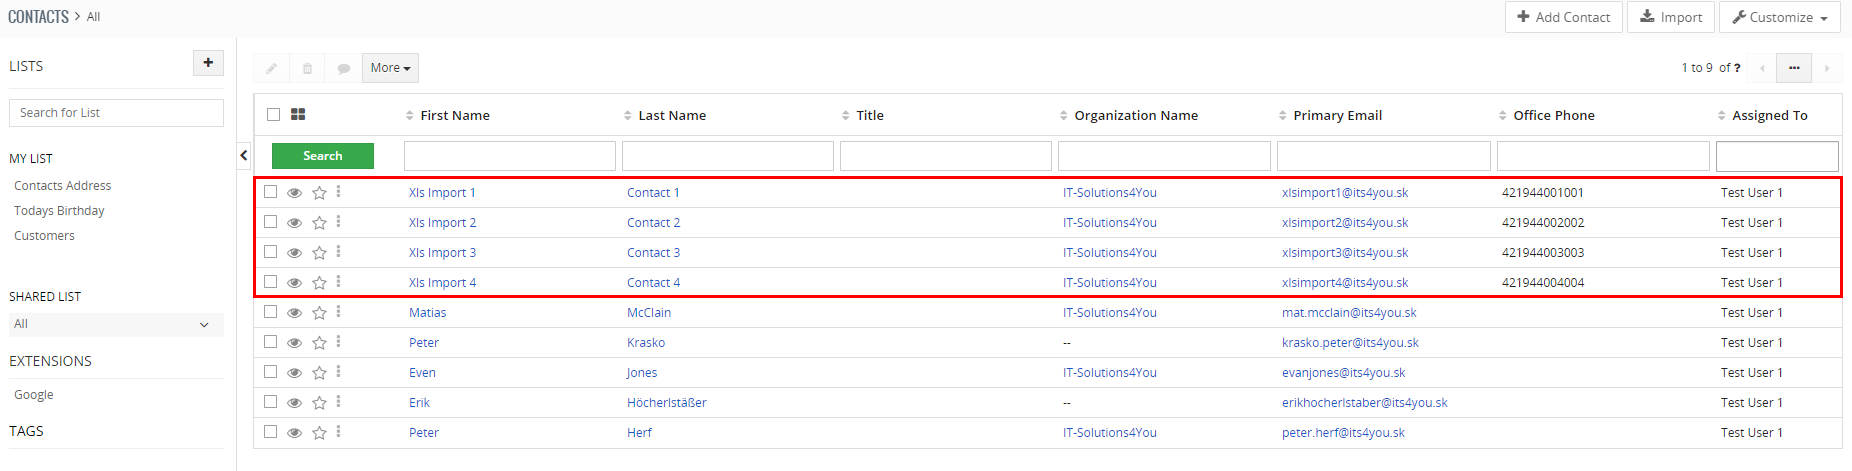
In our case, you see all 4 Contacts (records) were imported properly.

XLS Import – Results of import You can finish the importing via
 button or perform additional steps like:
 – start new import process
(current import will be finished and records will be imported), – shows the list of imported records,
 – cancels the current import
(records will be removed from the system).
Our Contacts were Imported successfully
6.Additional features
6.1.Import of records failed, what to do?
Sometimes can happen that some of the records will not be imported properly and you don’t know why.
That’s why we have feature to check why the upload failed.
- Go to XLS Import module list view and click on the Import you recently created
(or the one which failed to upload some records) - In the detail view of record click on the button:
XLS Import – Import error check
After Log file is downloaded, you can open it and check:
- which record failed (line of the record),
- error message (why upload failed).
6.2.Duplicates handling
With our XLS Import extension you have option to handle duplicates, this can be useful if the records in the system already exist, you can simply overwrite them or perform other methods.
There is need to select for which fields this method will be used.
Duplicates handling methods are:

6.2.1.Skip method
After import, duplicate records are identified based on fields criteria. If your Vtiger CRM and .xls file has records in common, to avoid redundant data, the records in .xls file are imported and will replace the records in Vtiger CRM.
You need to also define “Fields to be matched on”, we suggest selecting the all fields if you want to prevent any duplicated or selects the fields based on the module for which you are creating import.
When you selected the Skip method, in the last step of import process, you should see the following results:
- Records total – 4
- Records created – 0
- Records skipped – 4 “Details”
By clicking on the “Details” the list of skipped records will appear: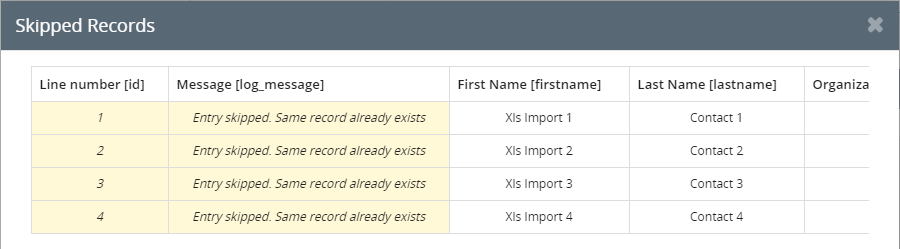
XLS Import – Duplicates handling, skip method - Records failed – 0
Check which records were skipped
(Click on the image to enlarge)
6.2.2.Overwrite method
After import, duplicate records are identified based on fields criteria. If your Vtiger CRM and .xls file has records in common, to avoid redundant data, the records in .xls file are imported and will replace the records in Vtiger CRM.
When you selected the Overwrite method, in the last step of import process, you should see the following results:
- Records total – 4
- Records created – 0
- Records overwritten – 4
- Records failed – 0

6.2.3.Merge method
After import, duplicate records are identified based on field’s criteria. Merge, unlike overwrite and skip, checks for duplicate records first and then captures only useful information from your .xls file and updates it in your Vtiger CRM.
What if your records on either ends (csv file and Vtiger) have duplicates, but also have important information on those duplicates? That’s exactly when the merge comes really helpful.
Merge feature finds out duplicates and converge information in .xls file and Vtiger CRM. That makes it only one record with complete information.
See an example:
We have Contact record in .xlsx file

Then we have Contact record in Vtiger CRM before Import

Next, we will create an import via our extension XLS Import and use following duplicate handling method with fields to be matched:
Result: Contact record updated in Vtiger CRM after import
*in the green you can see the fields which were updated

6.3.Trigger workflow
The XLS Import have also Workflow Trigger feature, which work the same way as Workflow Trigger.
By default, this feature is turned off for XLS Import, however you can turn it on while you are creating an import by marking the checkbox.
How does this works?
- Lets say you have created workflow for Contacts module, so every time Contact is created you send the welcome e-mail to that Contact.
So your settings for workflow are: Trigger Workflow On – Contact creation. - When you import the .xls file via XLS Import, you are basically creating new records when the import is finished.
- All you need to do is check the box in XLS Import Trigger workflow feature, so when you import the contacts, records are created = workflow is triggered = newly created contact will receive welcome e-mail
6.4.Create picklist values
Create picklist values is very useful feature of XLS Import if you have already created a picklist in your Vtiger CRM system with pre-defined values but you need to add additional value/s to it.
Example:
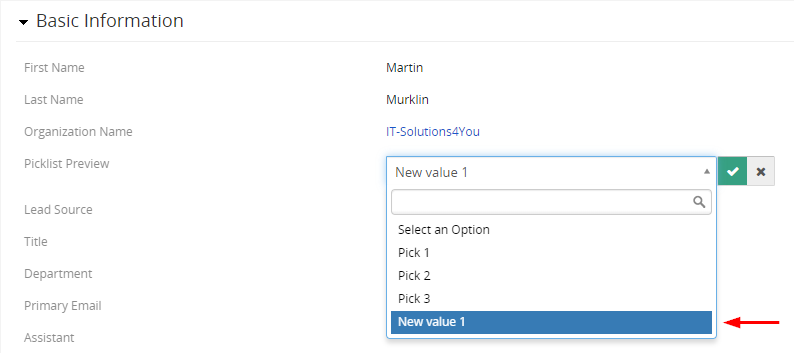
- We have already created picklist for the Contacts module called “Picklist Preview” with values: Pick 1, Pick 2, Pick 3.
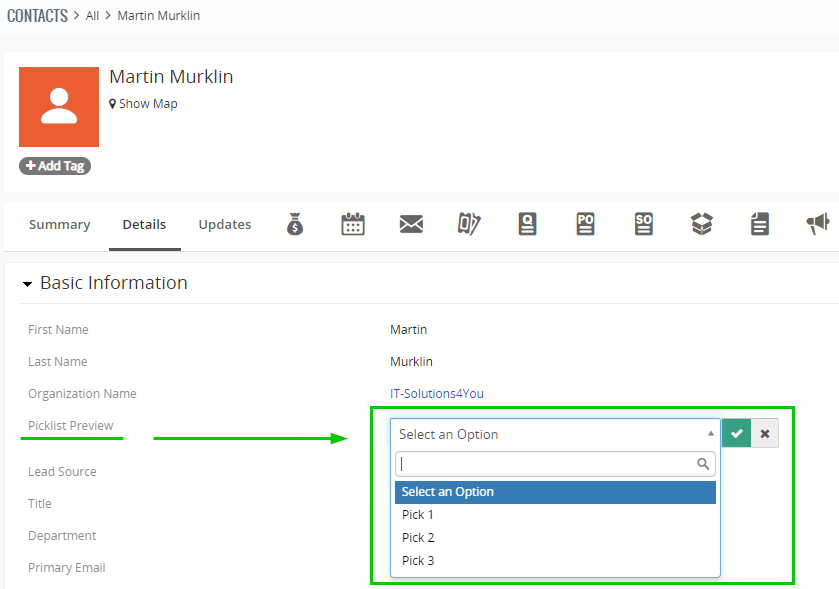
XLS Import – Create picklist value - But, we want to add additional values to the picklist “Picklist Preview” when importing new records.
How to add new values to the Picklist?
Lets say we want to add new value for picklist “Picklist Preview”: New value 1.
We need to add the picklist field and values to the .xls file, see below:

Next, open XLS Import and load the file, then under 4. Additional settings check box Create picklist values.
Finish the import process, after import go to the Contact you imported and see that the new Picklist value was set:
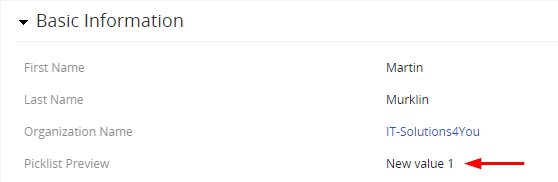
And also added as a new value for the picklist “Picklist preview”:
6.5.Updating prices for the Price Books
Since version 4.10 released in October 2022, users have option to update prices of Products and Services in Prices Book via More button in the detail view of the Price Book record.
Please follow the steps to update prices in Price books:
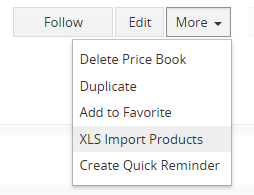
- Go to your Price book detail view for which you want updated prices of the Products

- Next, click on the button and select XLS Import Products
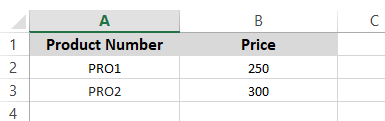
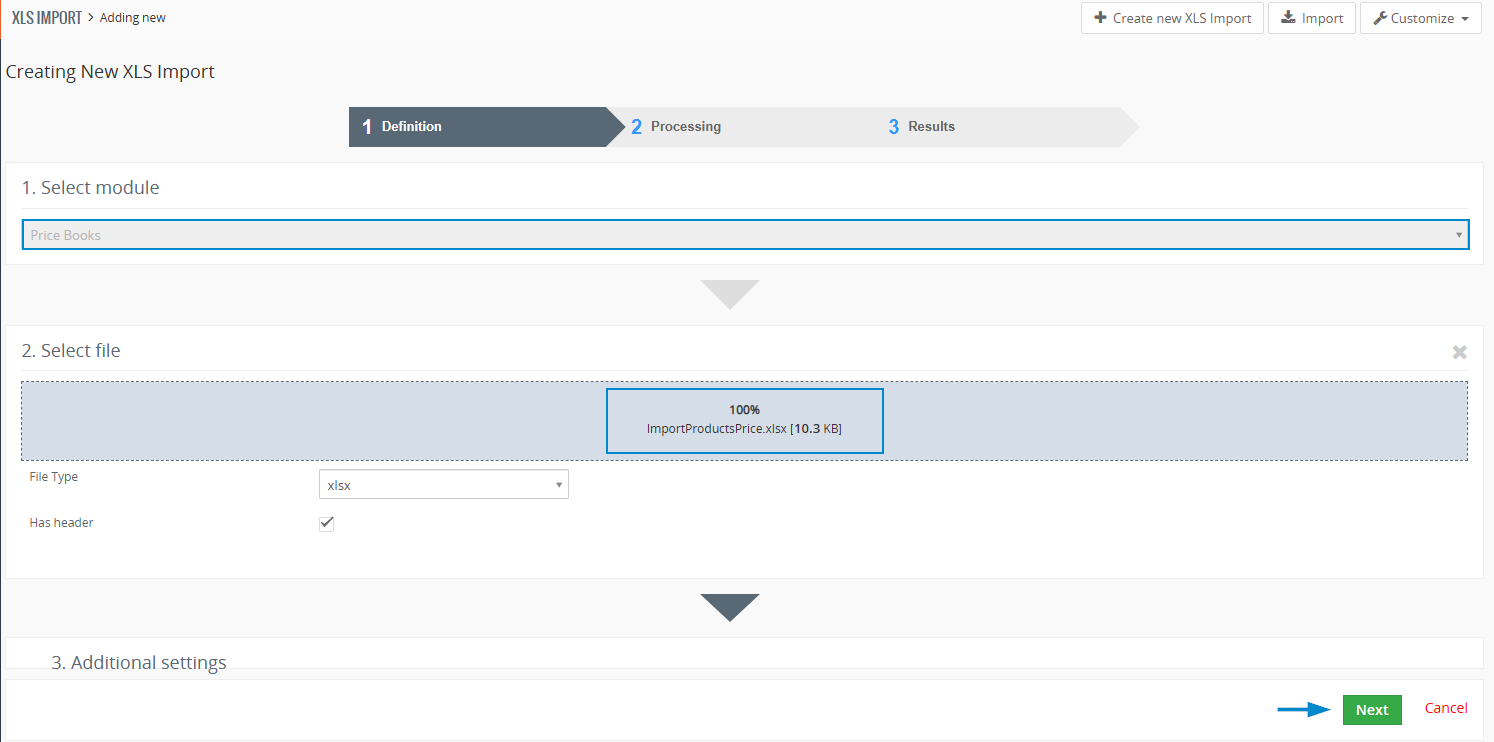
- When importing the .xls file, the 1. Select module is automatically filled with Price Book module, then you need just select your .xls file with Product Numbers and the Price/List price, in our case we will use only Product Number and Price as identifier:
Our .xls file table below:
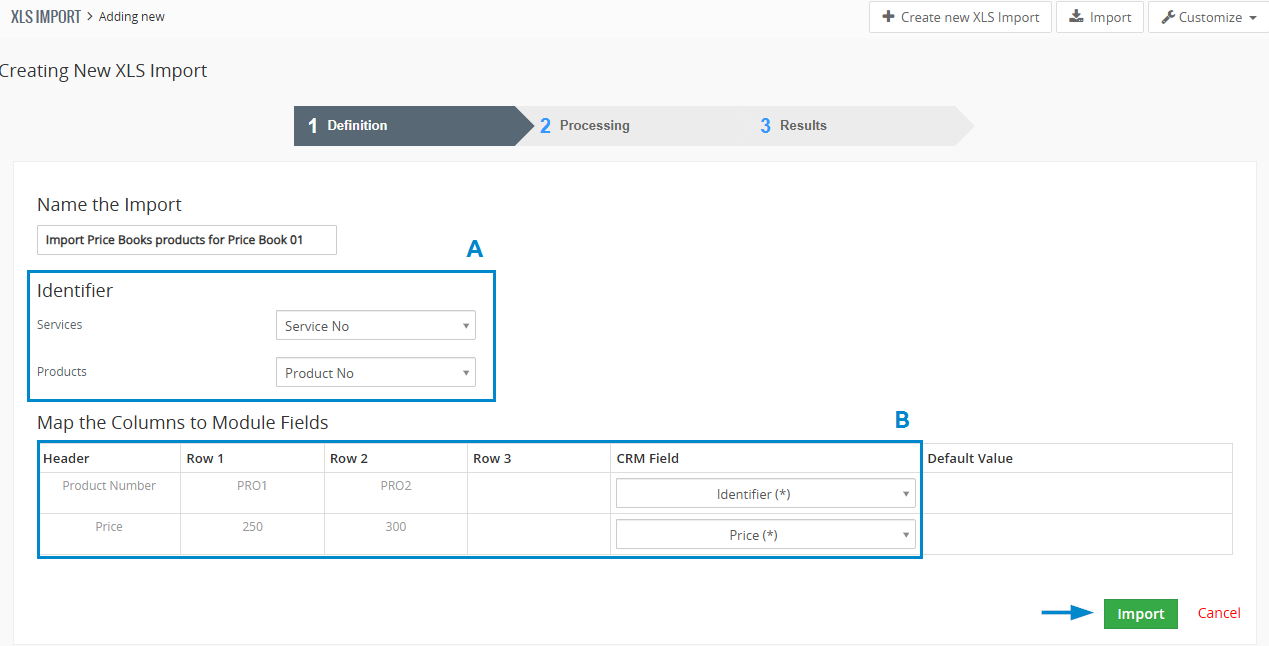
- Next step is important, here you select Identifier for already existing products in your Price Book:
/A/ – Select the identifier, in our case it’s a Product Number/Product No for Products from our .xls file
/B/ – From the table, select under CRM Field Identifier (*) for Header/Product Number and Price (*) for prices
- In third step of importResults, you can preview if import was successful and see overall preview, proceed via button.


Below you can see how our Selling Prices in Price Book were updated:
From:

To:

7.Settings
Settings for XLS Import can be found in the List view via ![]() button.
button.

7.1.License Settings
Since December 2019/January 2020 all our modules will be using Installer to manage licenses. Please check our Installer pages for more information.
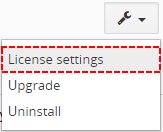
You can access the License settings like its shown below:
(there can be more options from the pick-list, depends on the module)
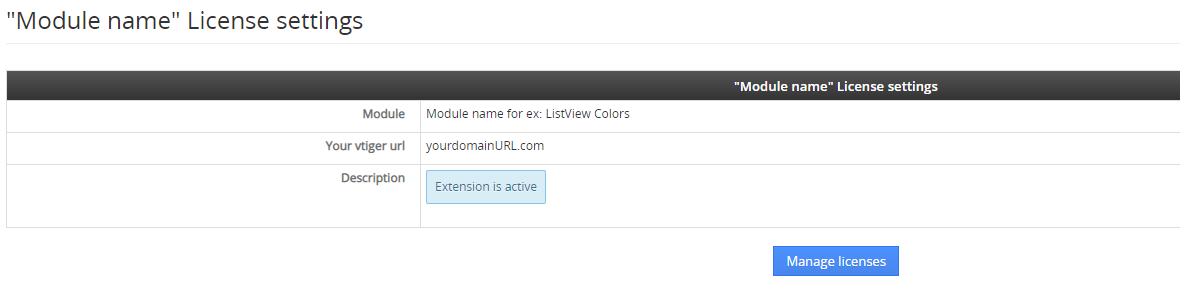
After accessing the License window you can see screen bellow with following information:
- Module name, Your Vtiger domain URL
- Description, if license is activate or not:
 – your license is currently active,
 – your license is not active and you need active it via Installer.
To activate or manage license, click on the ![]() button.
button.
7.1.1.Deactivate license
If you want to deactivate your license, please provide following steps:
- Go to your Installer, by a click on Notifications Icon and then on the button
or via Main Menu – Settings – CRM Settings – Extensions – ITS4YouInstaller - The following screen will appear (see below):

Installer – deactivation of license You can deactivate license by click on the button

![]() Note: The module will be deactivated but not uninstalled and license will be removed from the Activated Licenses tab.
Note: The module will be deactivated but not uninstalled and license will be removed from the Activated Licenses tab.
7.1.2.Reactivate license
To reactivate a license after deactivation, you need to follow the same process as you activated it first time:
- Click on the
 button and enter your license key.
- Confirm with
 button.
When the license was activated you can see module available in the Modules tab below.
![]() Note: To see modules and manage licenses you have to log in to our e-shop with @email and password via
Note: To see modules and manage licenses you have to log in to our e-shop with @email and password via ![]() button (top right screen side in Installer module).
button (top right screen side in Installer module).
7.2.How to Update XLS Import
The upgrade of the module is initiated manually or via our Installer.
Updating via Installer:
- open the Installer in the CRM
- in the Modules tab find your installed module and you should see the button available
- If the new version is available, you will be notified via Installer Notifications icon
Updating XLS Import manually:
Go to Menu – Tools – XLS Import, in the list view click on the ![]() button and choose “Upgrade” option.
button and choose “Upgrade” option.
Please refer to below installation part for details how to initiate the import of the module from the .zip file.
As you can be seen on the picture below you will be notified that the XLS Import extension already exists. Confirm License agreement and upgrade will start immediately when you click on the ![]() button.
button.
After upgrade the notification about successful upgrade is shown.
7.3.Uninstall
If you need to remove the module from your Vtiger you have two options:
- Uninstall via Installer.
- Manually via going to module Settings and choose Uninstall option.
7.3.1.Uninstall via Installer
You have also option to remove the module via Installer window by accessing the Settings – Uninstall window:
- Go to your Installer, by a click on Notifications Icon and then on the button ,
or via Main Menu – Settings – CRM Settings – Extensions – ITS4YouInstaller - Find the module you need to uninstall in the Modules tab
- Via
 pick list button choose the Uninstall option, you will be redirected to the Uninstall window.
 - Click on
 button

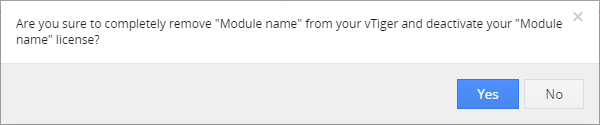
- Confirm uninstall with
 button
Now, the module has been removed from your Vtiger and your license has been deactivated. To use this module again, you need to provide installation and validation steps (see Installation chapter).
7.3.2.Manual Uninstall
There is also available option to remove XLS Import from your Vtiger manually. To uninstall please provide following steps:
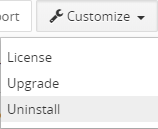
- Go to the List view of XLS Import and via Customize option select Uninstall.
- Click on button.

- Confirm uninstall with
 button.
Now, XLS Import is removed from your Vtiger and your license is deactivated. To use XLS Import again you need to provide installation and validation steps (see chapter 2. How to Install XLS Import).
 Unistalling XLS Import
- When uninstalling the XLS Import, you will NOT lose any records you imported previously.
8.Change Log
- Check latest versions available and fixes applied
- What was changed/added to manual
8.1.XLS Import
- 3 March 2021: 4.4
- added compatibility with Multi Company numbering
- fixed issue where numbers were not properly imported if the field was an Integer type
- 5 February 2021: 4.3
- fixed issue where imported records were missing a record number (Record No.)
- 13 November 2020: 4.2
- fixed issue where during creation of Import, creating Picklist values feature was causing issues with the database and was mixing the records, what created duplicity
- fixed issue where importing .csv files caused error on some Vtiger systems
- 11 May 2020: 4.1
- added new icon for XLS Import module
- fixed issue with Duplicates handling, where you had only one option to Skip (should be: Skip, Overwrite and Merge)
- January 2020: 4.0
- new validation system via our FREE extension Installer
- August 2019: 700.1.1
- minor bug fixes
- August 2019: 700.1.0
- extension release
8.2.Manual of XLS Import
- 26 May 2020: manual based on XLS Import 4.1
- first initiate for Vtiger 7.x