
6.1 Import of records failed, what to do?
Sometimes can happen that some of the records will not be imported properly and you don’t know why.
That’s why we have feature to check why the upload failed.
- Go to XLS Import module list view and click on the Import you recently created
(or the one which failed to upload some records) - In the detail view of record click on the button:
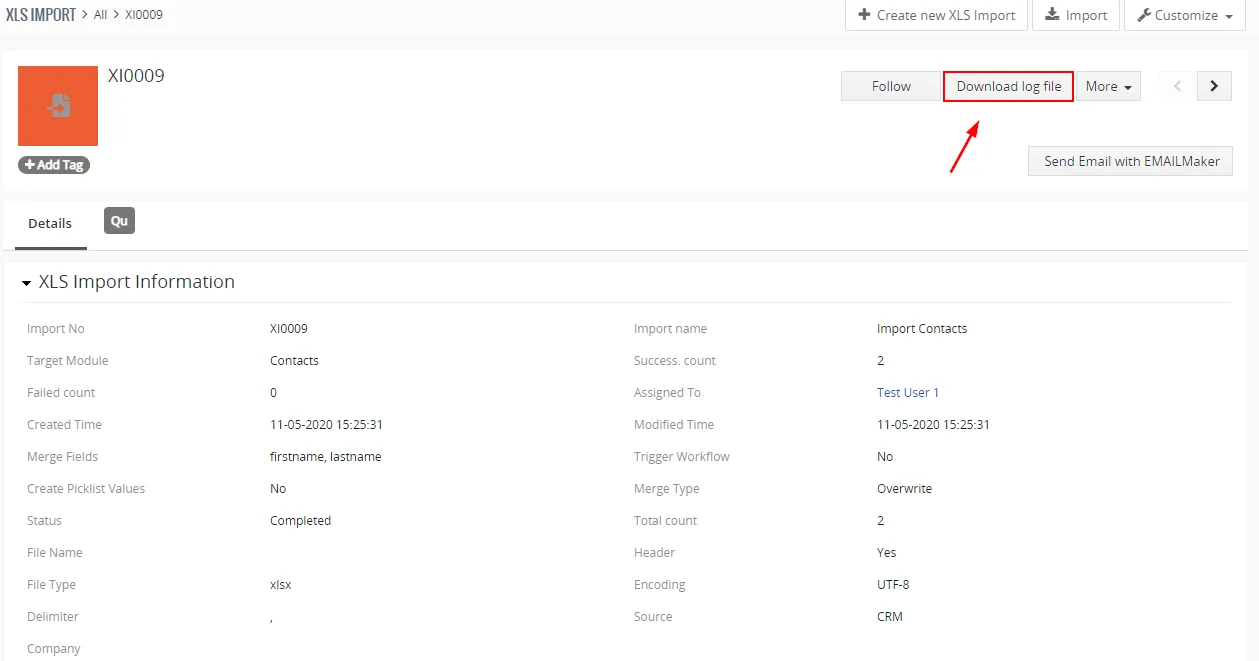
XLS Import – Import error check
After Log file is downloaded, you can open it and check:
- which record failed (line of the record),
- error message (why upload failed).
6.2 Duplicates handling
With our XLS Import extension you have option to handle duplicates, this can be useful if the records in the system already exist, you can simply overwrite them or perform other methods.
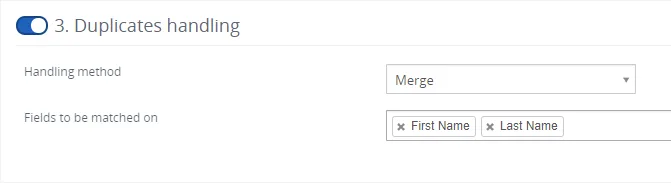
There is need to select for which fields this method will be used.
Duplicates handling methods are:

6.2.1 Skip method
After import, duplicate records are identified based on fields criteria. If your Vtiger CRM and .xls file has records in common, to avoid redundant data, the records in .xls file are imported and will replace the records in Vtiger CRM.
You need to also define “Fields to be matched on”, we suggest selecting the all fields if you want to prevent any duplicated or selects the fields based on the module for which you are creating import.
When you selected the Skip method, in the last step of import process, you should see the following results:
- Records total – 4
- Records created – 0
- Records skipped – 4 “Details”
By clicking on the “Details” the list of skipped records will appear: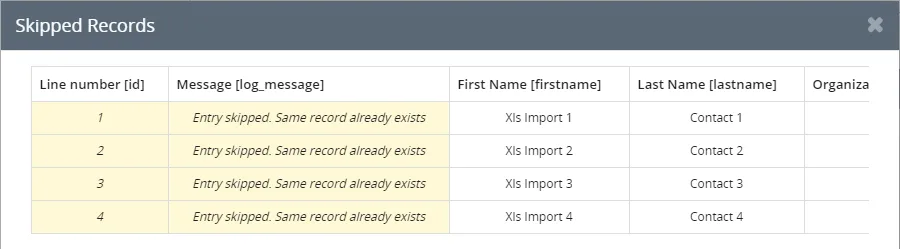
XLS Import – Duplicates handling, skip method - Records failed – 0
Check which records were skipped
(Click on the image to enlarge)
6.2.2 Overwrite method
After import, duplicate records are identified based on fields criteria. If your Vtiger CRM and .xls file has records in common, to avoid redundant data, the records in .xls file are imported and will replace the records in Vtiger CRM.
When you selected the Overwrite method, in the last step of import process, you should see the following results:
- Records total – 4
- Records created – 0
- Records overwritten – 4
- Records failed – 0

6.2.3 Merge method
After import, duplicate records are identified based on field’s criteria. Merge, unlike overwrite and skip, checks for duplicate records first and then captures only useful information from your .xls file and updates it in your Vtiger CRM.
What if your records on either ends (csv file and Vtiger) have duplicates, but also have important information on those duplicates? That’s exactly when the merge comes really helpful.
Merge feature finds out duplicates and converge information in .xls file and Vtiger CRM. That makes it only one record with complete information.
See an example:
We have Contact record in .xlsx file

Then we have Contact record in Vtiger CRM before Import

Next, we will create an import via our extension XLS Import and use following duplicate handling method with fields to be matched:
Result: Contact record updated in Vtiger CRM after import
*in the green you can see the fields which were updated

6.3 Trigger workflow
The XLS Import have also Workflow Trigger feature, which work the same way as Workflow Trigger.
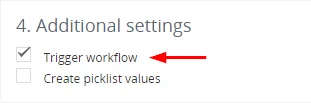
By default, this feature is turned off for XLS Import, however you can turn it on while you are creating an import by marking the checkbox.
How does this works?
- Lets say you have created workflow for Contacts module, so every time Contact is created you send the welcome e-mail to that Contact.
So your settings for workflow are: Trigger Workflow On – Contact creation. - When you import the .xls file via XLS Import, you are basically creating new records when the import is finished.
- All you need to do is check the box in XLS Import Trigger workflow feature, so when you import the contacts, records are created = workflow is triggered = newly created contact will receive welcome e-mail
6.4 Create picklist values
Create picklist values is very useful feature of XLS Import if you have already created a picklist in your Vtiger CRM system with pre-defined values but you need to add additional value/s to it.
Example:
- We have already created picklist for the Contacts module called “Picklist Preview” with values: Pick 1, Pick 2, Pick 3.
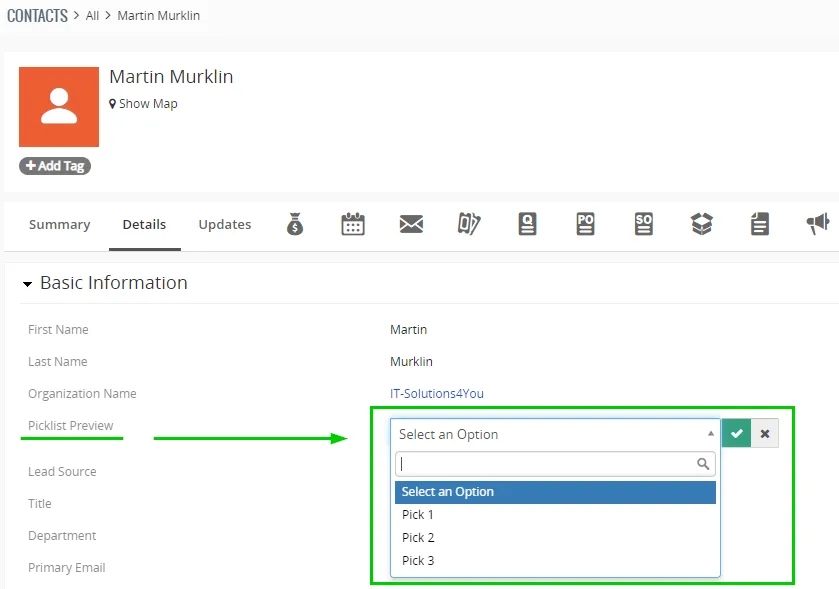
XLS Import – Create picklist value - But, we want to add additional values to the picklist “Picklist Preview” when importing new records.
How to add new values to the Picklist?
Lets say we want to add new value for picklist “Picklist Preview”: New value 1.
We need to add the picklist field and values to the .xls file, see below:

Next, open XLS Import and load the file, then under 4. Additional settings check box Create picklist values.
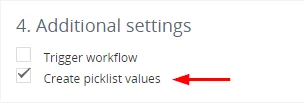
Finish the import process, after import go to the Contact you imported and see that the new Picklist value was set:
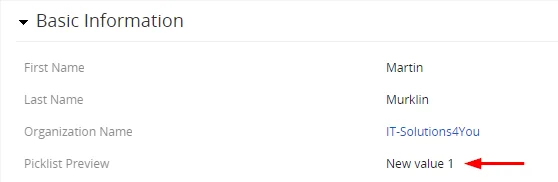
And also added as a new value for the picklist “Picklist preview”:
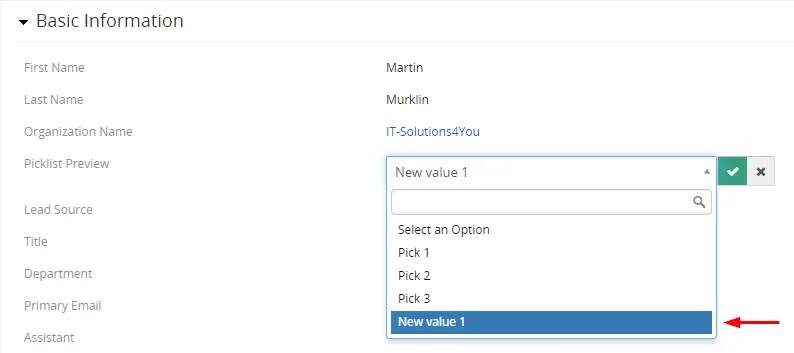
6.5 Updating prices for the Price Books
Since version 4.10 released in October 2022, users have option to update prices of Products and Services in Prices Book via More button in the detail view of the Price Book record.
Please follow the steps to update prices in Price books:
- Go to your Price book detail view for which you want updated prices of the Products
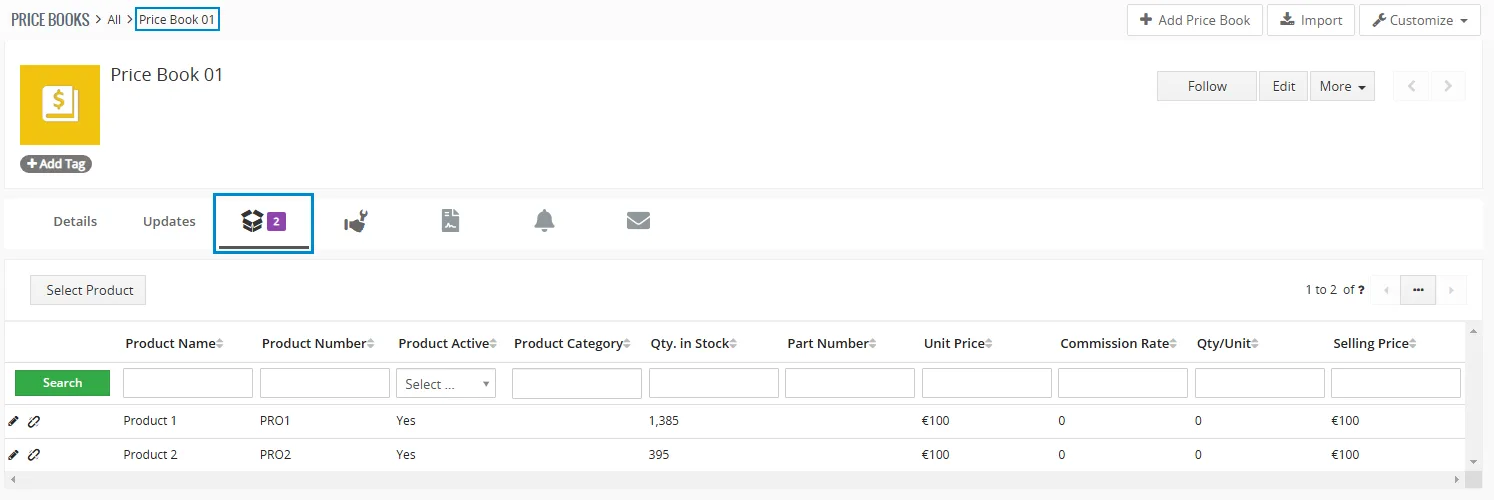
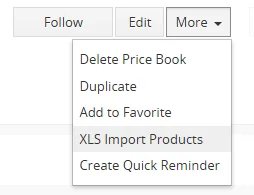
- Next, click on the button
 and select XLS Import Products
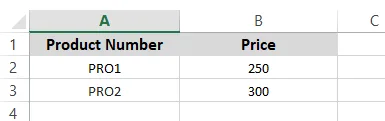
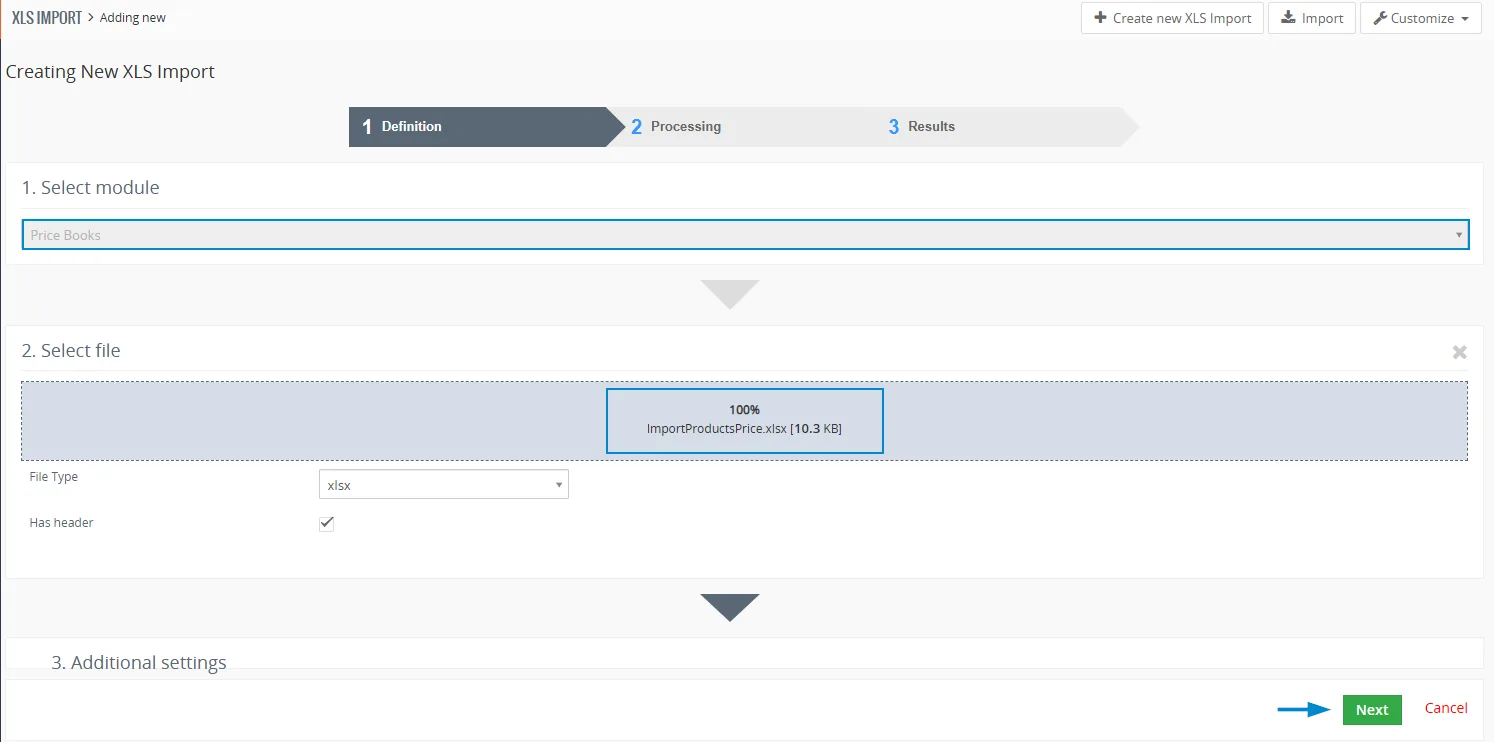
- When importing the .xls file, the 1. Select module is automatically filled with Price Book module, then you need just select your .xls file with Product Numbers and the Price/List price, in our case we will use only Product Number and Price as identifier:
Our .xls file table below:
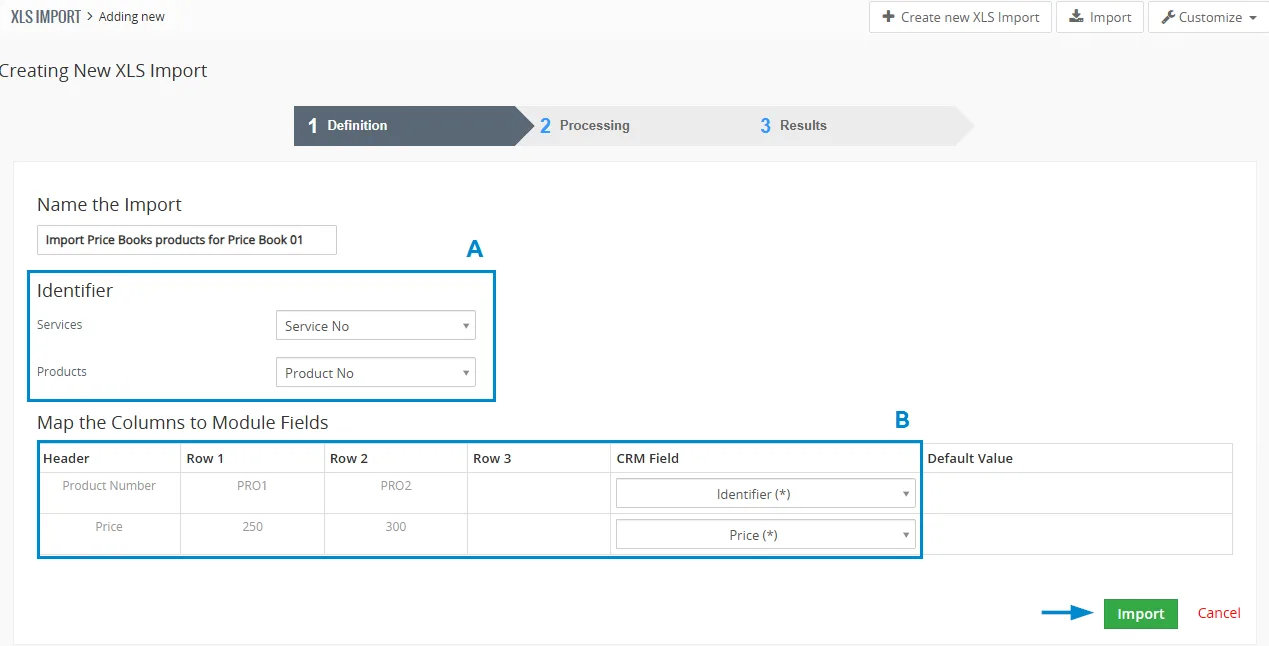
- Next step is important, here you select Identifier for already existing products in your Price Book:
/A/ – Select the identifier, in our case it’s a Product Number/Product No for Products from our .xls file
/B/ – From the table, select under CRM Field Identifier (*) for Header/Product Number and Price (*) for prices
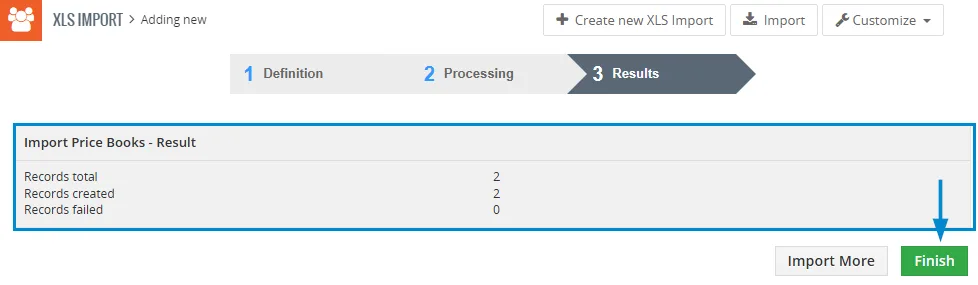
- In third step of importResults, you can preview if import was successful and see overall preview, proceed via
 button.
Below you can see how our Selling Prices in Price Book were updated:
From:

To:

Need help with XLS Import?
Our support team answers questions about installation, templates and settings.