
After successful installation of XLS Import you are able to access module and start using it.
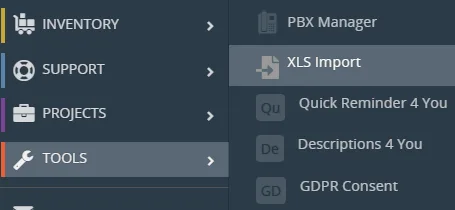
To access the XLS Import extension, navigate via the menu to the XLS Import module: TOOLS — XLS Import:
5.1 Create new XLS Import
We will show you how you can easily import any records for any module you need, we will use module Contacts as an example in next steps.
First, you will be needed to prepare .xls file with your records, second part is to load file via XLS Import extension, so let’s divide it into two parts:
- XLS (.xls) file preparation for Import
- Importing the .xls file via XLS Import extension
5.1.1 XLS (.xls) file preparation for Import
The .xls file should contain:
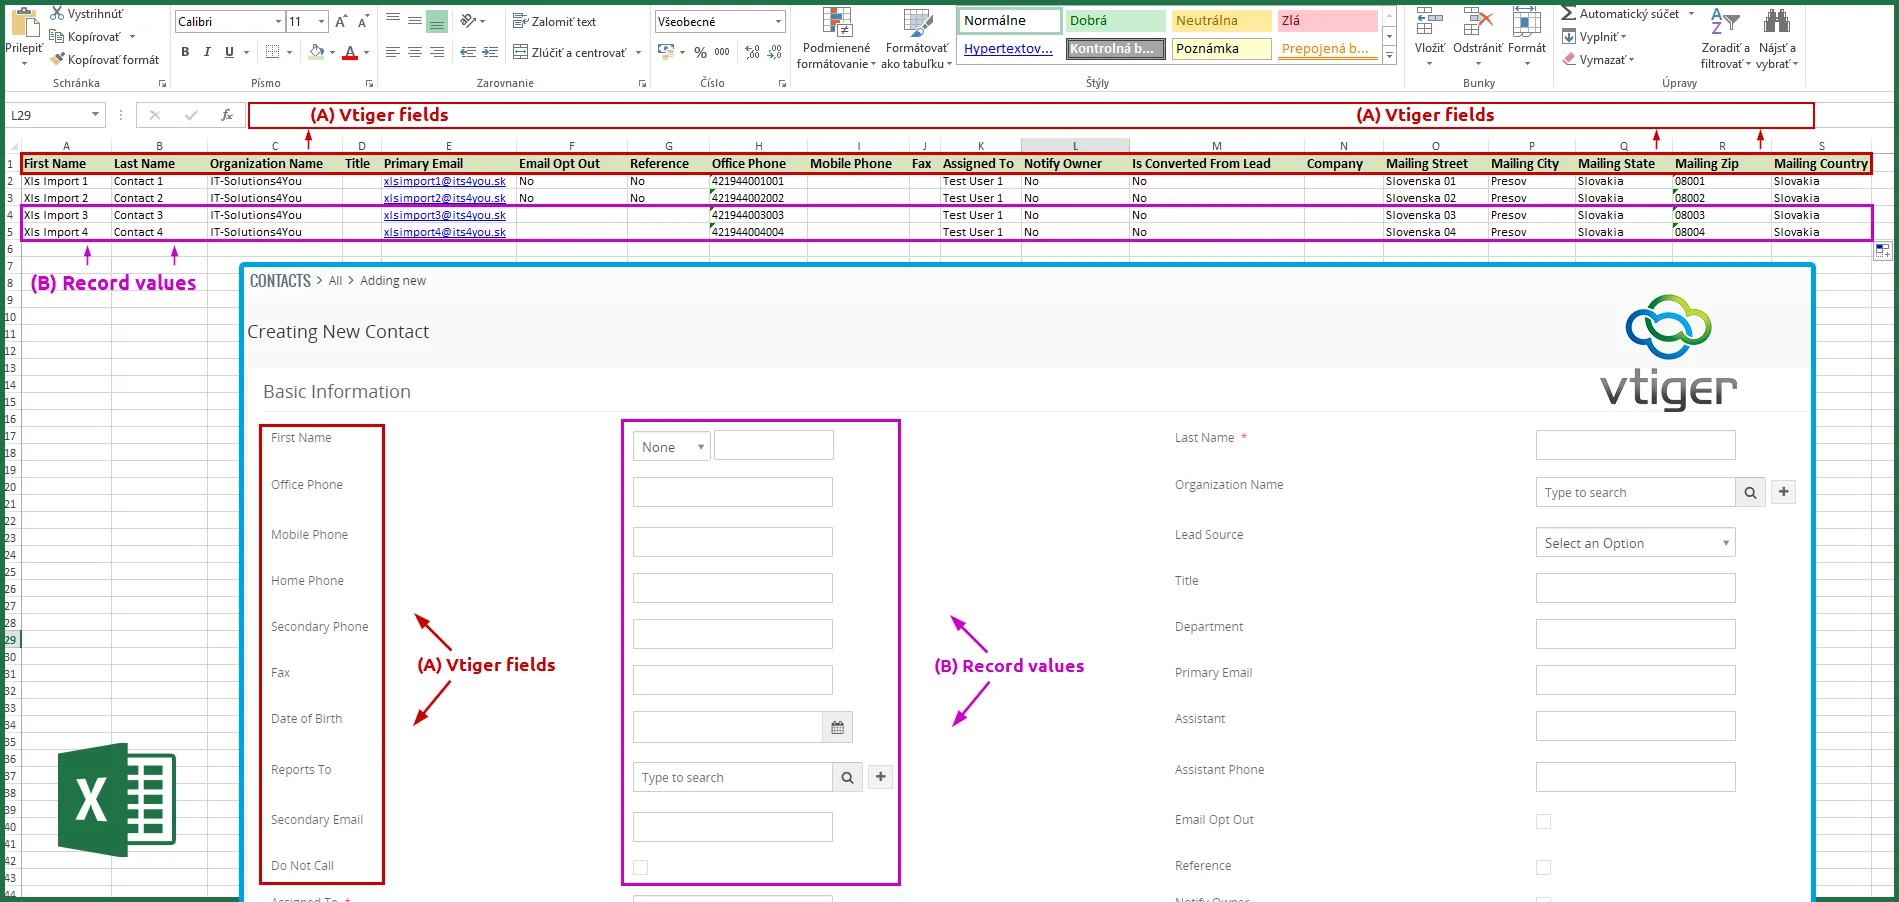
- (A) Vtiger fields –default or custom fields created in Vtiger
- (B) Record values –details for specific field in the record
Below you can see a simple example where we want import 4 records for Contacts module:
- (A) Vtiger fields will be filled with the (B) Record values
(Click on the image to enlarge)
5.1.2 Importing the .xls file via XLS Import extension
When you have already .xls file ready, we can proceed with Importing.
In order to start import please provide following steps:
-
- Go to the XLS Import module (Menu – Tools – XLS Import).
- Click on the button

- A new window will appear, select the module (we will be doing Contacts module) and load the .xls file by clicking on “Drop file here or click to upload”.
XLS Import – How to import file - When the .xlsx file is loaded, new features, options are available:
- File Type – the type of file you loaded
(mostly this is selected automatically based on the file type you loaded). - Duplicates handling – you can choose the duplicates handling methods like Skip, Overwrite, Merge based on selected fields.
- Additional settings – Trigger workflow (counts as record create/update)
Create picklist values (create a picklist if there are more values,
for example: First name: Martin, Peter).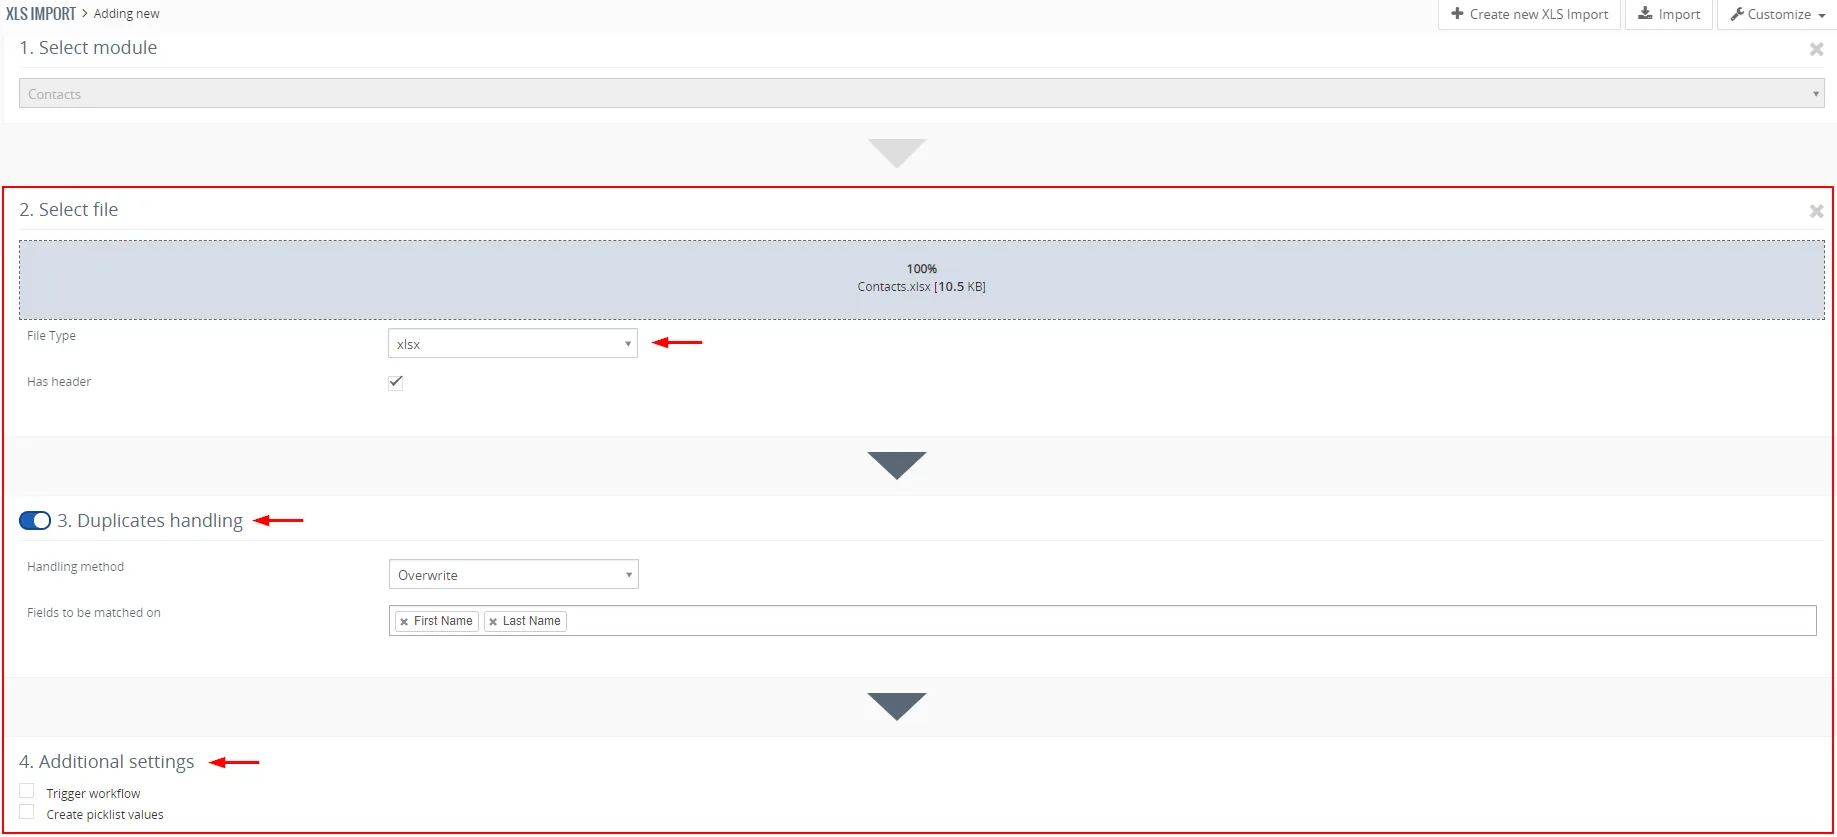
XLS Import – How to import file, features Proceed via
 button.
- File Type – the type of file you loaded
- The next step is mainly about field mapping, you can change the field mapping or save custom mapping.
You have the option to change the name of the Import (A).
Change the mapping for specific fields (B).
Set Default value (C).
Create own custom mapping (D1) and use it for future imports (D2).(Click on the image to enlarge)
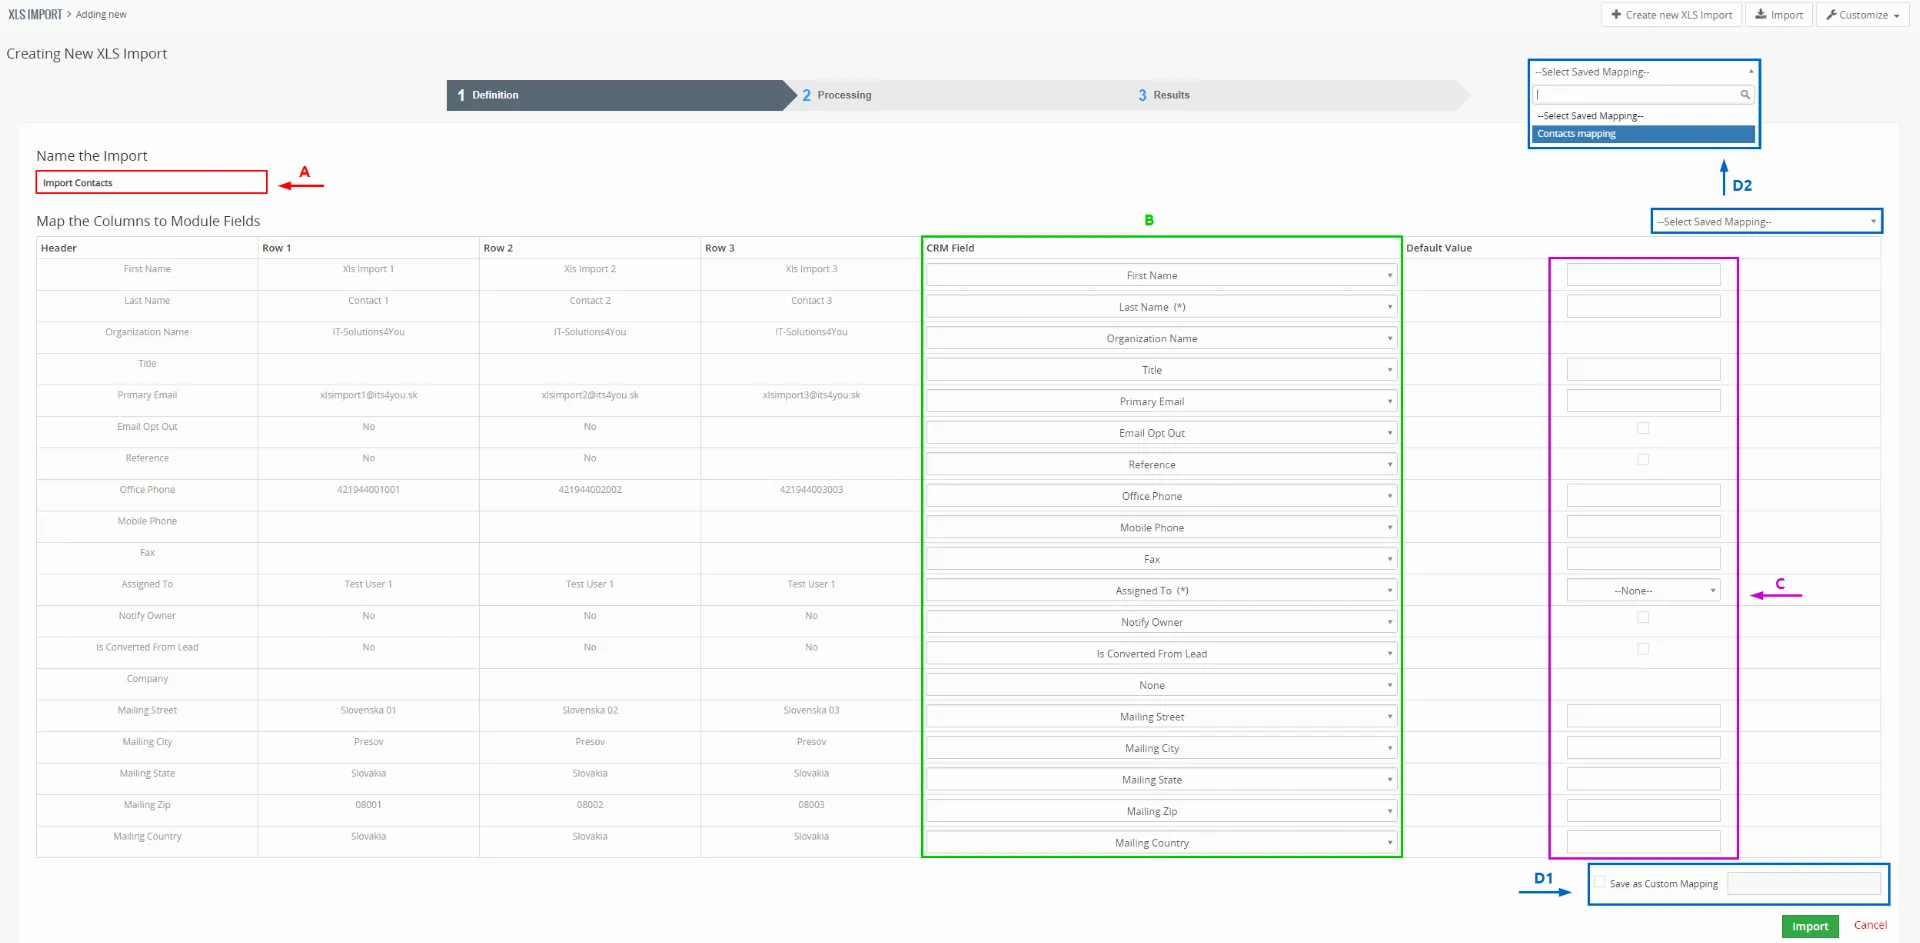
XLS Import – How to import file, mapping step overview Proceed via
 button.
- The last step is where you can see the results of the import, you can see how many records were imported/created in total and if any of records failed to import.
In our case, you see all 4 Contacts (records) were imported properly.

XLS Import – Results of import You can finish the importing via
 button or perform additional steps like:
 – start new import process
(current import will be finished and records will be imported), – shows the list of imported records,
 – cancels the current import
(records will be removed from the system).
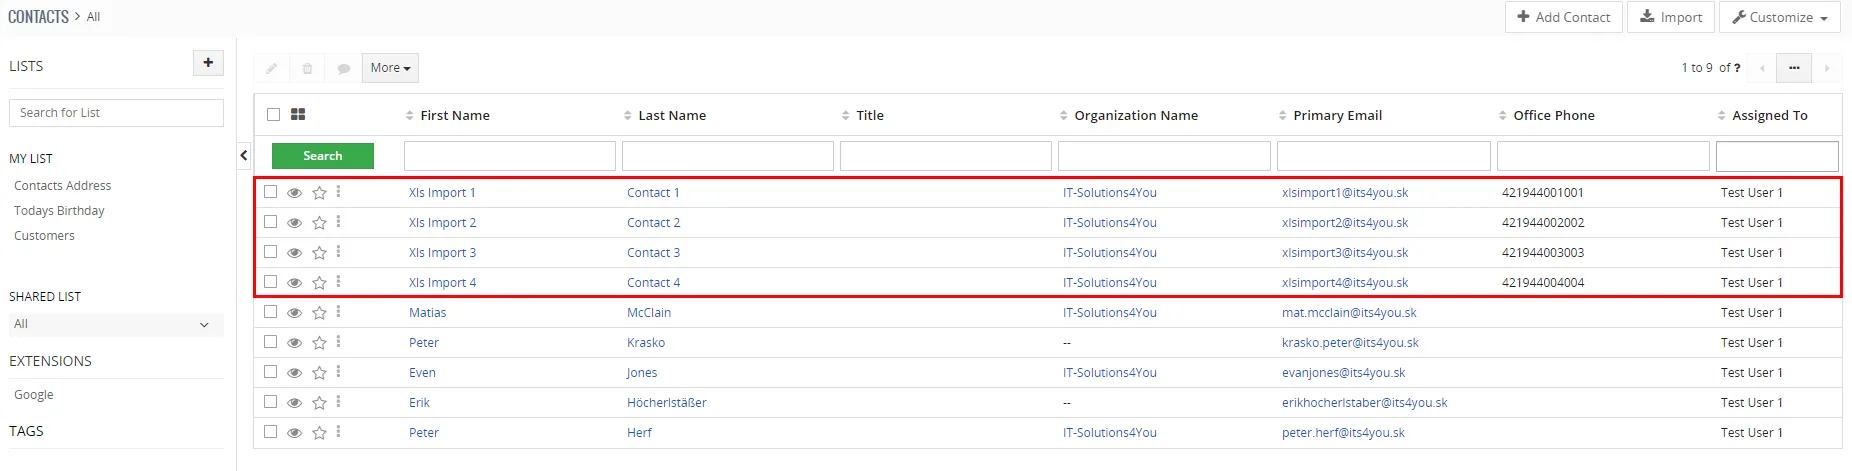
Our Contacts were Imported successfully
Need help with XLS Import?
Our support team answers questions about installation, templates and settings.