

6.1 Unsubscribe
An Email Marketing extension come with built in unsubscribe feature, however this is not automatically added to the templates, you need to add it manually.
There are two options how to use unsubscribe:
- Newsletter template – add an unsubscribe link in the GrapeJS editor
- Email Maker template – using custom function in the template

Please see the chapters below for detailed information.
6.1.1 Unsubscribe via Newsletter
 Note: This feature is available from version of Email Marketing 4.2, so please update your extension via Installer if you want to use it without any issues.
This feature is added in to the template of Newsletter which comes with Email Marketing extension.
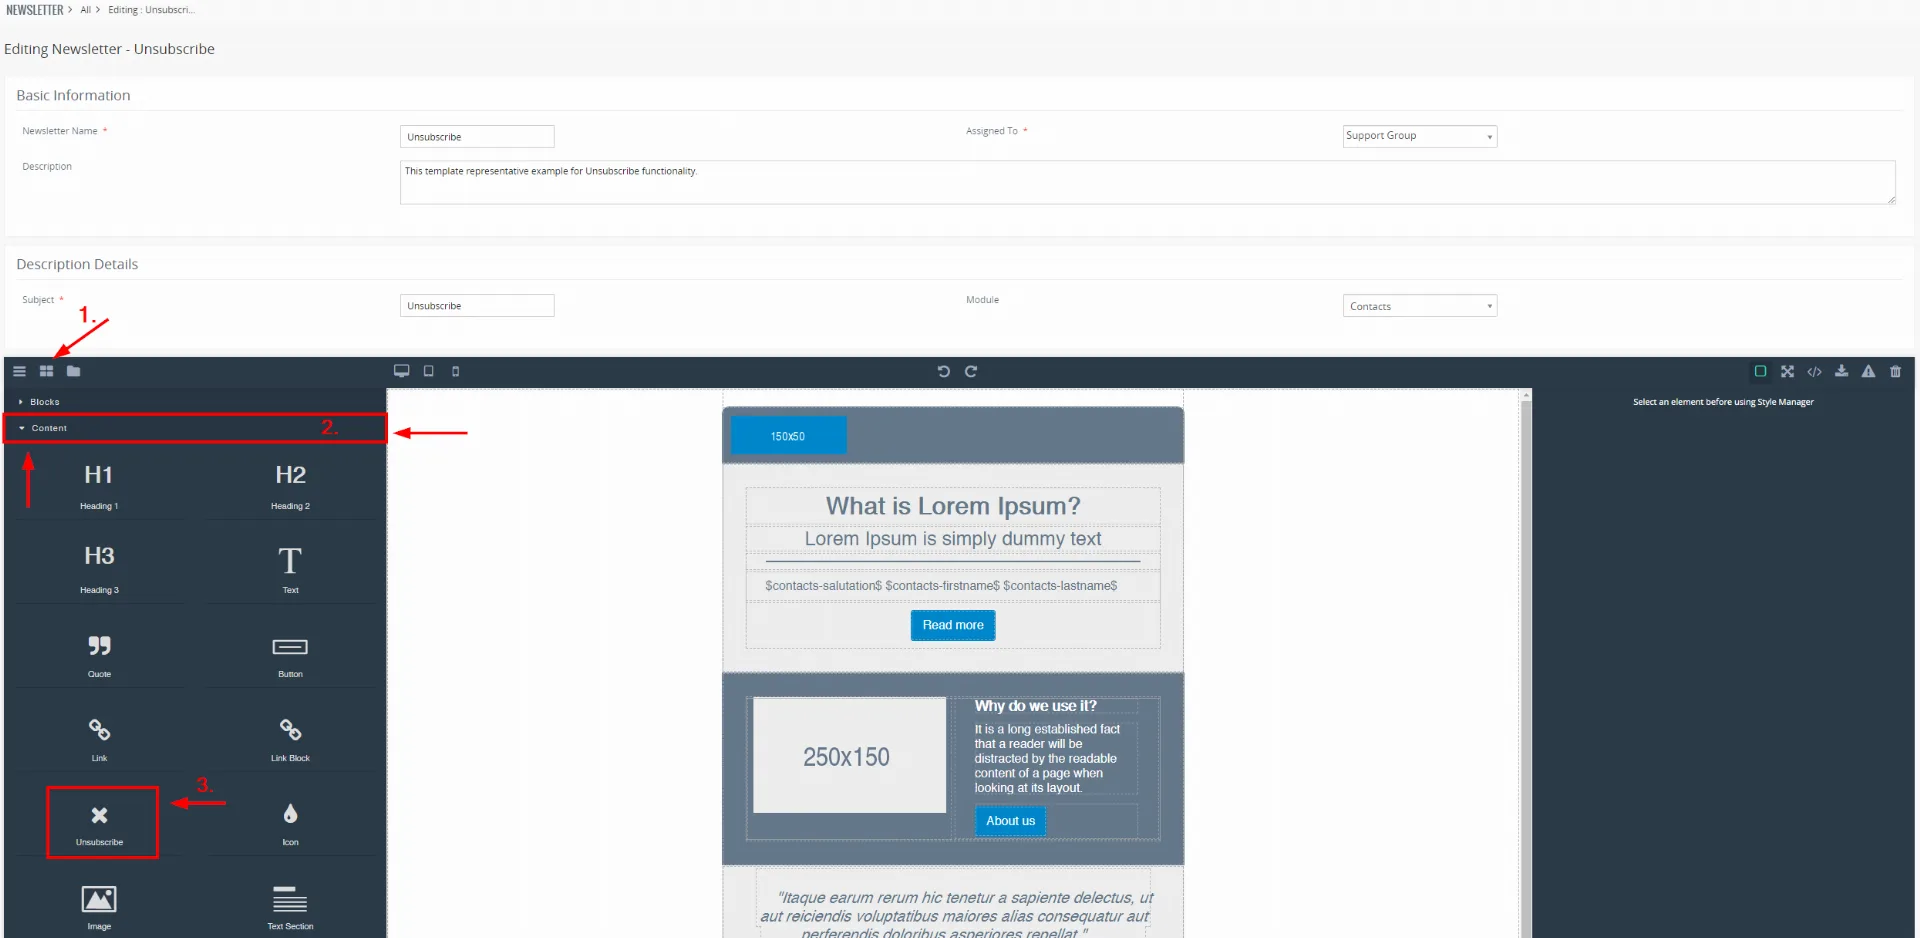
- In the Newsletter module, simple open any template you created/creating.
- In the Editor you see Content Icon (1)
 , click on it and look for Unsubscribe icon (3) under Content block (2), see below:
- Next step is to place the Unsubscribe link where do you want, its drag and drop process.
Simple drag the Unsubsribe icon from the left side of the menu and drop it to the template, see below:
- After placing an Unsubscribe link / button, you can send out the emails via Email Marketing.
Whoever clicks on the button / link will be unsubscribed from your emails.
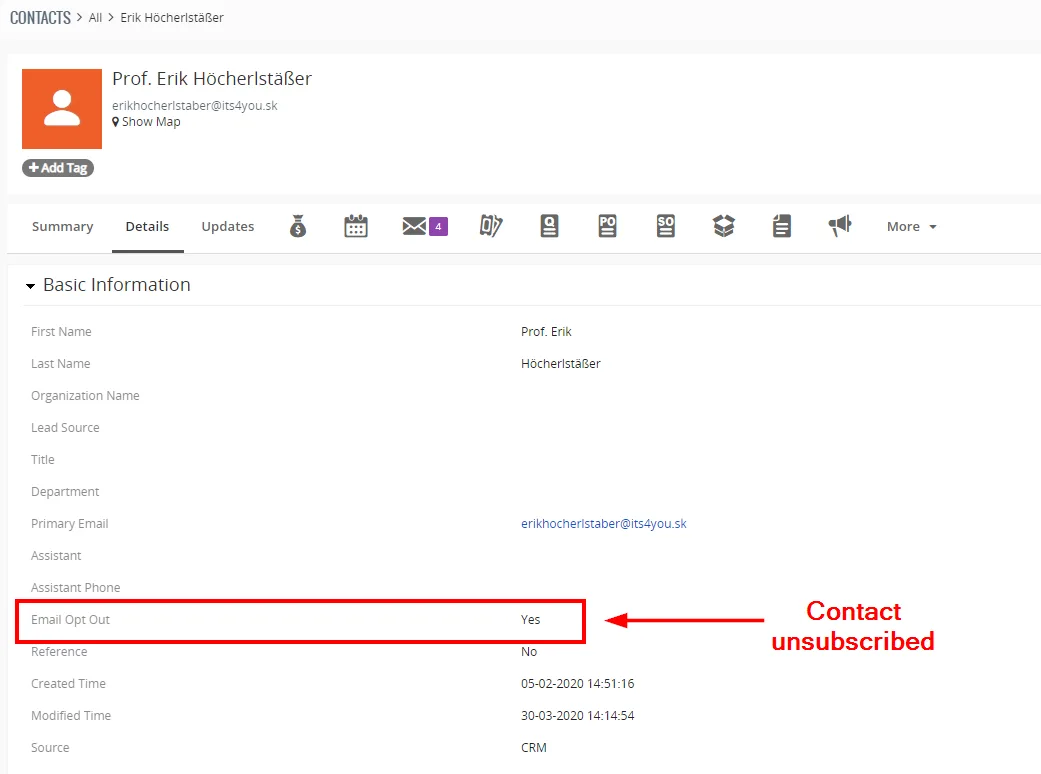
For example, in module Contacts, the field Email Opt Out will change from No to Yes, if the unsubscribe link was clicked by a Contact.
Yes means he will not receive any emails. You can change it anytime by editing this field.
Changing the style of button and unsubscribe message.
Changing the style of added unsubscribe link/button is very easy and you can change, label, add icon, change font style, color and more.
- Click on the Unsubscribe link you added to the template.
- On the right side of the screen you can see the Settings window will pop-up for certain link/button you clicked.
- See below:
How to change Unsubscribe message?
- Go to your Vtiger folder directory and look for ITS4YouUnsubscribe.php file.
- Open the file with any editor you like and look for line (25) with:
$message = ‘<p>Your email address has been unsubscribed</p>’; - You can change the message between <p> and </p> as you like for example:
$message = ‘<p>You have successfully unsubscribed.</p>’; - Save the changes.
6.1.2 Unsubscribe via Email Maker
In order to use the Unsubscribe feature for the Email Maker template, first you need to perform setup steps.
Unsubscribe is performed via Unsubscribe custom function.
For some kind of the email templates (campaign, advertising…) You can insert into your email template “Unsubscribe from emails” link. This link allows the recipient to unsubscribe himself from receiving such multiple emails just by one click.
Note: All these steps are performed in the Email Maker extension.
Please provide following steps to start using Unsubscribe Email functionality:
- Download UnsubscribeEmail.zip

Download UnsubscribeEmail.zip – Email Maker Vtiger 7 - Unzip content of the .zip file into your server (we recommend into the same location where you have Vtiger installed)
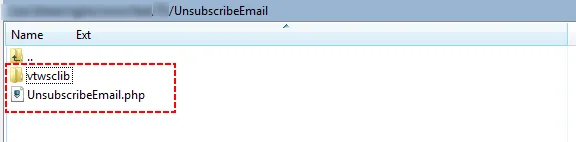
Unzip UnsubscribeEmail.zip – Email Maker Vtiger 7 - Inside UnsbuscibeEmail.php is necessary to define:
- $server_path – this is your Vtiger URL. (Be sure that $server_path is same like $site_URL from config.inc.php of your Vtiger installation)
- $user_name – this is the username you use to login to the Vtiger CRM, see also “My Preferences”
- $user_access_key – the access key can be retrieved by logging into your Vtiger CRM account, going to “My Preferences”
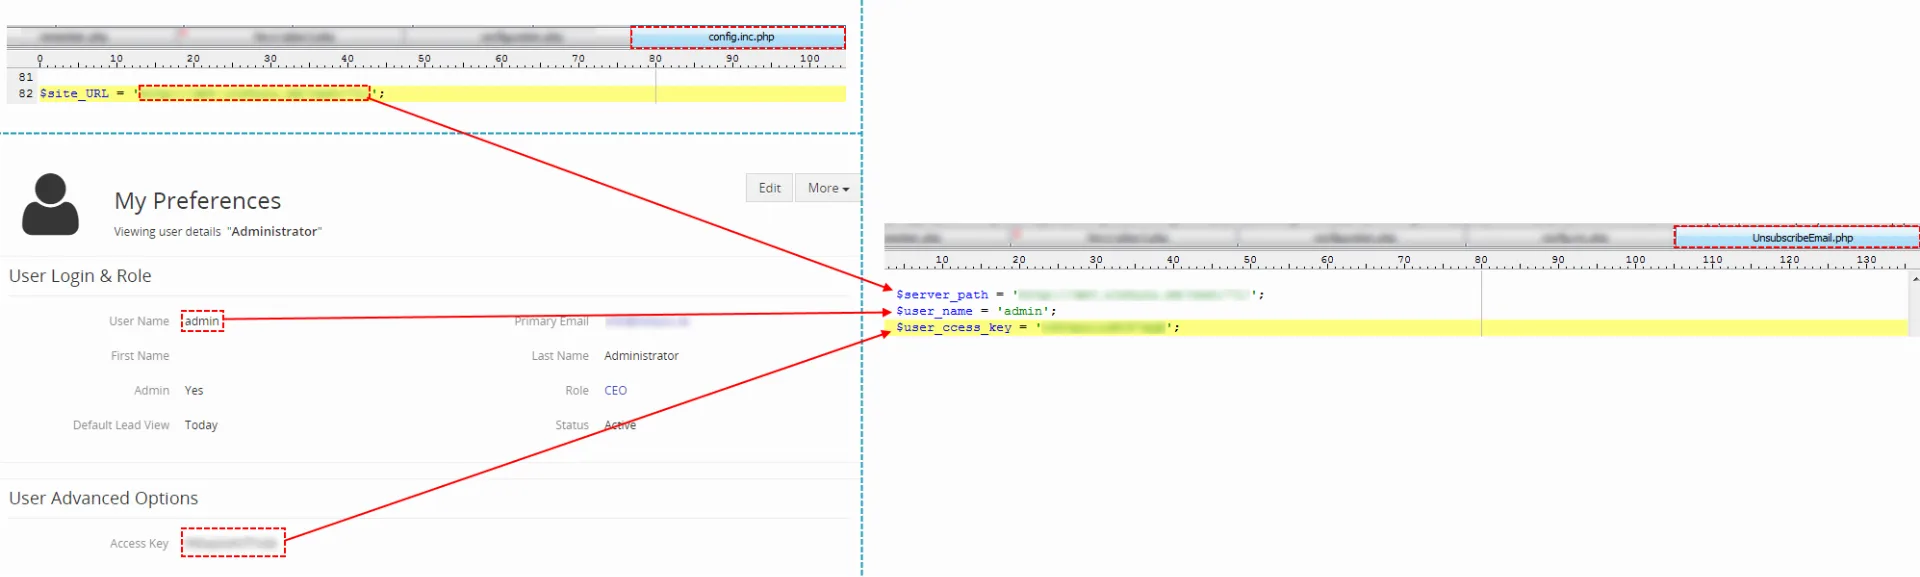
Edit UnsubscribeEmail.php – Email Maker Vtiger 7 - Sentence shown after successful unsubscribing (row 81) (optional edit)
- Sentence shown when email address has not been unsubscribed (row 83) (optional edit)
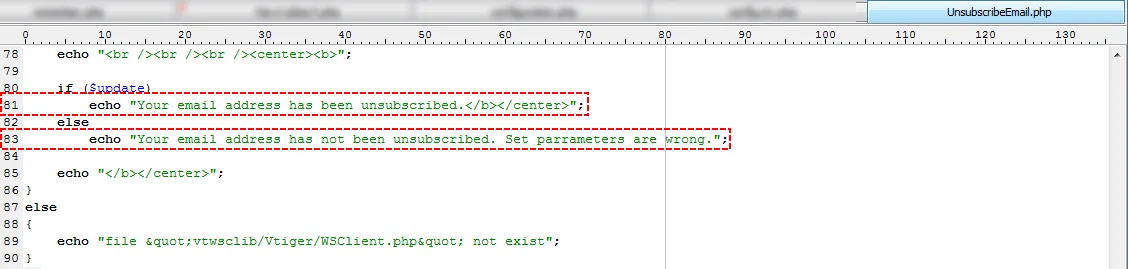
Edit sentences – Email Maker Vtiger 7
- The final step is to put custom function its4you_unsubscribeemail into your template. There are just two parameters which you need to modify inside custom function
[CUSTOMFUNCTION_AFTER|its4you_unsubscribeemail|$s-accounts-crmid$|$s-contacts-crmid$|url_address|label|$s-leads-crmid$|CUSTOMFUNCTION_AFTER]- URL_ADDRESS –URL address of your UnsubscribeEmail.php
- label – Text of the unsubscribe link
Next picture shows process of unsubscribing contact which leads to change his “Email Opt Out” to “yes”.
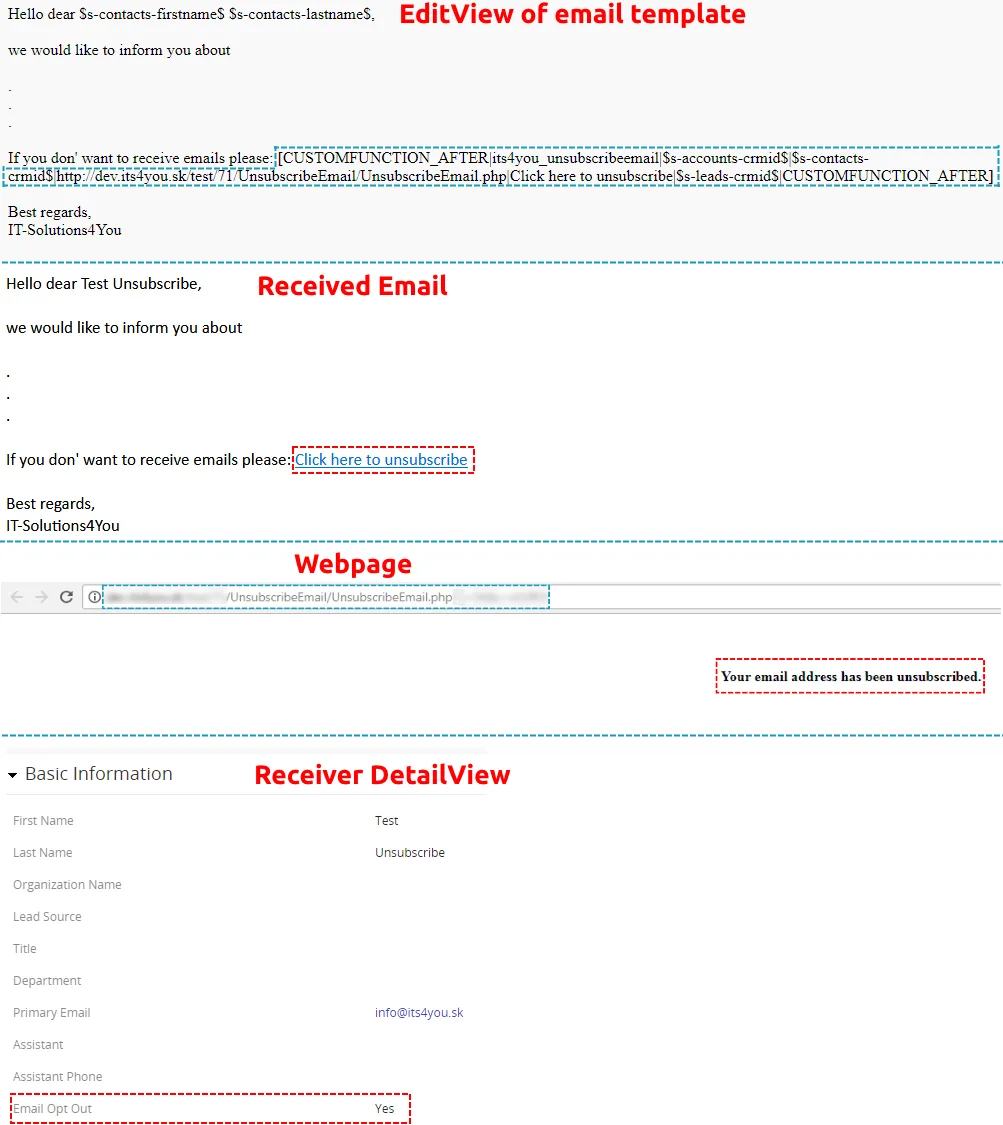
When the setup is finished, you can load this template via Email Marketing and keep using this feature.
6.1.3 Unsubscribe custom page
If users want to have custom page when clicked on Unsubscribe link in the emails, they can set it easy!
Follow these steps:
- Go to Vtiger folder and open file config.inc.php
- Add line:
$ITS4YouUnsubscribeRedirectUrl = “www.YourUnsubPage.com”;
Should look like this: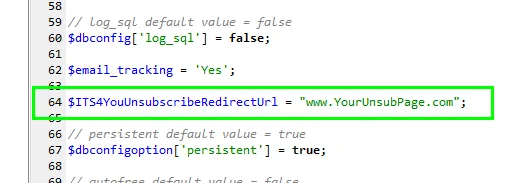
- Save the changes.
Now when subscribers click on the Unsubscribe link in the Email, they will be redirected to this page and unsubscribed.
Need help with Email Marketing?
Our support team answers questions about installation, templates and settings.