

The Work Area of the Email Marketing consists of:
- List view – shows the list of created Email Marketing campaigns with additional actions
- Create/Edit view – consists of 4 steps: Campaign Details, Subscribes, Templates, Schedule
- Summary / Detail view – view when you can see all information for the specific campaign created, you can track status and other statistics of the campaign here + perform additional actions
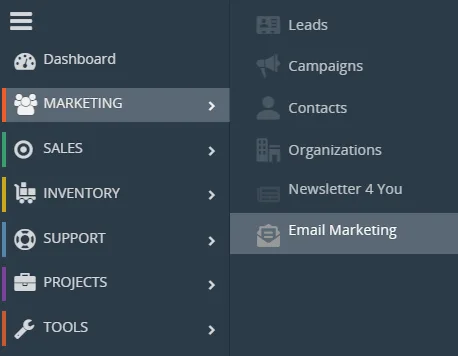
4.1 List view
In the List view of Email Marketing you are able to see a list of already created campaigns, by clicking on the campaign name you will be taken to the Detail view.
In the list view you see default information of campaigns, like: Campaign Name, Assigned To, From Name, Reply To etc.
You can also create own list view if you require to show other information in it.
In the list view of Email Marketing you can perform the following actions:
- Create new campaign via
 button
- Create new Newsletter template via
 button
- Access Settings via
 drop down menu:
Templates – list view of Newsletter templates
License settings – check status of your license
Upgrade – option to update module manually
Uninstall – Remove the module from the CRM system - Enter to Summary / Detail view by clicking on campaign record
- Delete the already created campaigns
- Perform additional actions via
 drop down menu like: Follow, Unfollow, Add Tag, Find duplicates, Export
4.2 Create/Edit view
In this view you are creating new campaigns or editing already created ones.
You are filling the fields with required values or performing additional actions to create/edit your desired campaign.
This view consists of 4 steps:
Each step will be explained in the next chapters below.
4.2.1 Campaign Details (step 1)
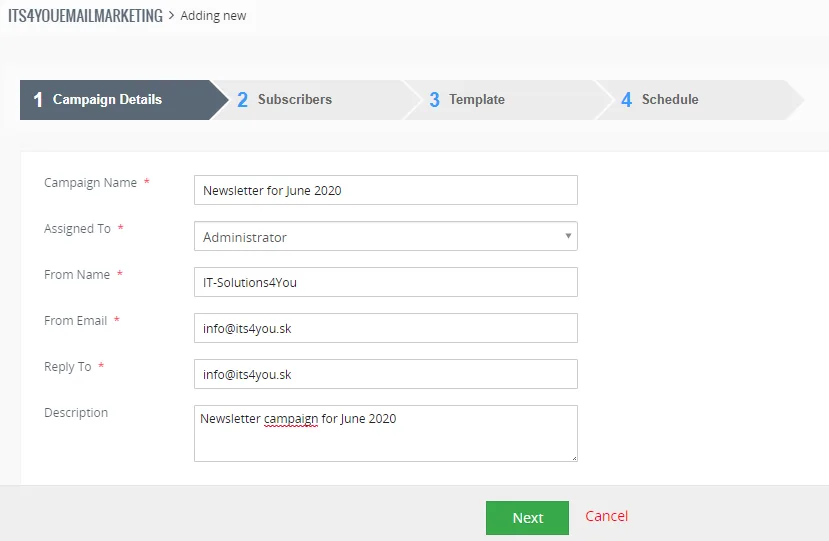
Following fields needs to be filled in this step so you can create campaigns:
- Campaign Name – name for the campaign you are creating, this name will be shown just in your Email Marketing list view or detail view
- Assigned To – select the user to whom this campaign will be assigned
(by default its to user who is creating the campaign) - From Name – name of the user or person who is sending campaign, you can use any name you want, for example your organization name too
- From Email – email from which campaign will be sent, this email will be shown to the recipient of your campaign as “From: -email you filled-“
- Reply to – email, where the emails will be sent if your recipients reply to your campaign
- Description – this is shown just for you as a campaign creator, you can see it in your CRM system, recipients will NOT see this description, you can put any descriptions or notes you need here
Example of step 1 is shown below:
4.2.2 Subscribers (step 2)
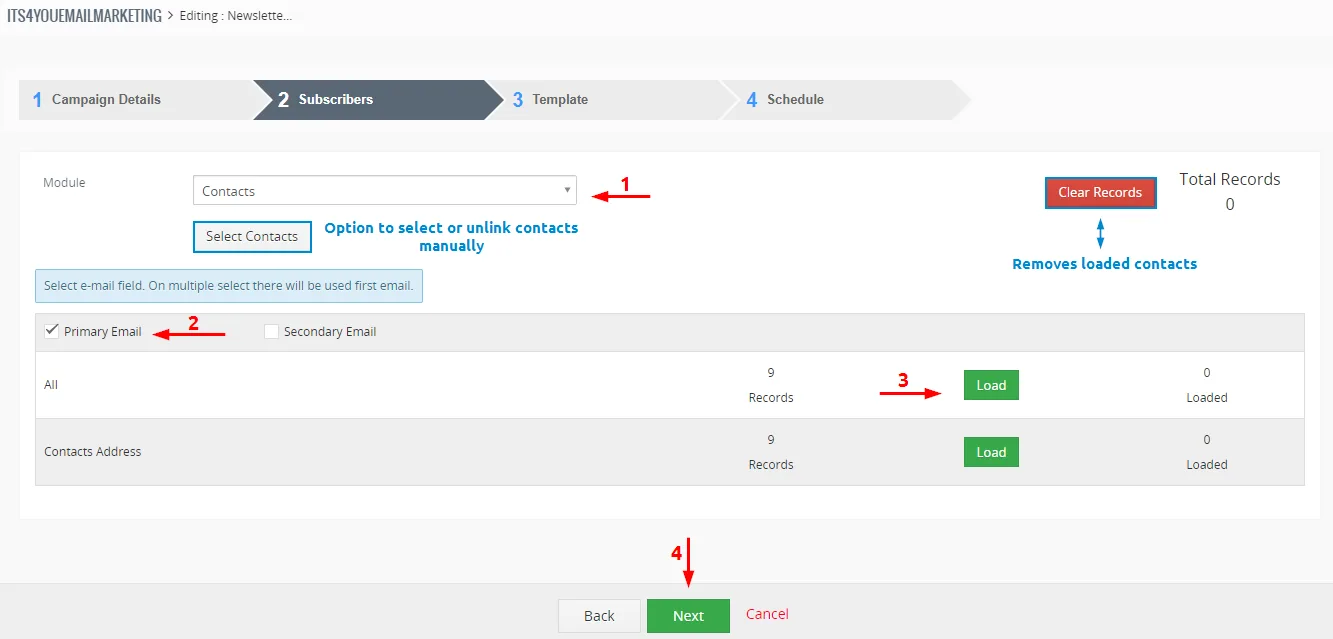
This is a very important step of creating campaigns, here you are selecting all recipients which will receive your campaign emails.
You need to select the module and also list view from which recipients (records) will be loaded.
Note: You can create any list view you need based on conditions.
See: More information about custom list views
All available list views will be shown in the table, you can load contacts from this list view via  button.
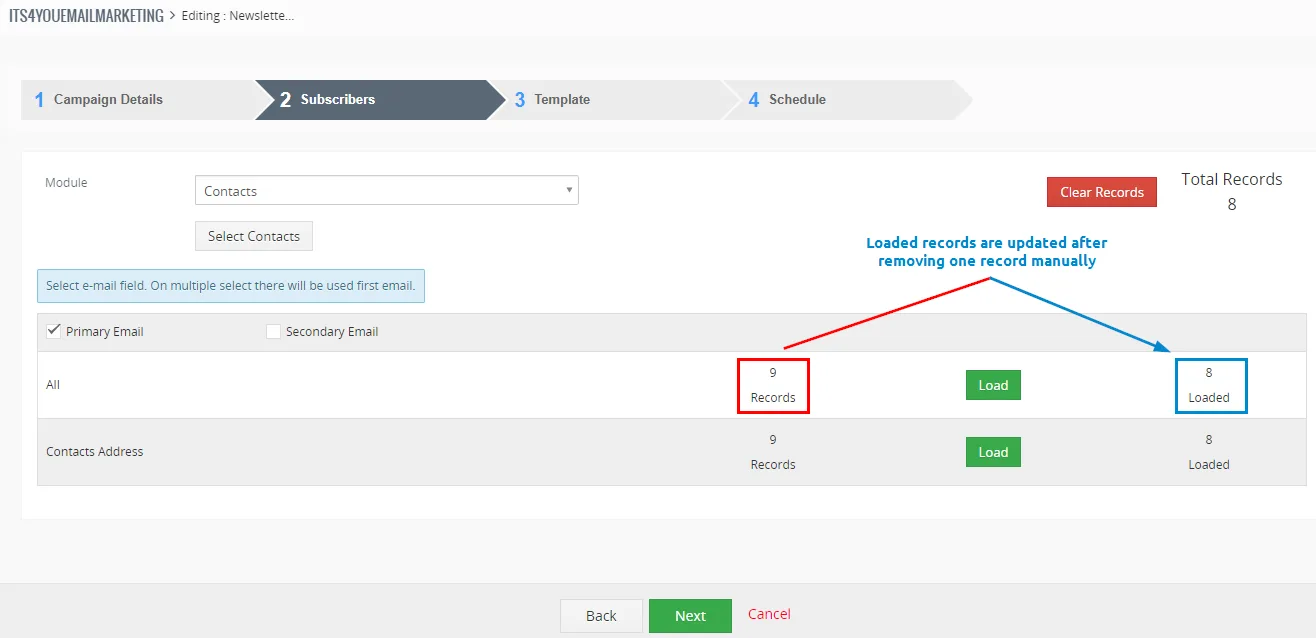
After selecting emails use checkbox to check, which email fields will be used for the record:
- Primary or Secondary email field
Example of step 2 is shown below (before loading contacts):
Selecting/Removing contacts from the list manually
When the list of contacts is loaded, you can also add or remove contacts (recipients) manually via  button.
After clicking on the button, your browser will open new tab with the list of conctacts included in this list.
(9 in total) see below:
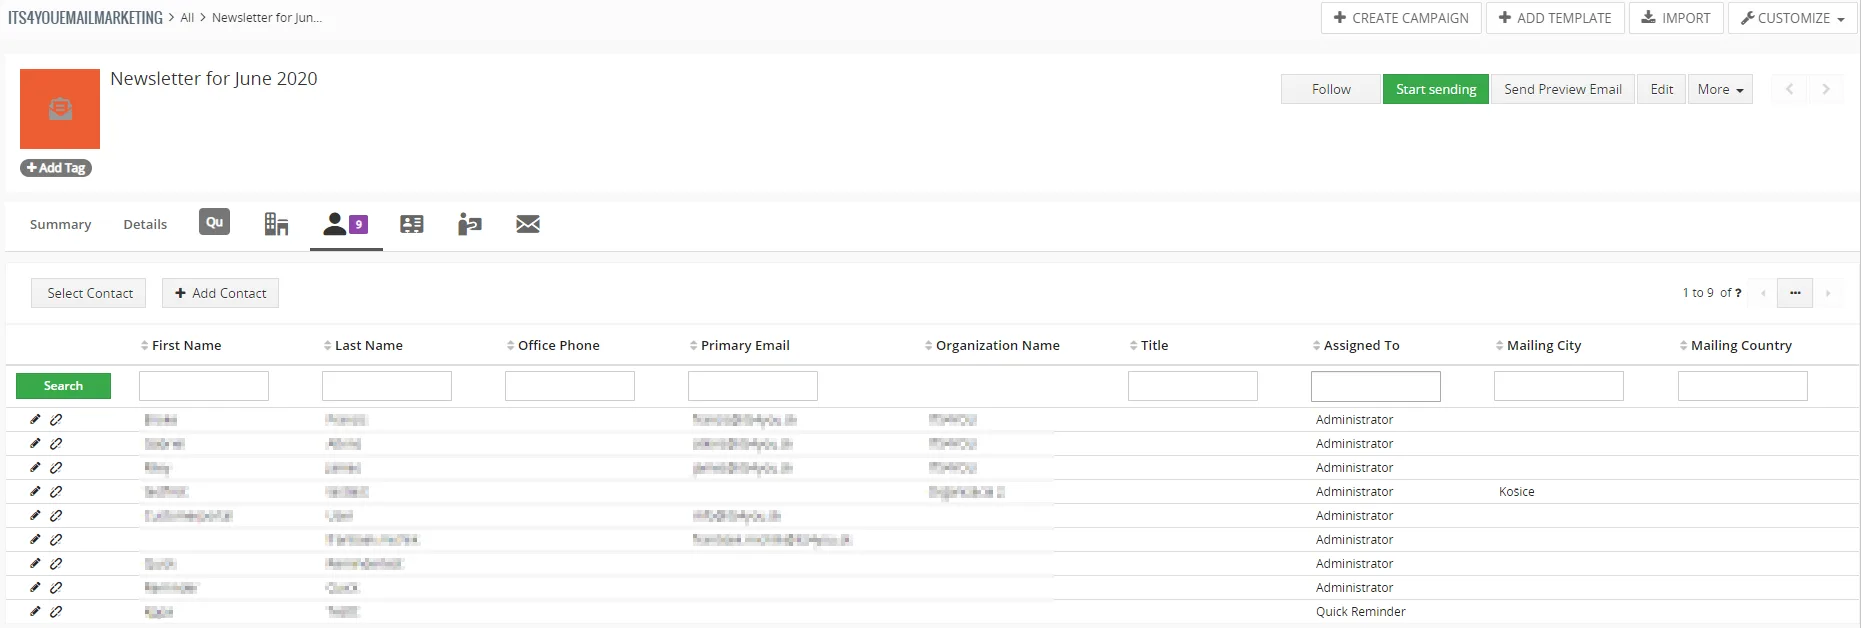
In the list, you have options to:
- Select already created contacts via button
- Create new contacts via
 button
- Unlink contacts which are loaded into the list via
 option near your record in the list view
- Edit contacts which are loaded into the list via
 option near your record in the list view
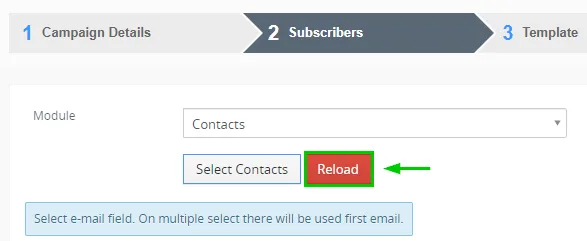
When you are done with actions mentioned above, simply close the newly opened tab and hit the button  in the Subscribers step 2, see below:
Example of step 2 is shown below (after manually removed one contact via button):
4.2.3 Template (step 3)
In this step of creating/editing email campaign you need to select which templates you want to use. These templates are shown as the content of emails which will be sent to your selected recipients.
There are two options from where you can load templates:
- Newsletter – this extension coming in the package if you purchased the Email Marketing module, its used to create templates with improved styling and design via GrapeJS editor.
How to create Newsletter template guide - Email Maker – this is a standalone extension from It-Solutions4You. If you have this extension purchased, you can create Email Maker templates and use these templates for Email Marketing too!
Features like custom functions, related blocks and using all variables are supported also. Values are loaded from the record which will be receiving the email.
How to create an Email Maker templates guide
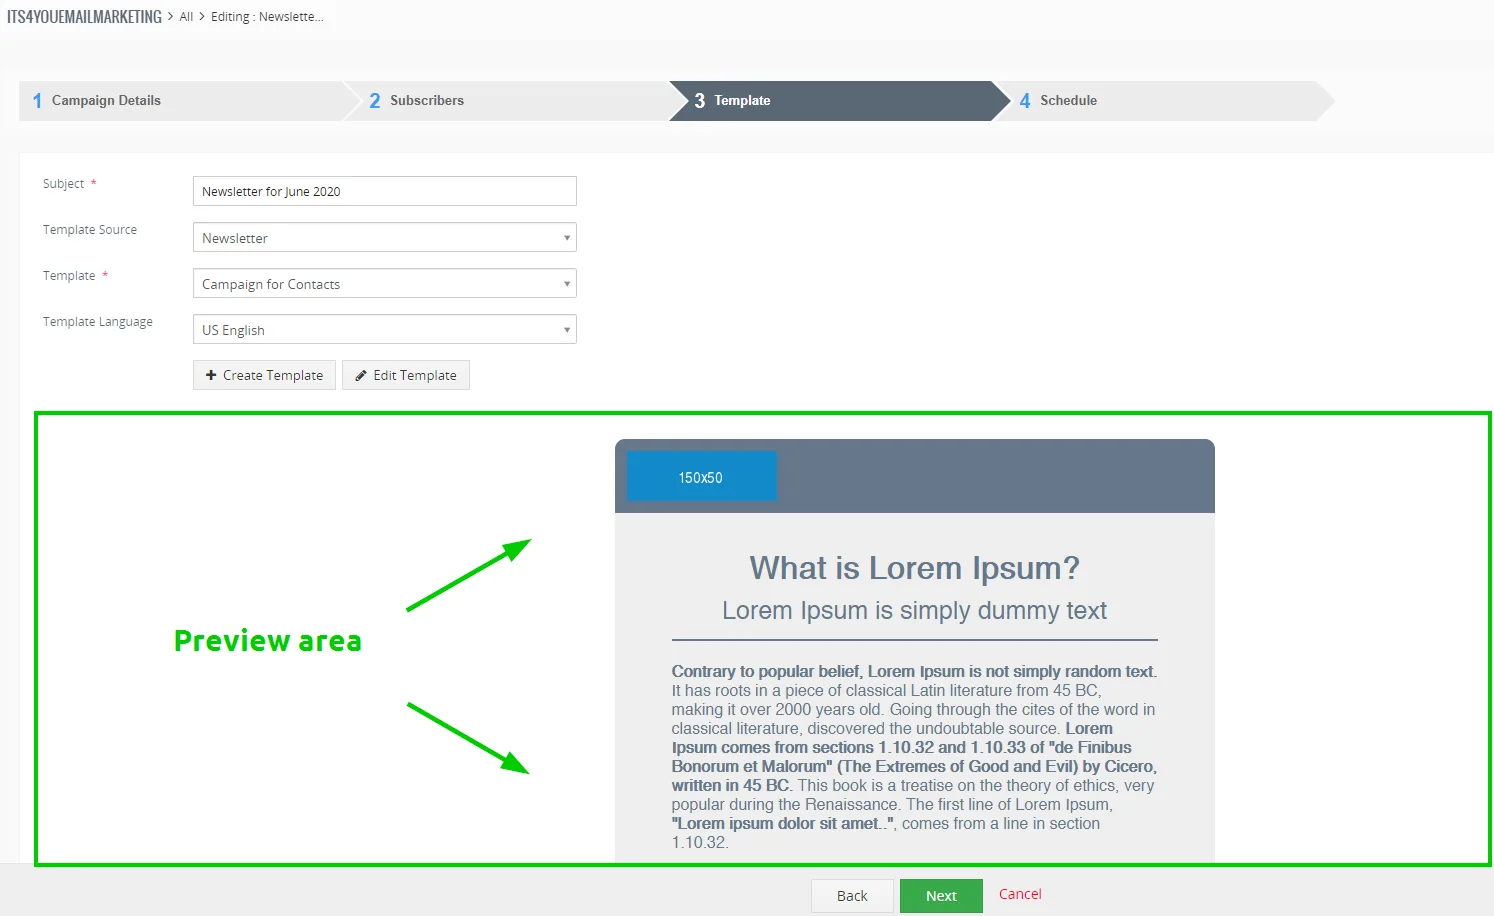
This step includes following fields and actions:
- Subject – fill the subject, this subject will be shown to your recipients. Subject also can be automatically pre-filled when you select template, it will use the subject from the template you have created.
- Template Source – select from which module will be templated loaded, you can choose Newsletter or Email Maker.
- Template – if you have selected module from which will be templates loaded, now you need to select specific template.
 Note: Templates are displayed according to which module they are assigned to. If Email Marketing subscribers are loaded from Conctacts module, you need to select template created for module Contacts too.
- Template Language – select which language will be used for your template.
 – this button opens new browser tab where you can create new templates. If you selected Template source Newsletter, you will be redirected to Newsletter create a template window.
 – via this button you can edit already loaded/created a template, you also will be redirected to the Edit window of selected modules.
Note: When you decide to use these buttons, after editing or creating new templates, you need to deselect the module from the Template Source field and select it again same with the template.
When the template is selected, you are also able to see preview of it, like it’s shown on the image below:
In order to continue to the next step, you need to have template selected, otherwise following error message will pop-up:

This may also indicate that you are missing module to create templates and you need to install it. Without it, you are not able to continue.
4.2.4 Schedule (step 4)
The last step is where you need to choose how your email will be sent. What does that mean?
Email Marketing is working via Scheduler (CronJob).
Sending emails is performed via Scheduler in your CRM each 15 minutes. So if you set Send Hourly email’s value to 100, means each 15 minutes 25 emails will be sent.
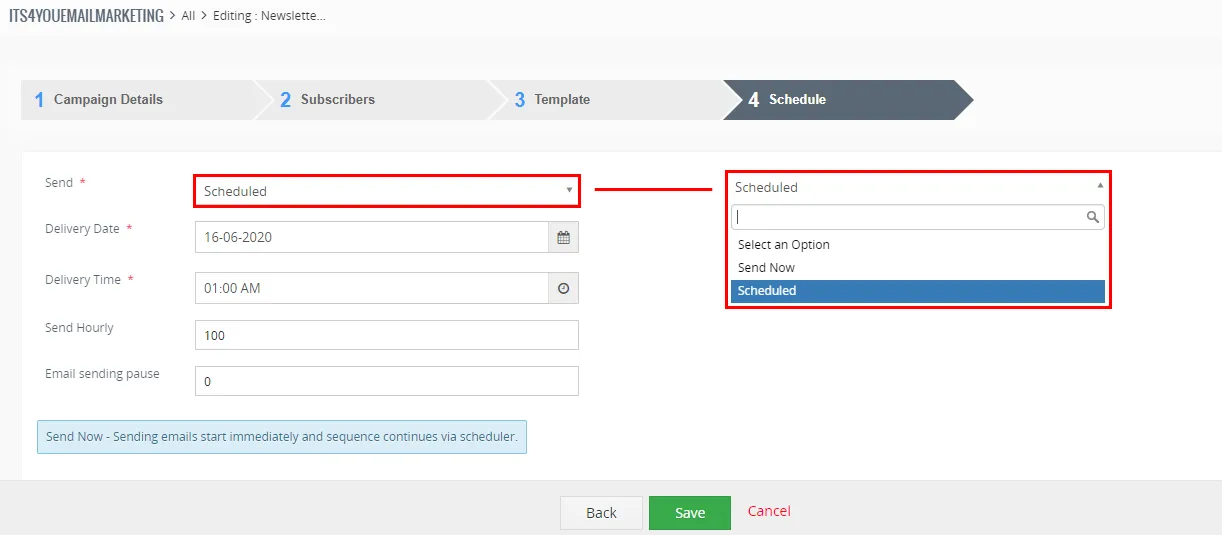
There are two options how to send emails:
- Send Now – sending emails start immediately after clicking on
 button and the sequence continues via scheduler.
*If you have 100 recipients/subscribers and Send Hourly field will be set to 100, each 15 minutes 25 emails will be sent. For Send Now option, first 25 emails are sent immediately without any delay. - Scheduled – set the date and time when the email sending sequence will start if you don’t want to start sending immediately.
Other options in this step:
- Send Hourly – how many emails will be sent in one hour sequence.
*If you have 100 recipients/subscribers and Send Hourly field will be set to 100, each 15 minutes 25 emails will be sent. For Send Now option, first 25 emails are sent immediately without any delay. - Email sending pause – time between each email is sent, by default this is set to 1 second.
The preview of this step is shown on the image below:
4.3 Summary / Detail view
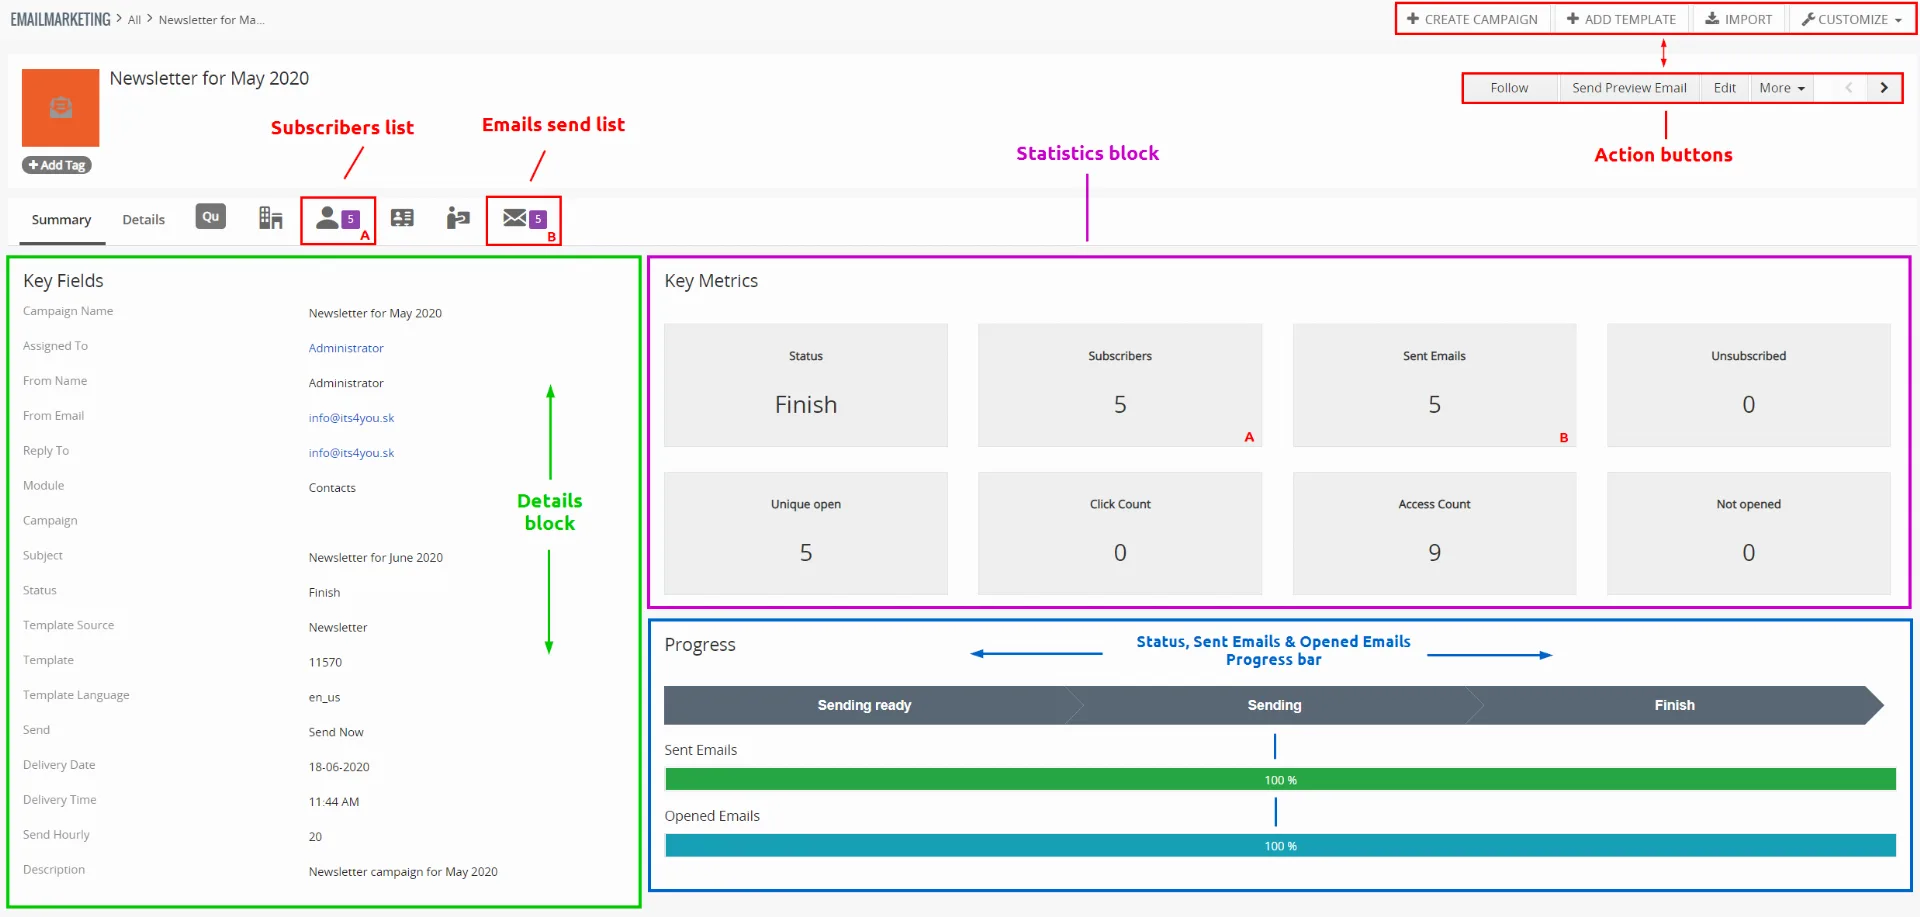
Summary / Detail view, provides you detailed information about your already created campaign, showing you the fields you filled during creation of the campaign.
You can perform many actions from here via specific buttons in this view and also track progress and statistics of the current campaign.
There is an option to check the list of subscribes loaded for this campaign and also see a list of already send emails
 .
Please see Detail view image below (click to enlarge):
4.3.1 Campaign statistics / Key Metrics
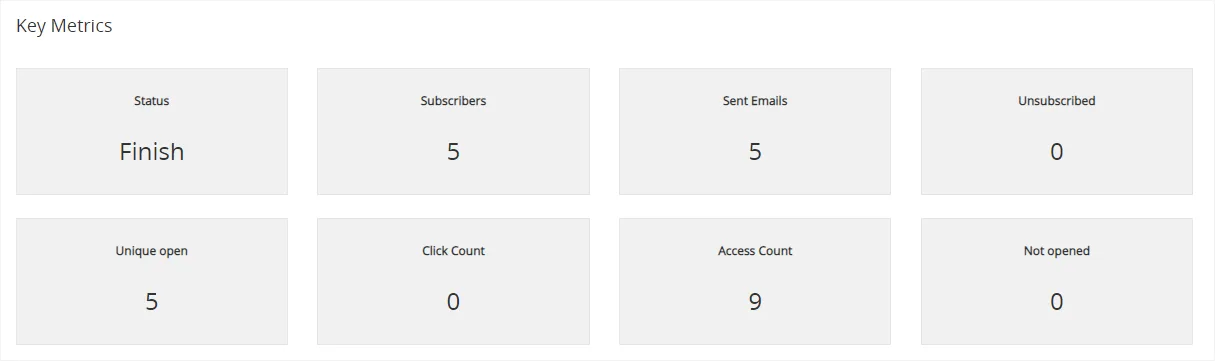
Each campaign has own Key Metrics available in the summary view.
Key Metrics block has own fields which are explained below:
- Status – its the current status of your campaign, normally when the campaign is finished status should be Finish. There are other status values like:
Created/Sending ready – you can start sending emails,
Pause – campaign is paused and emails are not sent,
Stop – The campaign was stopped but you can still resume it by changing the status of it,
Finish – campaign is finished, when all the emails have been sent. - Subscribers – shows the number of the records you loaded from the list for this campaign.
- Sent Emails – number of emails sent by your campaign.
- Unsubscribed – how many people unsubscribed and don’t want to receive campaign emails.
This is based on the field value Email Opt Out, for example, in the Contact detail view.
Email Opt Out value in the default view of the Contact is by default set to No = Subscribed, but it can be changed to Yes = Unsubscribed. - Unique open – how many times were email opened, this should be equal to:
1 email sent = 1 email unique open.
for example:
Sent emails = 5 / Not opened emails = 1 …. Unique open =4 , because only 4 recipients opened the email. - Click count – this count shows how many times someone clicked on the url/link in the actual template/email body (if there is any).
- Access Count – counts how many clicks total were on the email subject.
- Not opened – shows the number how many emails were unread.
4.3.2 Progress bars
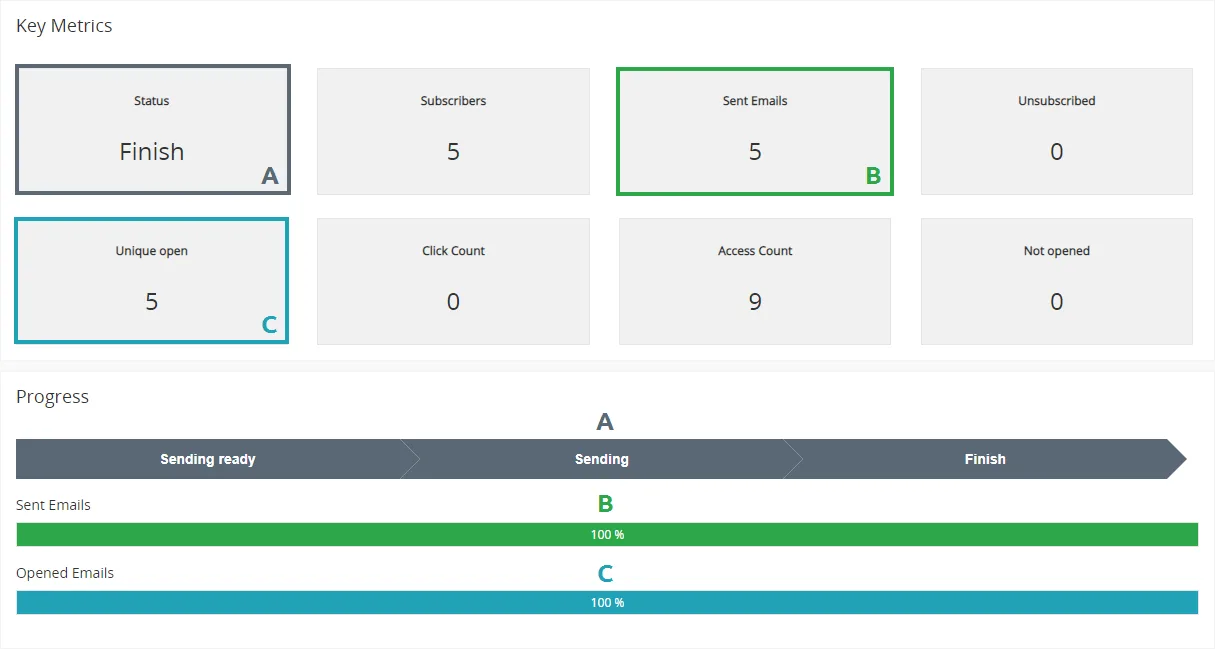
In the summary view you can track campaign status also via Progress bars.
You can track:
- Status – current status of your campaign
- Send Emails percentage – % how many emails was sent already
- Opened Emails percentage – % how many emails were opened
Progress bar is using data from Key Metrics block, see below:
4.3.3 Recipients / Subscribers list
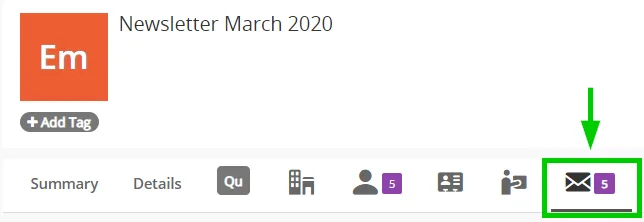
You are also able to see the recipients list when you click on related emails icon
Here you can track every recipient individually, most important is click count and access count.
To see recipients list, simply click on relation icon in the summary view of the Email Marketing campaign:
The following window will appear with the list of recipients.
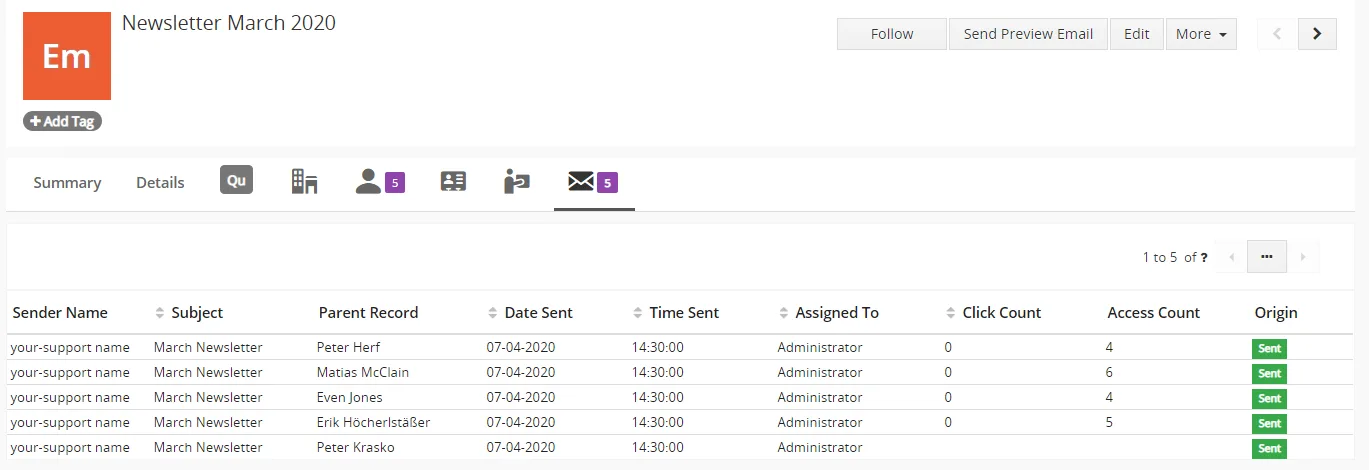
You can see and track the following information on the screen:
- Sender name – shows sender name based on settings $HELPDESK_SUPPORT_NAME in the file /config.inc.php in your Vtiger directory.
- Subject – subject of the email send to the recipients.
- Parent Record – record name
- Date sent – where was the email sent.
- Time sent – exact time when was email sent.
- Assigned to – shows to who is the record assigned.
- Click count – this count shows how many times a recipient clicked on the url/link in the actual template/email body (if there is any).
If there is no any number means recipient didn’t open email yet. - Access Count – counts how many clicks total were on the email subject by the recipient.
If there is no any number means recipient didn’t open email yet. - Origin – status of the email.
Need help with Email Marketing?
Our support team answers questions about installation, templates and settings.