
In the following chapters, we will show you how to use Warehouses extension step by step.
4.1 Create Warehouse
The first step to start using Warehouses is create warehouse(s).
Warehouses extension allows you to have one or more warehouses.
Follow the steps below to create a warehouse:
- Select Warehouses from the menu:
 ——>

- Here you can see your Warehouse(s). To add new please click on

How to create Warehouse - Now, fill information about your warehouse.
(If you check Negative Quantity – quantity of Products in your Warehouse can have negative count, if you don’t check Negative Quantity – then the quantity of Products can’t have negative count)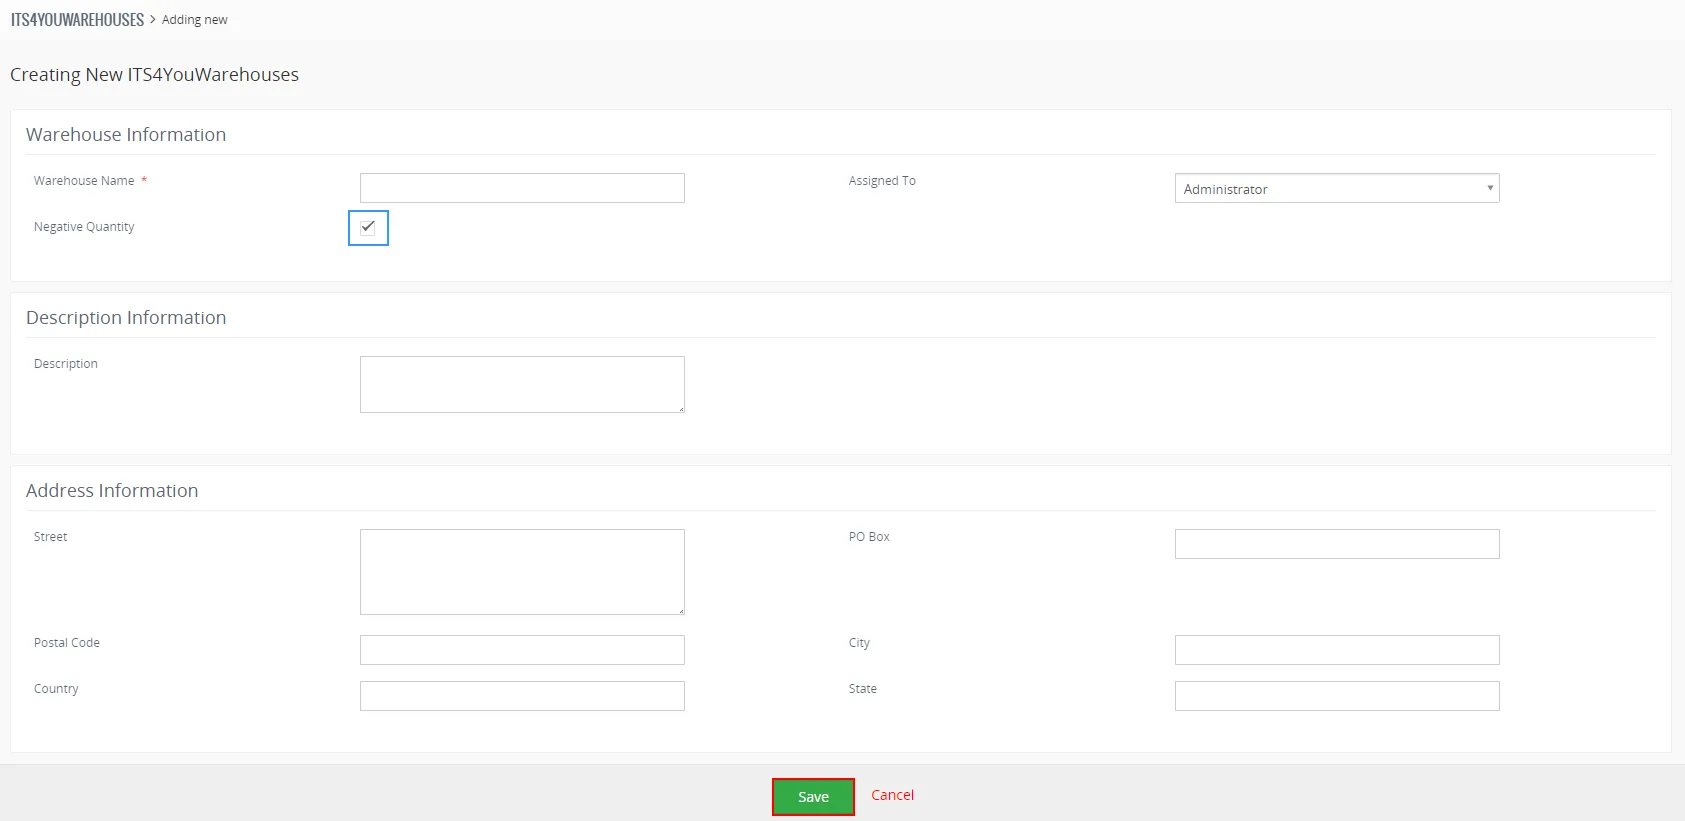
How to create Warehouse Proceed via
 to create warehouse.
4.2 Adding products to the Warehouse
Now, you need to add your Product(s) into Warehouse.
We would recommend to provide next steps:
- Prepare count of your Product(s).
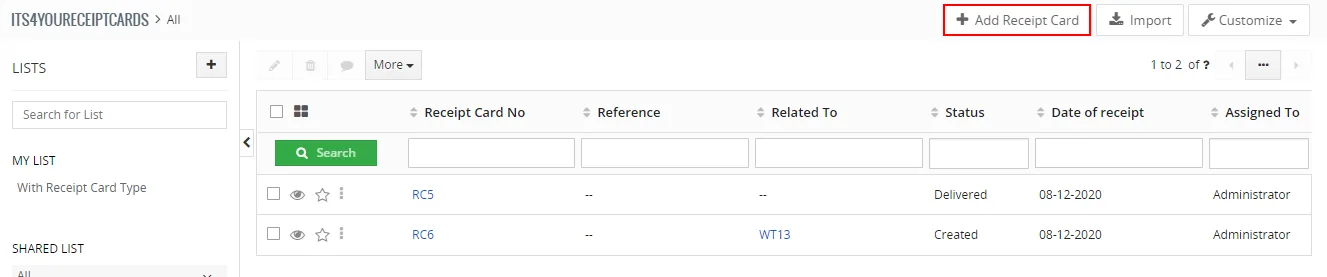
- In menu go to and then

- Click on
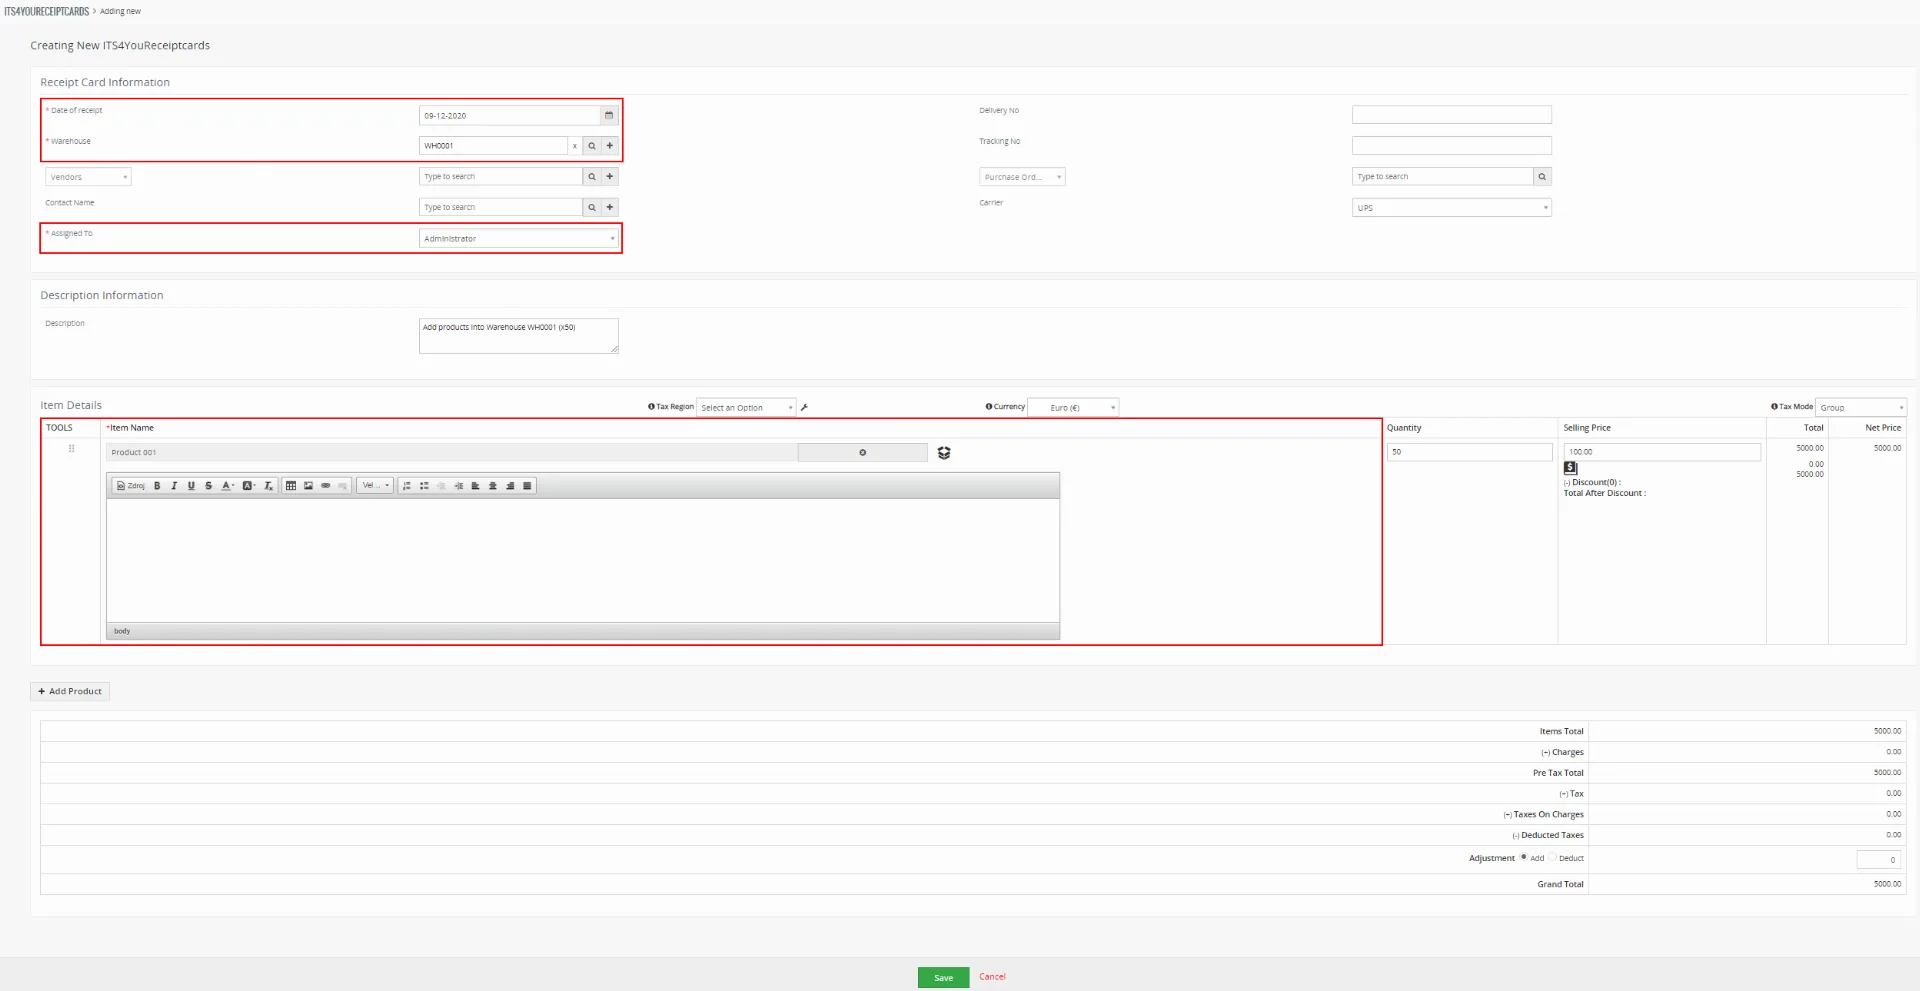
How to add Products into Warehouse - ill fields on the screen.
Mandatory fields are: : Date of receipt, Warehouse (to which warehouse you want to add products), Assigned To.
Then add Products, if you do not have Products, add your Products into Vtiger.
Finally, click on
How to add Products into Warehouse - Now, confirm Receipt Card via
 button and your Products will be added
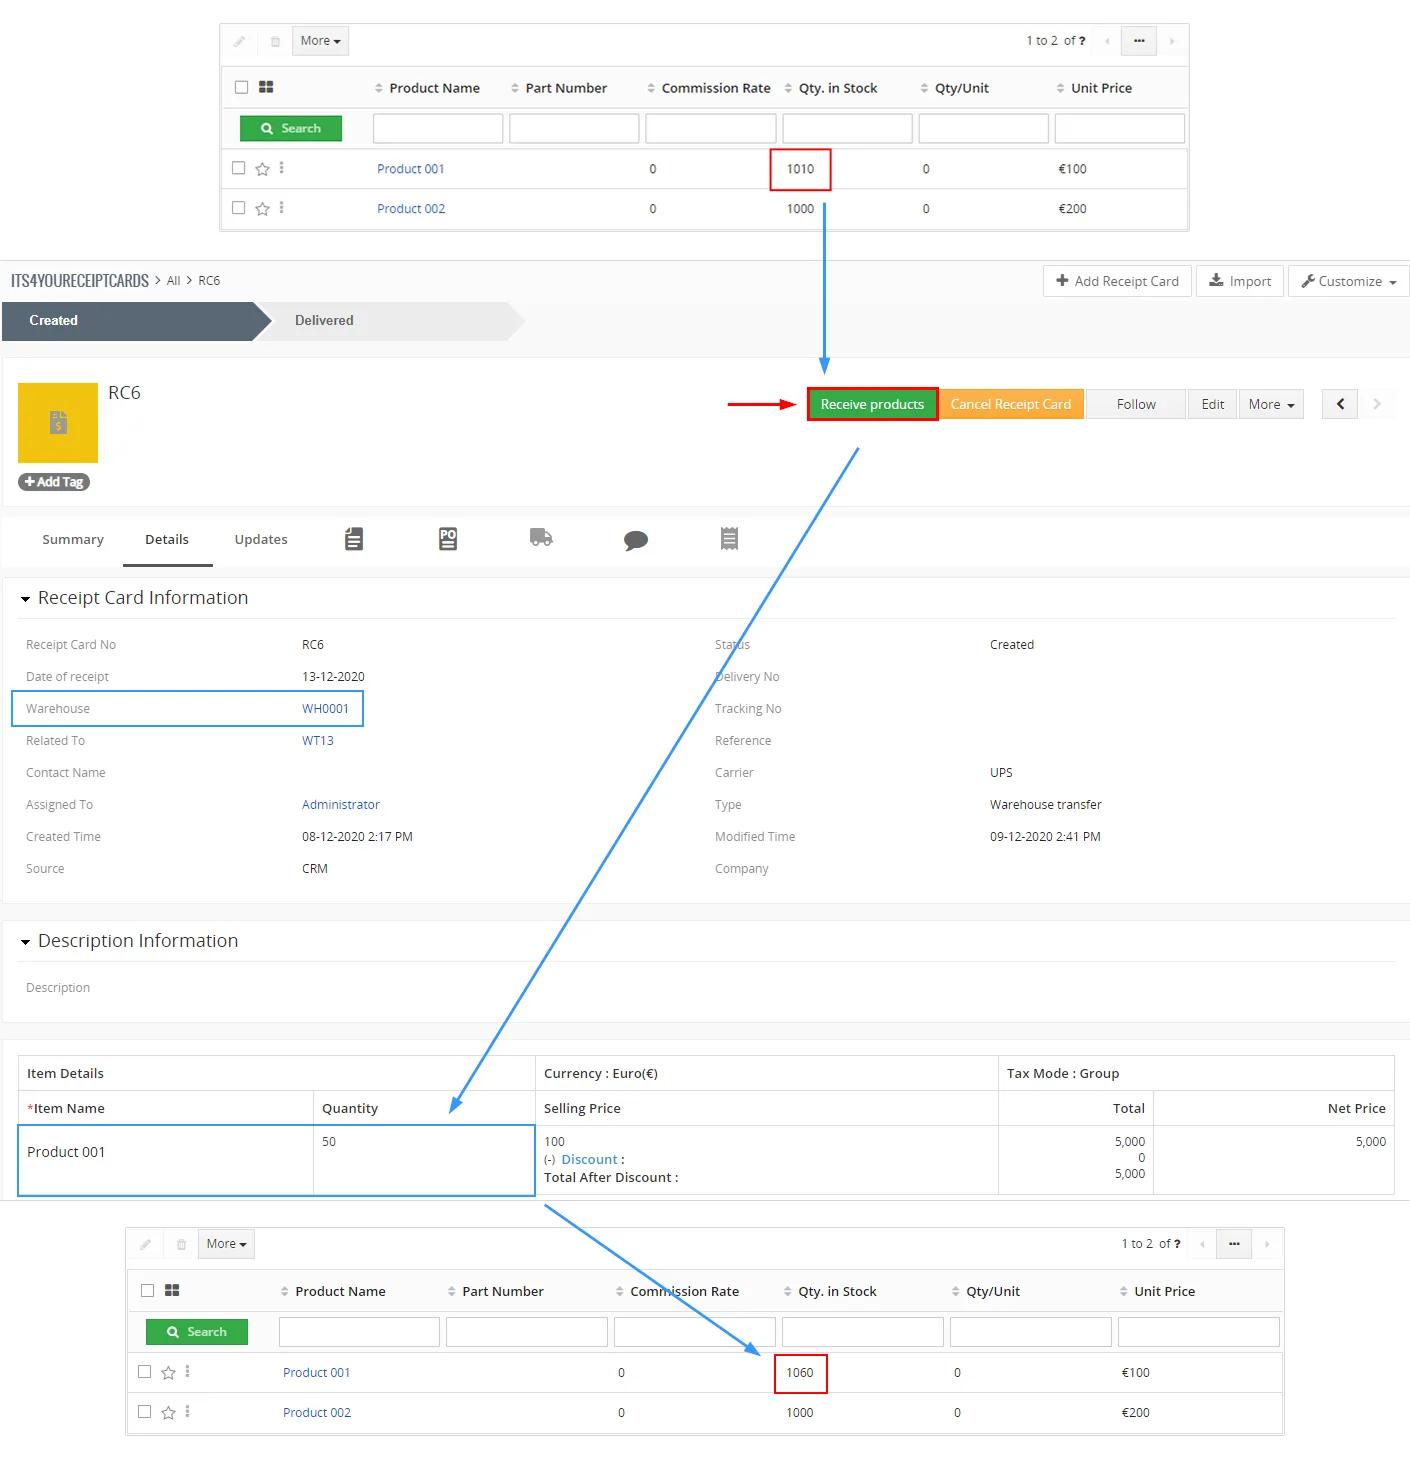
How to add Products into Warehouse - Products were added to the Warehouse, see below:
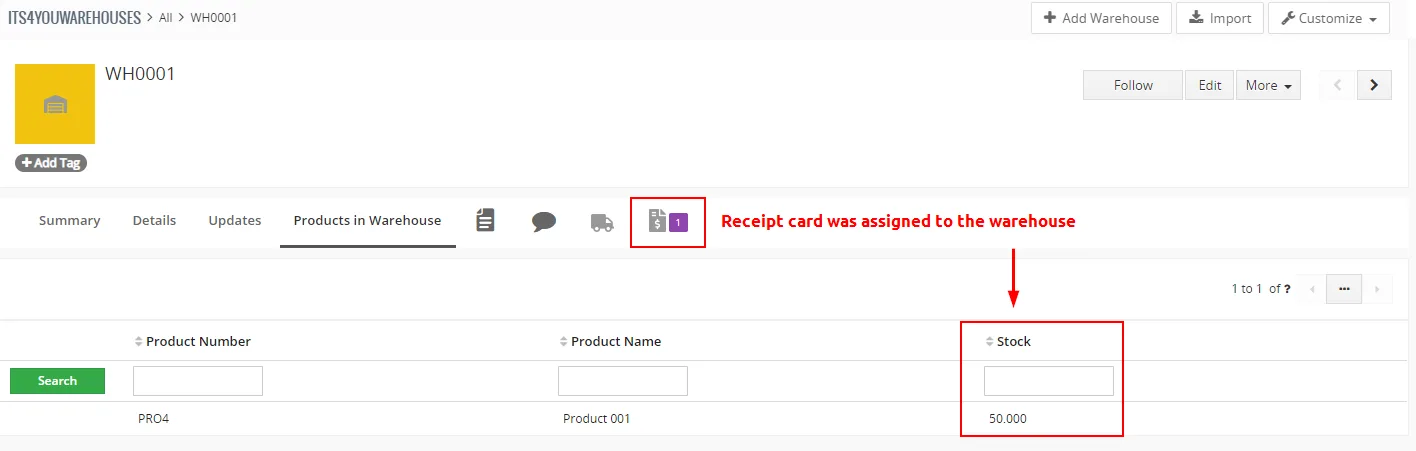
Products added to the Warehouse via Receipt Card
Need help with Warehouses?
Our support team answers questions about installation, templates and settings.