

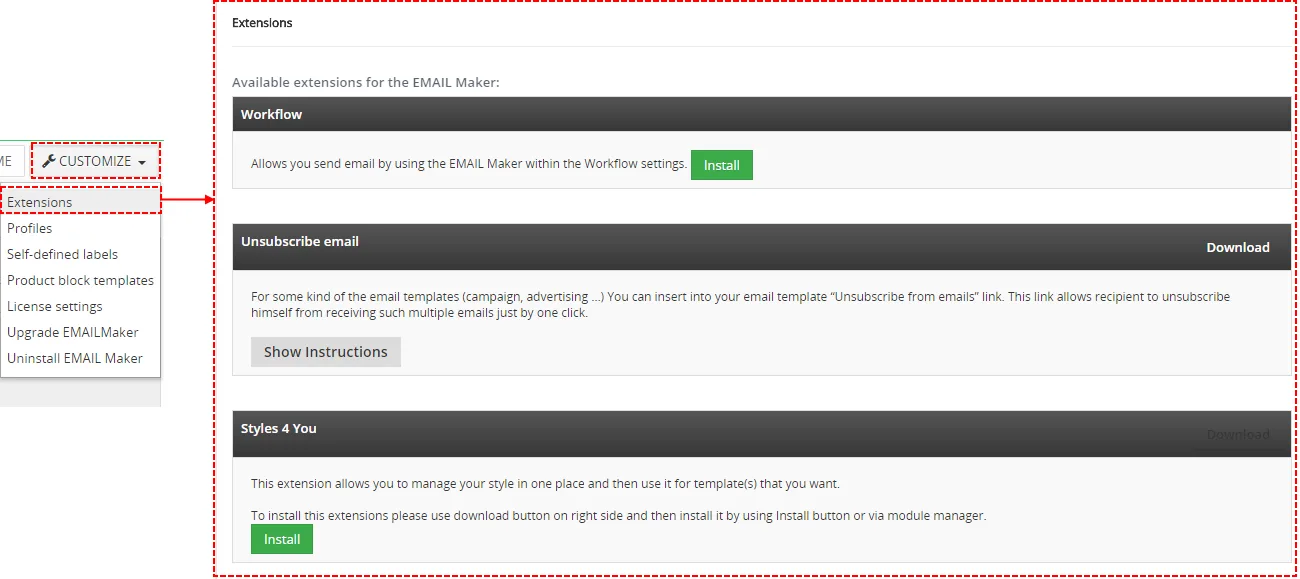
Here you can find extensions for EMAIL Maker. There are Workflow, Unsubscribe email and Styles 4 You extensions available now.
9.1 Workflow
Allows you send email by using EMAIL Maker within the Workflow settings.
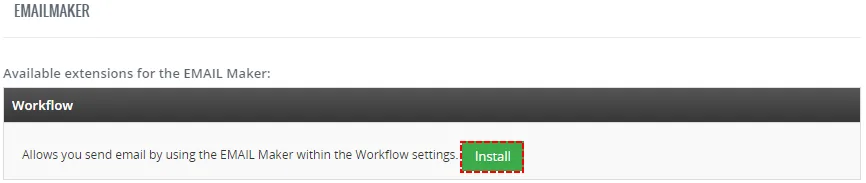
To use EMAIL Maker within Workflow you need to install Workflow functionality.
Please click on  button.
For more info please check chapter Support of Workflow
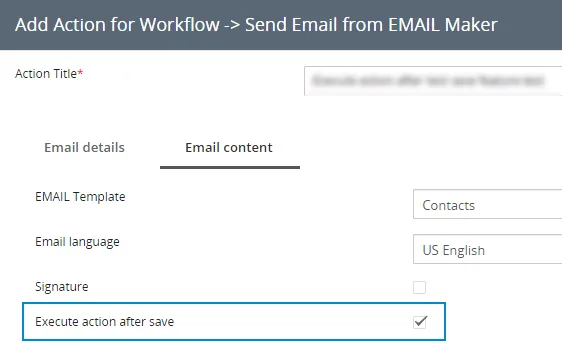
9.1.1 Execute action after save
 This feature is available from version 0.48 and higher.
After checking this feature, EMAIL Maker emails will be sent immediately according to the conditions set in the workflow.
9.2 Unsubscribe email
On 25 May 2018, the General Data Protection Regulation (GDPR) will come into force in the European Union. In order to comply with its new requirements and regarding how you use personal data, Email Maker lets you choose which emails you want to receive.
You may choose to:
- Continue to receive Newsletter as well as customer loyalty and personalised offer emails.
- Unsubscribe from all emails sent to you.
For some kind of the email templates (campaign, advertising …) You can insert into your email template “Unsubscribe from emails” link. This link allows recipient to unsubscribe himself from receiving such multiple emails just by one click.
Please provide following steps to start using Unsubscribe Email functionality:
- Download UnsubscribeEmail.zip

Download UnsubscribeEmail.zip – Email Maker Vtiger 7 Where to find it? see chapter: Extensions of Email Maker - Unzip content of .zip file into your server (we recommend into same location where you have Vtiger installed)
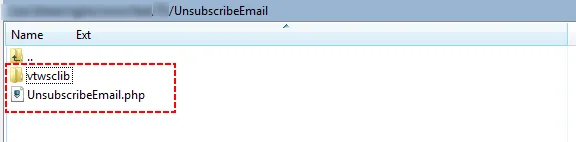
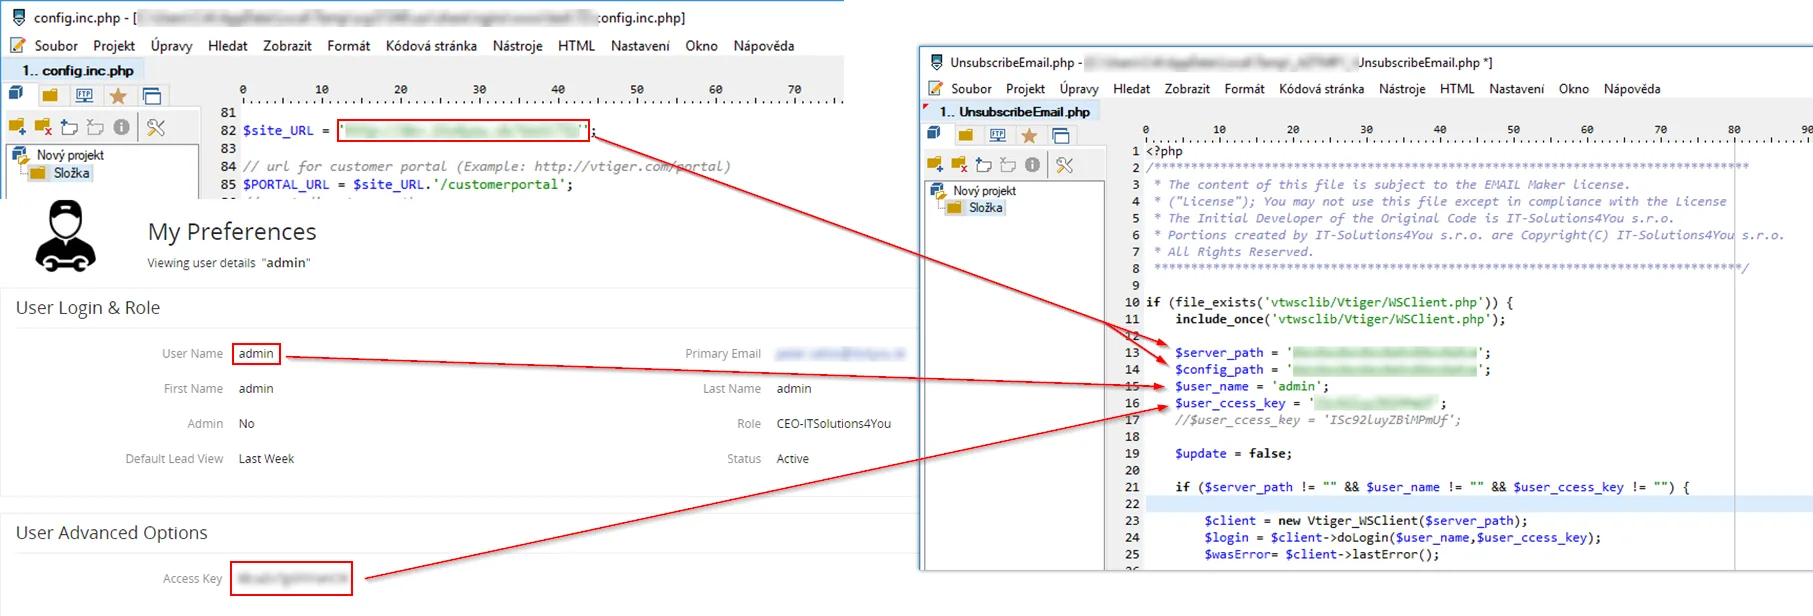
Unzip UnsubscribeEmail.zip – Email Maker Vtiger 7 - Inside UnsbuscibeEmail.php is necessary to define
- $server_path – this is your Vtiger URL. (Be sure that $server_path is same like $site_URL from config.inc.php of your Vtiger installation)
- $config_path – same as $server_path
- $root_path – ignore this unsell you have an UnsubscribeEmail.php file in other folder than main VTIGER_ROOT
(for example VTIGER_ROOT/unsubscribe/UnsubscribeEmail.php)
(then $root_path = “/../”;) - $user_name – this is the username you use to login to the Vtiger CRM, see also “My Preferences”
- $user_access_key – the access key can be retrieved by logging into your Vtiger CRM account, going to “My Preferences”
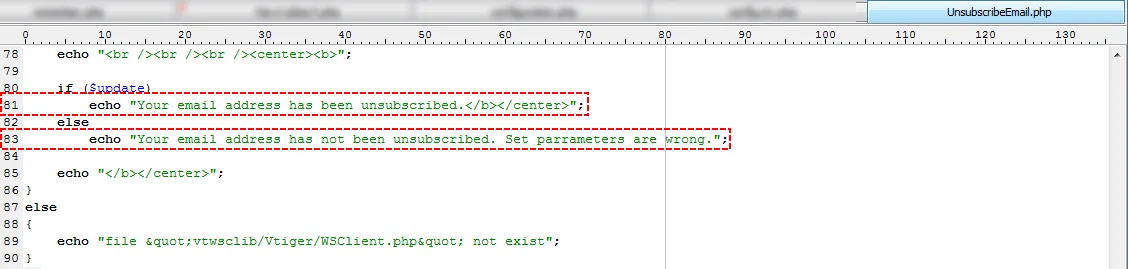
Edit UnsubscribeEmail.php – Email Maker Vtiger 7.x - Sentence shown after successful unsubscribing (row 81) (optional edit)
- Sentence shown when email address has not been unsubscribed (row 83) (optional edit)
Edit sentences – Email Maker Vtiger 7
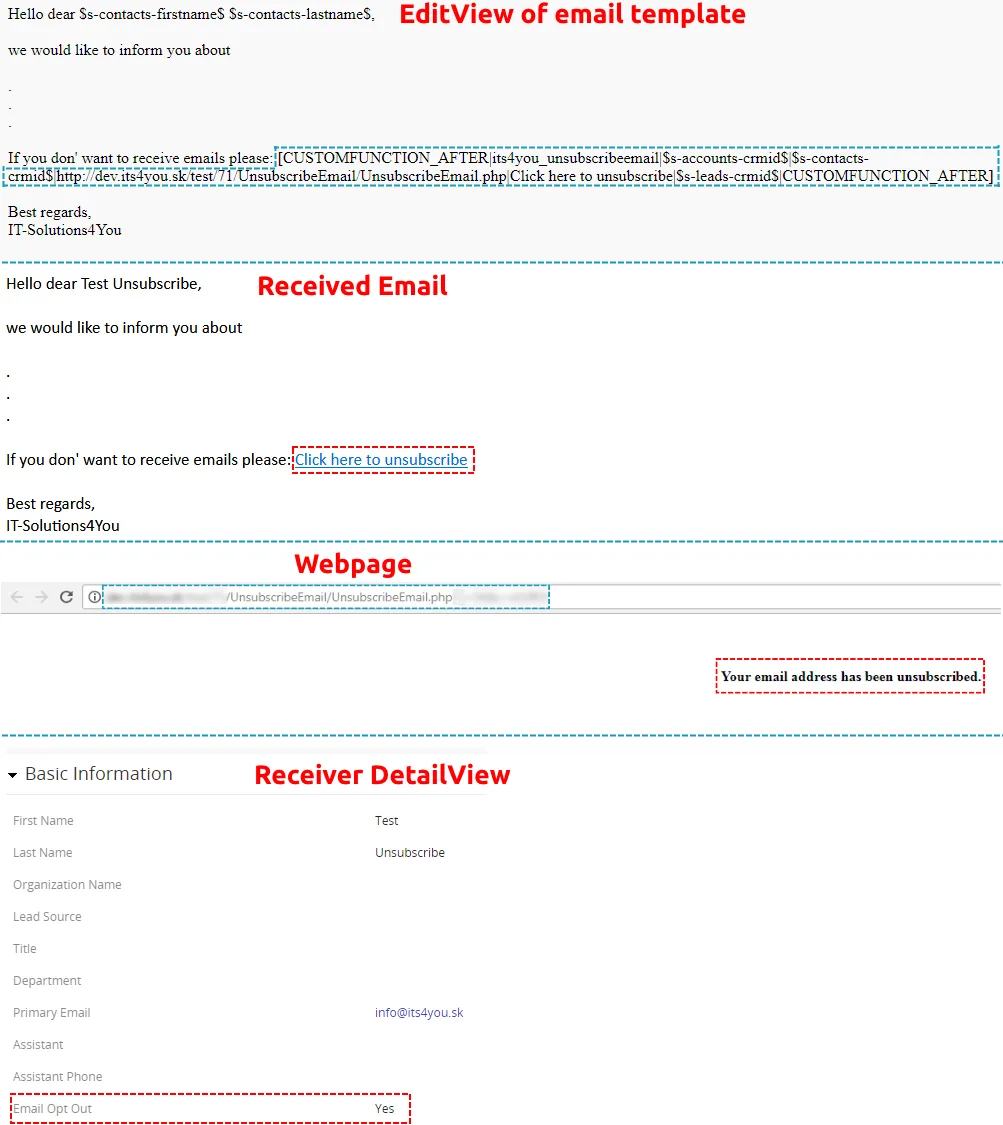
- The final step is to put custom function its4you_unsubscribeemail into your template. There are just two parameters which you need to modify inside custom function
[CUSTOMFUNCTION|its4you_unsubscribeemail|$s-accounts-crmid$|$s-contacts-crmid$|url_address|label|$s-leads-crmid$|CUSTOMFUNCTION]
- URL_ADDRESS –URL address of your UnsubscribeEmail.php
- label – Text of the unsubscribe link
Next picture shows process of unsubscribing contact which leads to change his “Email Opt Out” to “yes”.
9.3 Styles4You
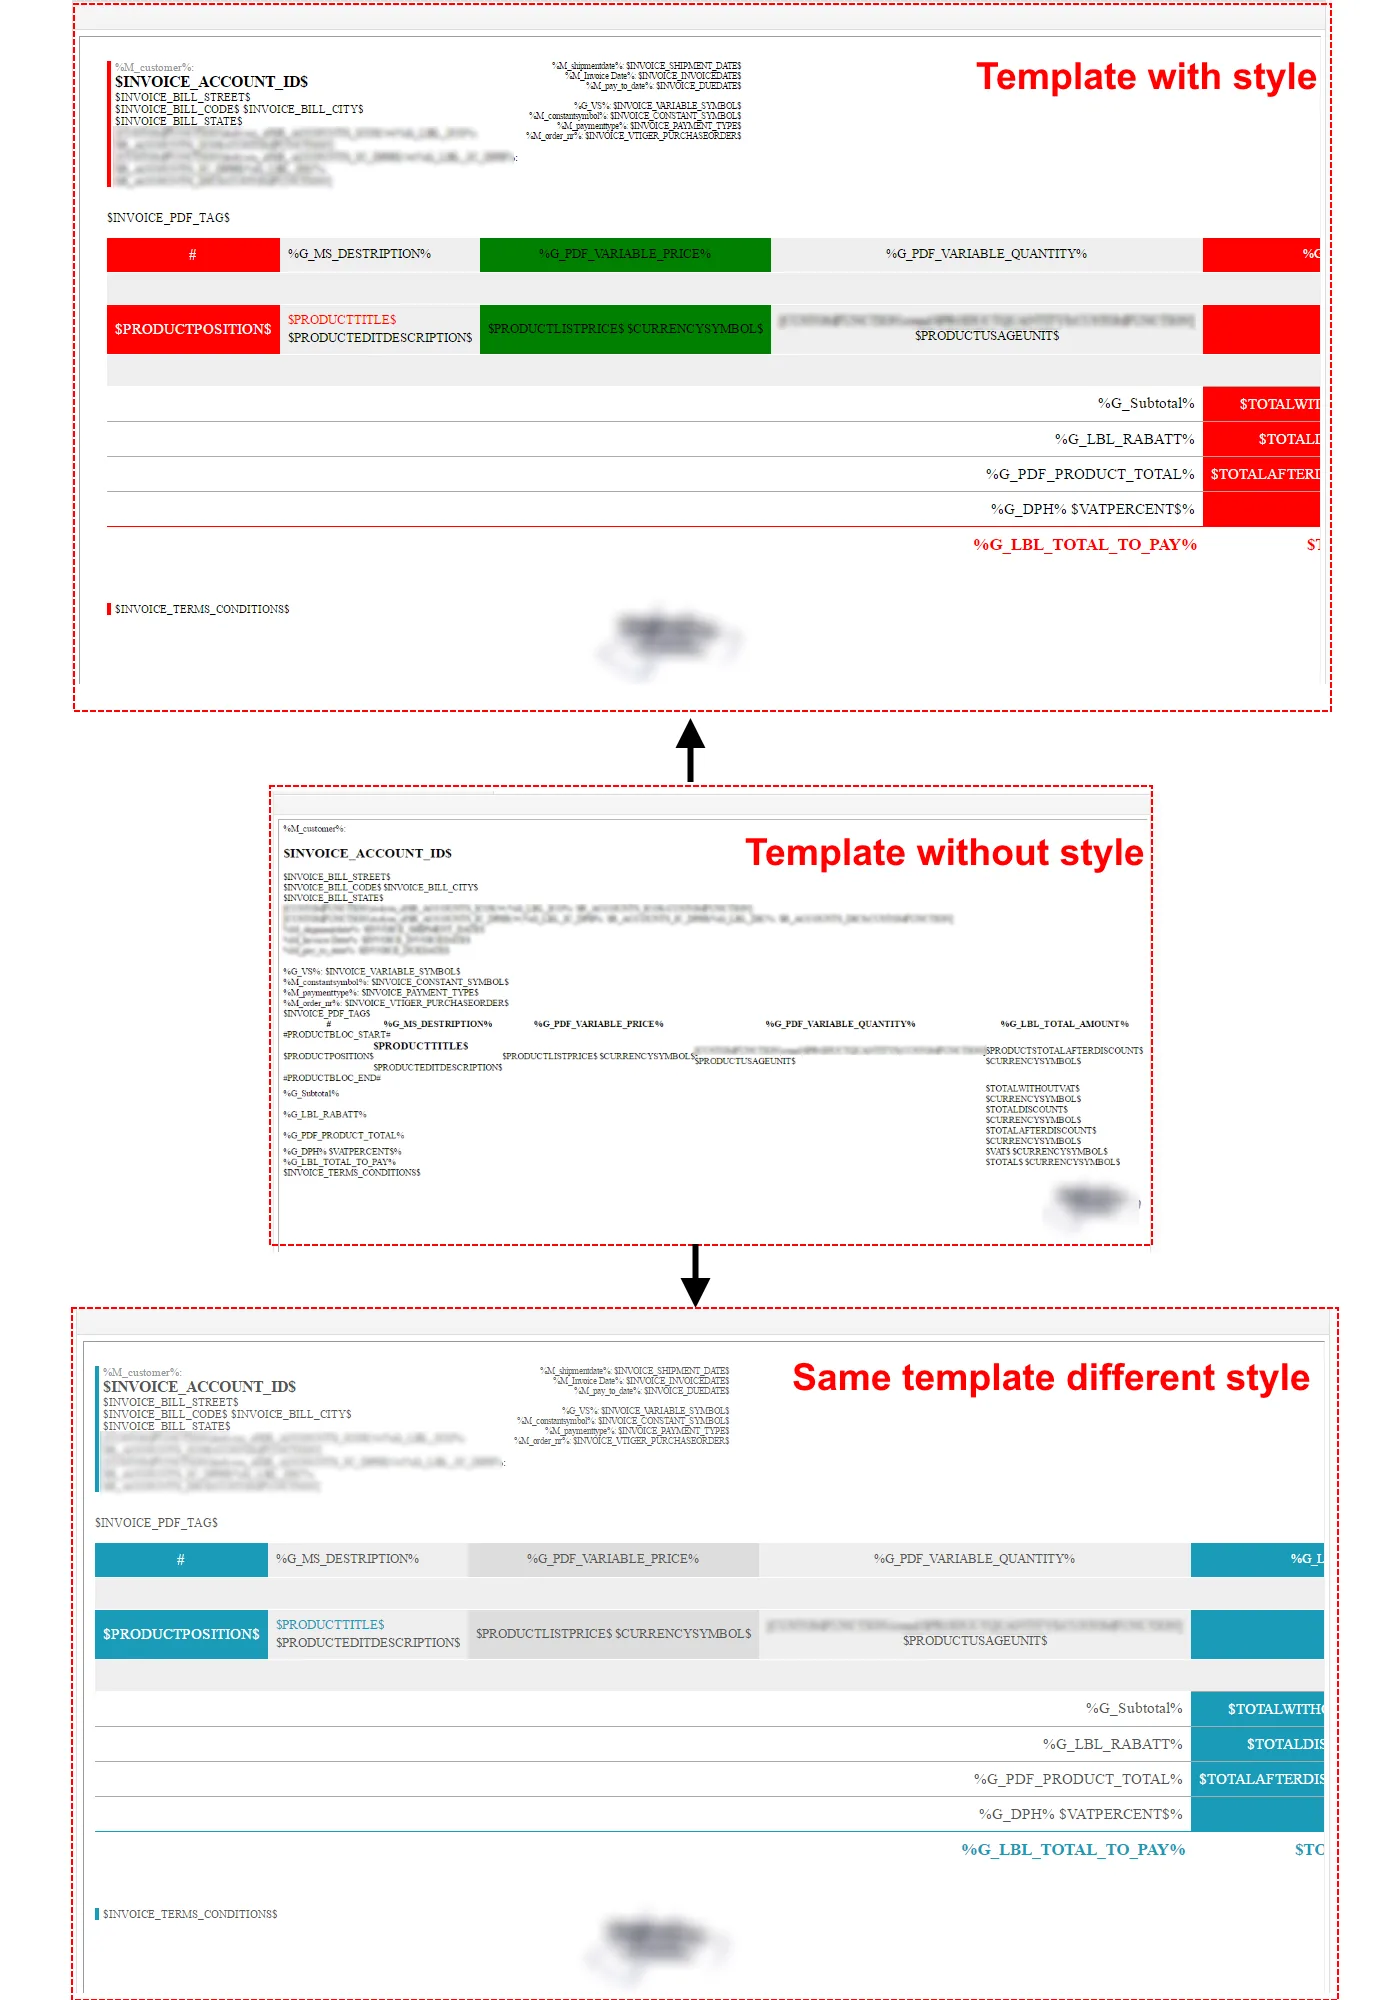
Styles4You extension allows to you manage your CSS styles and assigned it to templates.
To install Styles4You please provide following steps:
- Open EMAIL Maker
- Click on
 button and choose Extensions
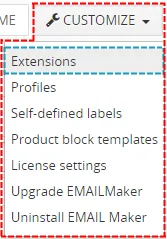
How to install Styles4You – Email Maker Vtiger 7 - Download zip file by Download button
- Install Styles4You via module manager or Install button

How to install Styles4You – Email Maker Vtiger 7
Now, Styles4You has been installed into your Vtiger.
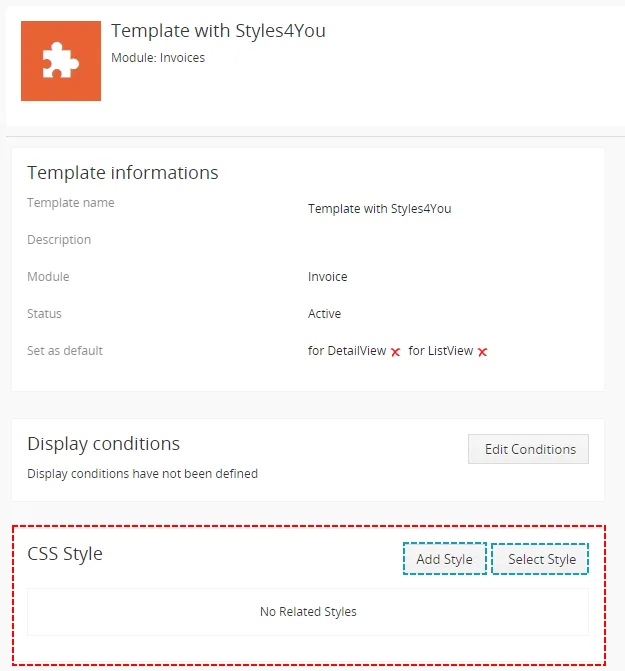
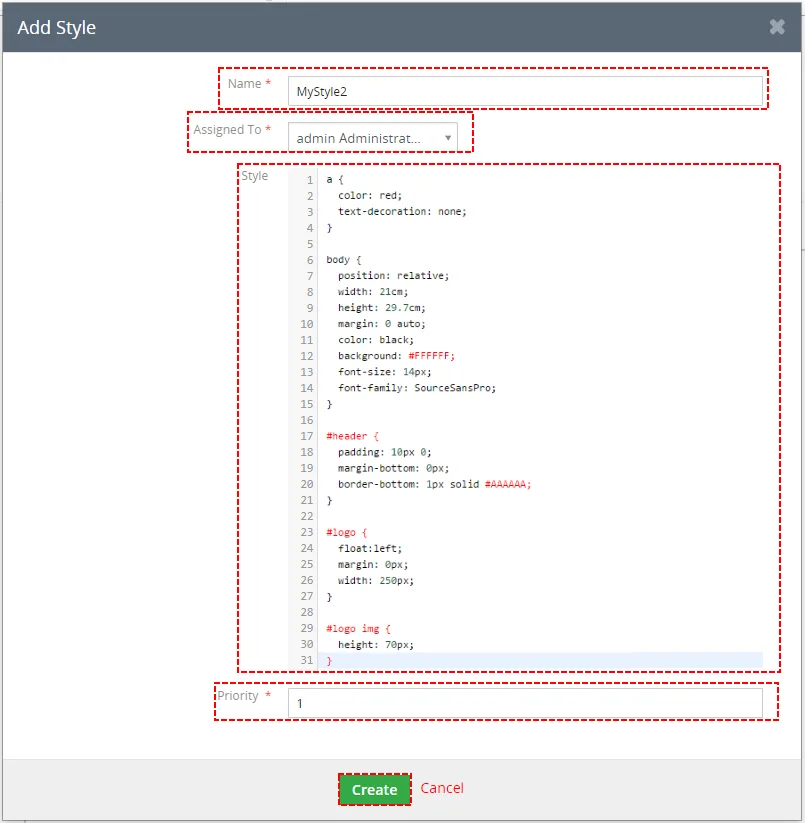
Here you can also add new Style or select your created Style. To create new Style and add it to template please open your template click on  button or click on
 button to select previous created style.
Fill name, insert your style and choose priority. Priority is used when you add more styles to one template. EMAIL Maker takes CSS with smaller number of priority.
Now, your style has been added to your template.
Need help with EMAIL Maker?
Our support team answers questions about installation, templates and settings.