

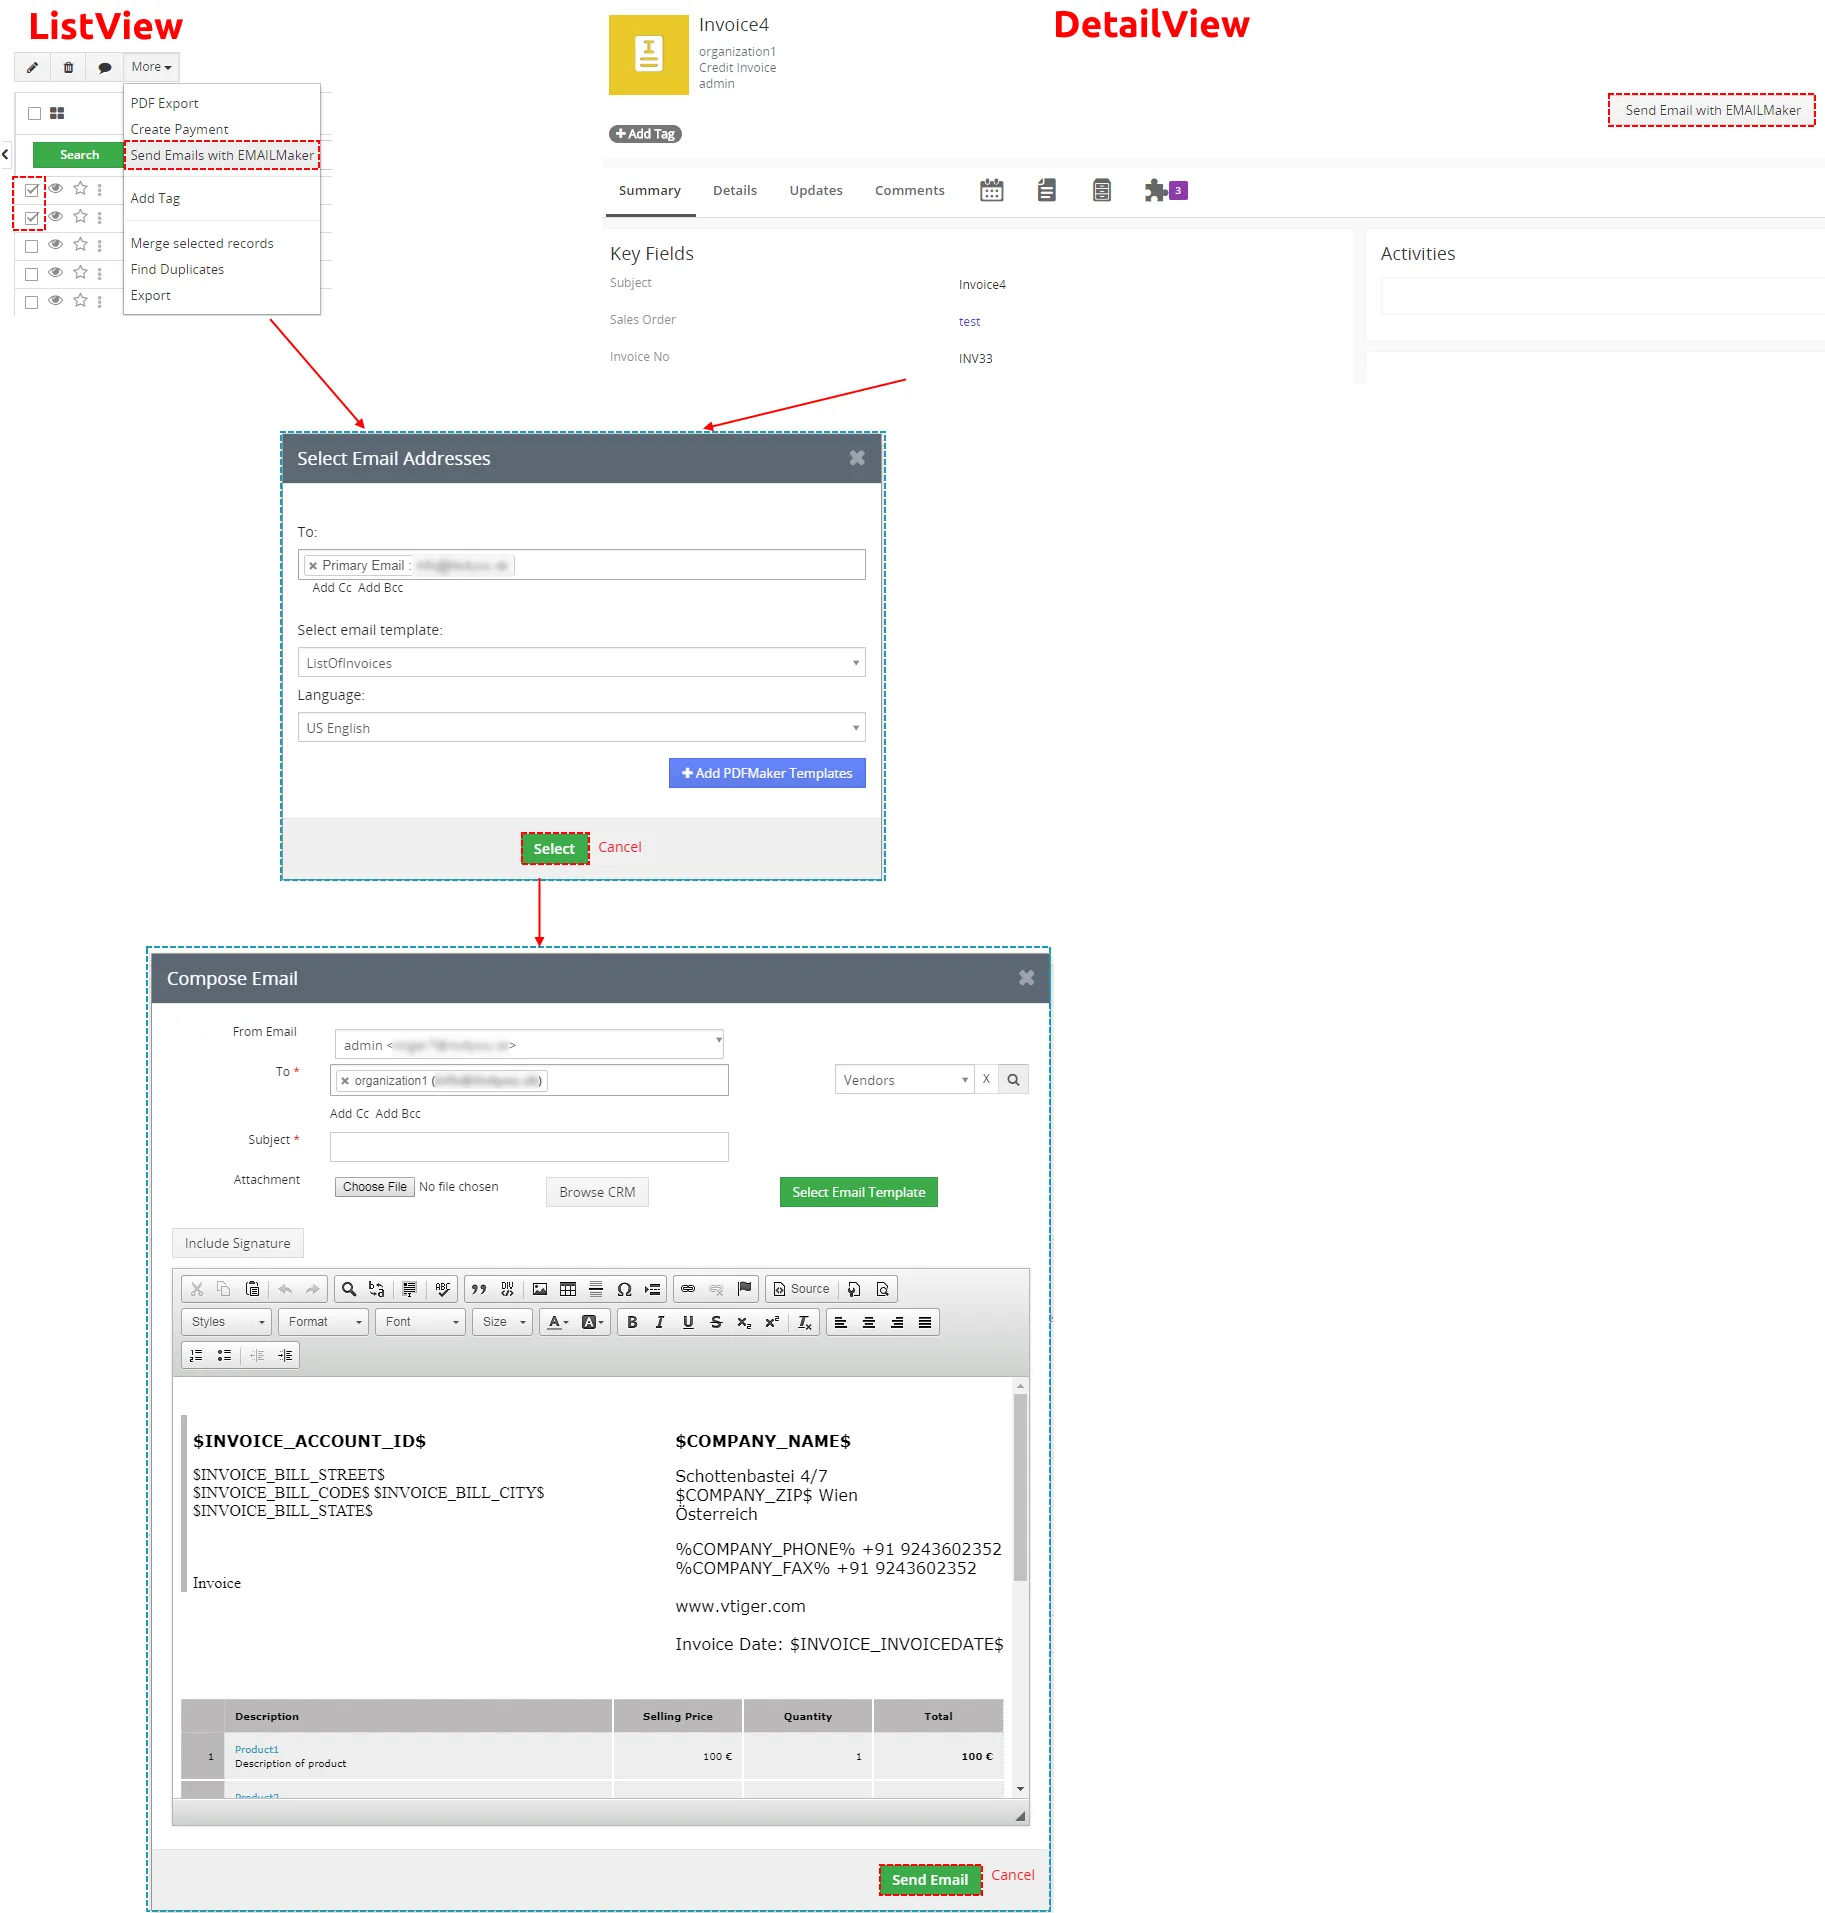
In the following picture you can see how to send email using EMAIL Maker:
ListView:
| DetailView:
|
 button.
The process of sending emails continues with window “Compose E-Mail”. Click on button  to send email. At the end you are informed about un/successful sending of the email. Please refer to following chapters for details about each step.
7.1 Select Email Addresses
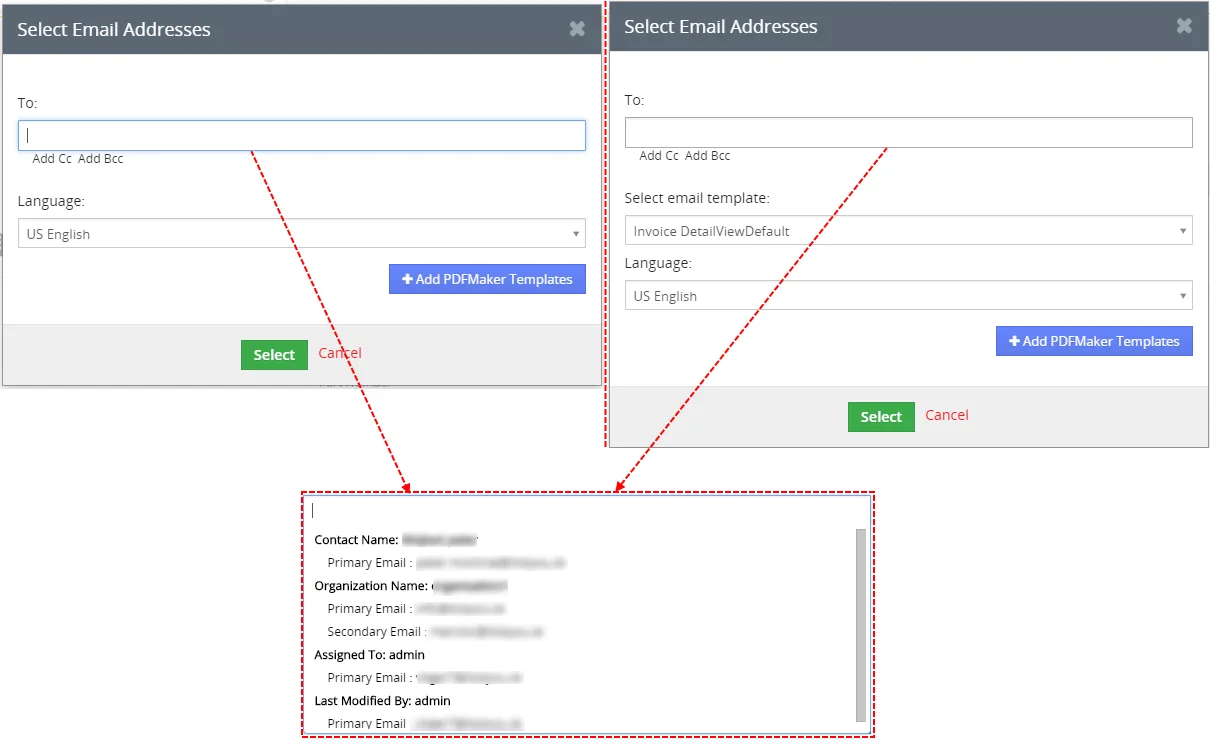
The Select Email Addresses window is first (ListView) or second (DetailView) window which is used to select email template, email recipients or PDF template (only if available). Please provide your selection and continue with  button in order to send email(s).
As you can see in the below picture, the Select Email Addresses window has several forms:
- doesn’t contain EMAIL Template part because there is no EMAIL template for this module.
- Select Email Addresses window differs also within same module in ListView. It depends whether one or more records were selected. The concrete email address/es are shown in case that only one record was selected.
7.1.1 Compose E-Mail
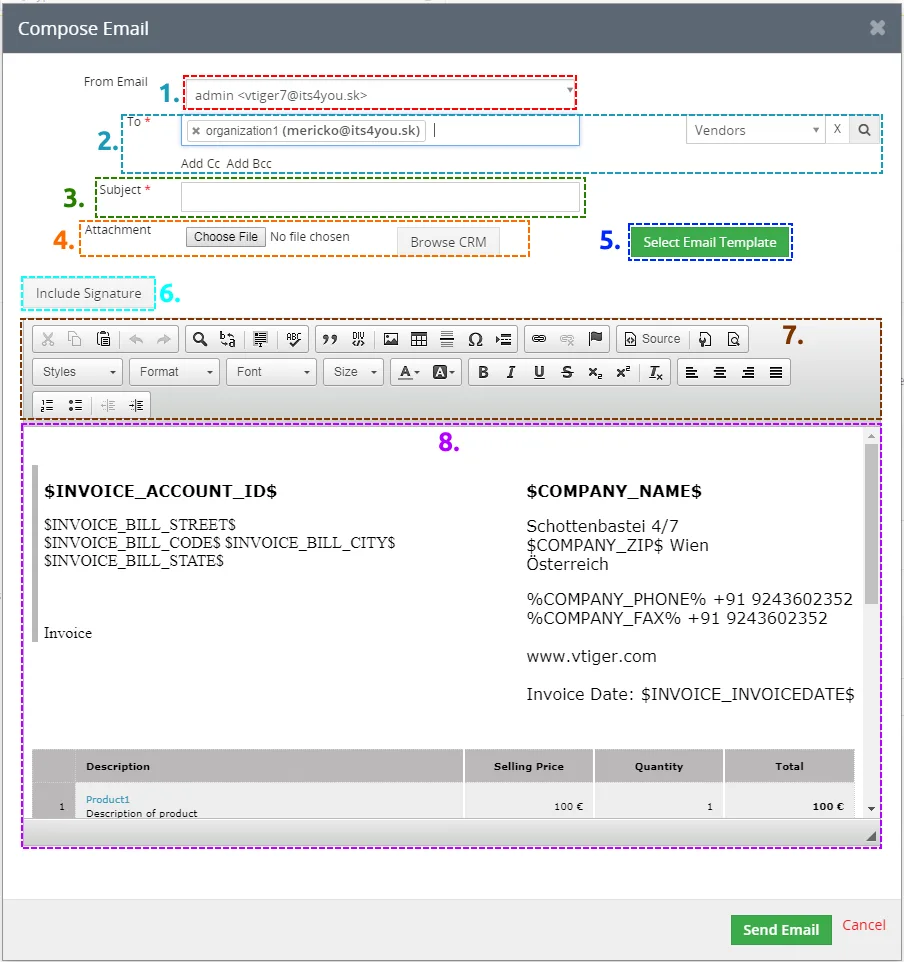
For successful sending of the email(s) it is enough to click on button in the Compose E-Mail window in case that email template and recipients were already selected in the previous Select Email IDs window. But as you can see in the picture below you can provide a lot of actions before sending of the email(s):
- Change your/sender mail
- Add additional “To”, “Cc” and “Bcc” recipients or remove recipients.
- Change subject of the email.
- Add/remove attachments.
- Change or select email template
- Include Signature
- Additional edit of the email or email template.
- Preview of the email or email template.
Some of above actions are described in the following chapters in details.
7.1.1.1 Emails sent from
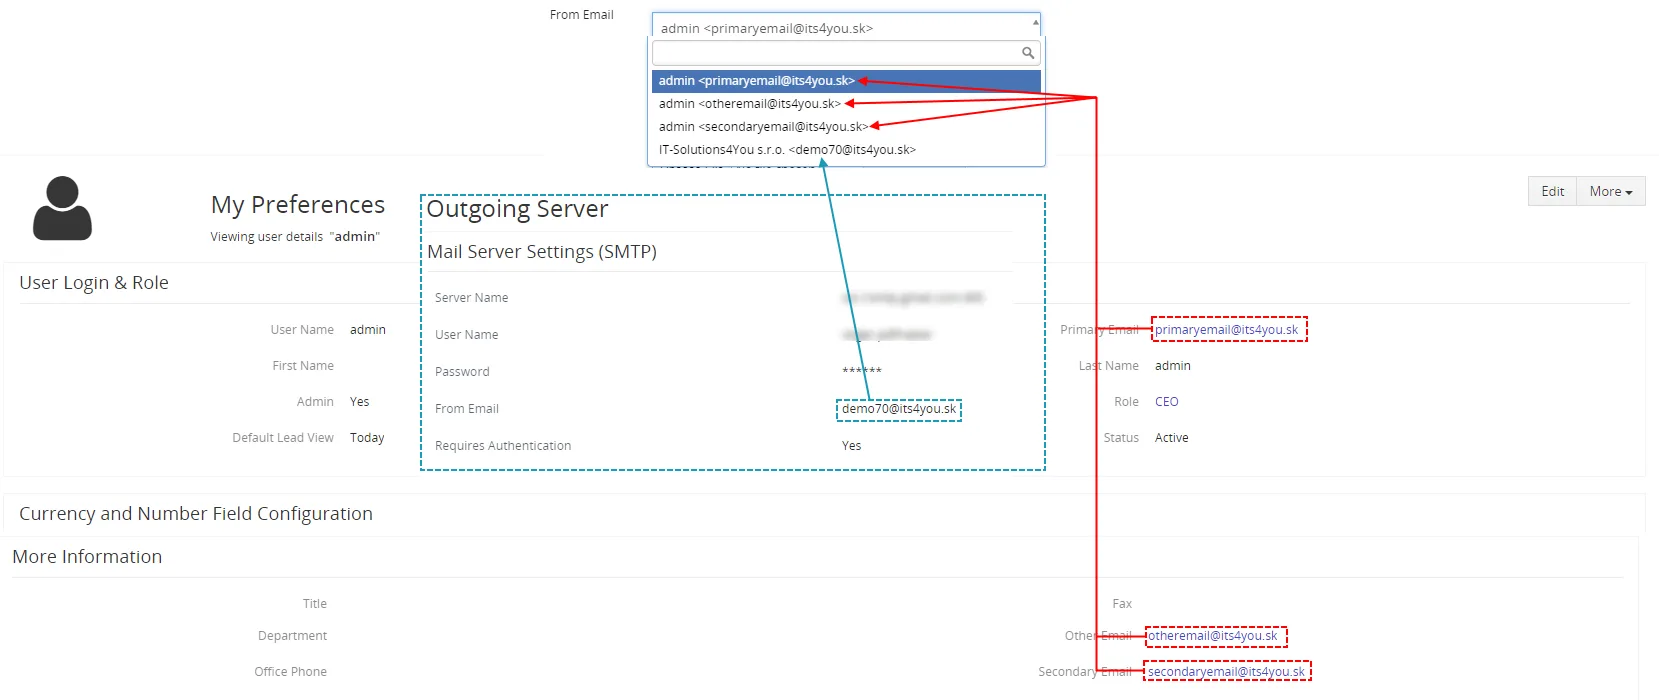
Within your vtiger you can define several email addresses. These addresses can be used as addresses of the email sender.
You can simply change the email address of the sender within “Compose E-Mail” window. It can be done using selectbox. Depending on your preferences and settings, you can select from the mail addresses shown in following picture:
- My Preferences / User Login & Role / Primary Email
- My Preferences / More Information / Other Email
- My Preferences / More Information / Secondary Email
- Settings / Outgoing Server / From Email
7.1.1.2 Recipients To, Cc, Bcc
Within this chapter is described one of the main parts of Compose Email window related to email recipients.
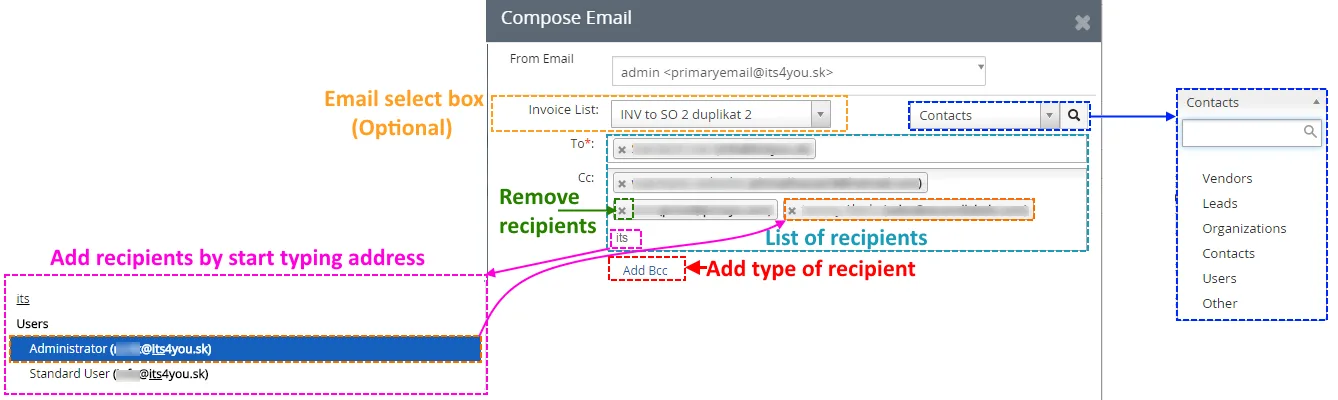
As described in the picture below you can provide here following actions:
- add recipients – you can select the recipients from module Contacts, Organizations, Vendors, Leads, Users or you can type any email address using selection “Other” or simply you can add recipients by start typing email address (3 and more characters)
- remove recipients (emails)
- add next type of recipients – Cc, Bcc
- there can be also email select box located in the above part for modules like Invoices, Products, Purchase orders, Sales orders, Quotes …
Please take into account that behavior of using To, Cc and Bcc differs in case of sending emails from ListView of the particular module in case more than one record was selected:
- For modules like Contacts, Organizations, Vendors, Leads …
- At least one recipient has to be defined as To
- In case you would like to send email also to Cc, Bcc recipient only for one selected record please use sending from DetailView of the module
- For modules like Invoices, Products, Purchase orders, Sales orders, Quotes …
- At least one recipient has to be defined as To for each selected record (INV_01, INV_02)
- It is possible to define Cc, Bcc recipient for each particular To, it means Cc, Bcc recipients are better controlled
7.1.1.3 Attachments
Three ways how to attach the attachments into emails are currently supported in the Email Maker:
- The attachments inserted directly into email template (see chapter Attach documents into templates for details).
- The attachments inserted within Compose E-Mail window
- The document/file from the module “Documents” can be added using
 .
- Any local file can be added using
 .
- The document/file from the module “Documents” can be added using
- PDF Maker templates (available only for users using also PDF Maker). Please refer to chapter Support of the PDF Maker for details.
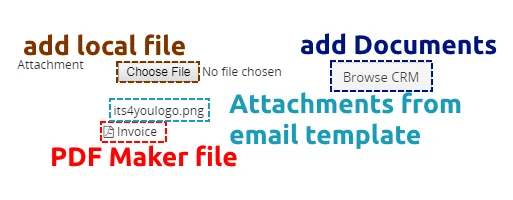
In order to delete any attachment please click on “X” before attachment (see picture)
7.1.1.4 Select Email Template
The Compose E-Mail window contains button  . You can select email template from ListView within window Select Email IDs or from DetailView within EMAIL Maker block. Button can be used in the following situations:
- in case you forgot to select email template from Select Email IDs window or EMAIL Maker block
- you would like to use different template but don’t want to close Compose E-Mail window
- you initiated sending emails outside EMAIL Maker tool (so you were not able to select email template), e.g. using PDF Maker tool
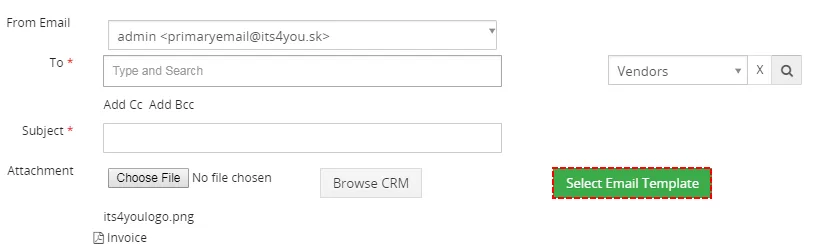
When you click on “Email Templates List” window will appear on the screen. You can select template name to be used. Inside this window also information of primary module and description is available. Please note that only module related templates or common templates are visible and can be used for sending emails.
Need help with EMAIL Maker?
Our support team answers questions about installation, templates and settings.