
There are currently two options how to install extension:
- (Recommended) Using our Free extension Installer
(Please visit the Installer page for more info) - Manually installation using a .zip file
(You still need to have Installer in order to activate license)
Since December 2019 we launched our extended version of Installer which helps you install / update modules and manage license keys.
⚠️ Uninstalling Google Sync will remove all saved Settings!
2.1 Installation via Installer (default)
Make sure you have Installer installed, you can download Installer via our E-shop when you log in under Free Downloads section.
Next, simply install Installer via Module Management in Vtiger CRM by importing the .zip file you downloaded.
After successful installation, you can access Installer in two ways:
- by a click on Notifications Icon
 and then on the button

- or via Main Menu – Settings – CRM Settings – Extensions – ITS4YouInstaller
 Note:
- To see modules and manage licenses you have to log in to our Installer with @email and password via
 button (top right screen side in Installer module).
- Login is same for Installer and for our E-Shop.
After log in, you can activate Extensions or our Packages licenses associated to your account via  button.
When the license was activated you can see module available in the Modules tab below.
Simply hit the  button and Extension is installed now.
 You can only activate Single-key licenses, which are assigned to your Email Account you made purchase with and with which you are logged to the Installer.
Package licenses can be logged in via Access Key (license key) following also activation via button.
2.2 Manual installation
There is also a way to install / update the extension manually in some scenarios:
- Manual installation or update of the extension can be requested if you contact our support because you are facing some issues with extension.
- Standard way of installation and update is using our Installer. In some rare cases we can send you .zip file to update the extension manually.
Please provide following steps in order to install Google Calendar Sync Manually
- Install the .zip (package) file of the Google Calendar Sync module via CRM Settings -> Module Management-> Modules. Click on the
 button.
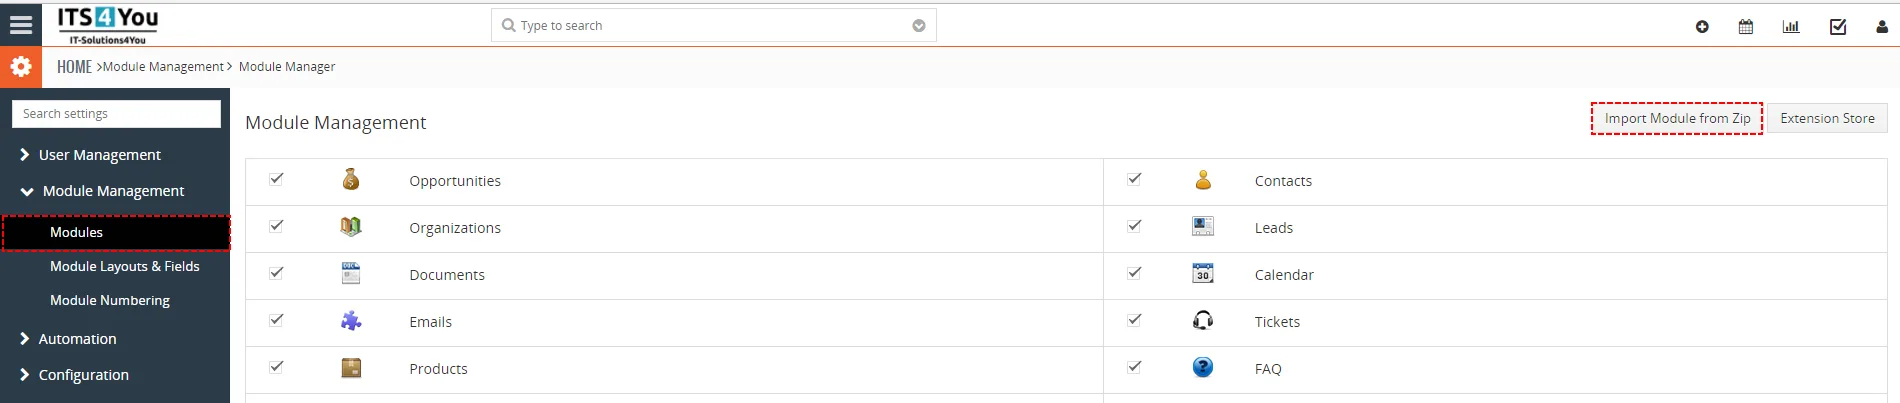
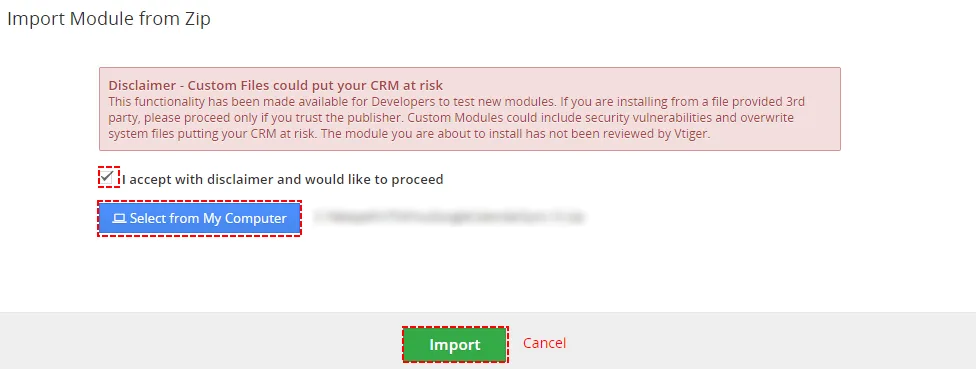
How to install Google Calendar Sync - Select the .zip (package) file that you downloaded from our shop. Please check that you accepted the disclaimer and would like to proceed. Click on the
 button.
How to install Google Calendar Sync - Verify the import details parsed from the .zip (package) file. Please check that you accepted the license agreement and click
 to proceed or Cancel to cancel.
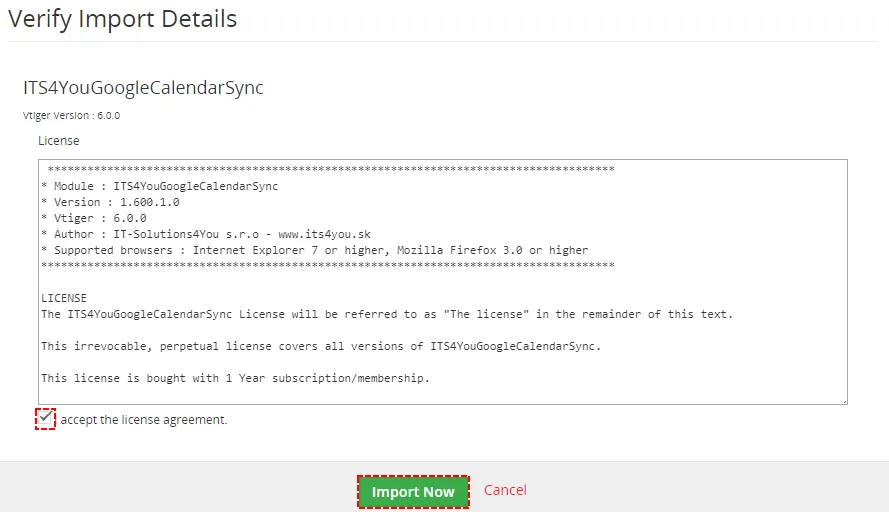
Accept agreement – Google Calendar Vtiger 7 Sync - Google Calendar Sync for Vtiger 7 was imported

Import Successfull – Google Calendar Vtiger 7 Sync
Need help with Google Calendar Sync?
Our support team answers questions about installation, templates and settings.