
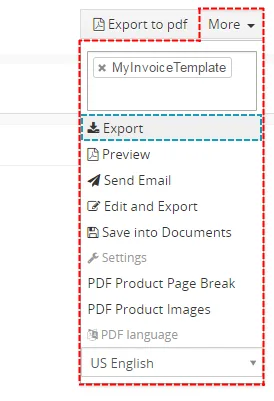
The PDF Maker block contains links to initiate several actions:
- Export
- Preview
- Send Email
- Edit and Export
- Save into Documents
- Settings
- PDF Product Page Break
- PDF Product Images
- PDF language
You can find description of above actions in the following sections. Please take into account that visibility of above links within PDF Maker block depends on user profile.
7.1 Export
The export of your documents/records to PDF files is the basic action of PDF Maker block.
- Go to the detail view of given Module and on the ride side of DetailView, click on
 button and in the PDF Maker block, choose your PDF Template. The template is selected automatically in case the only one exists for given module or in case the default template is already defined.
- Click on Export and export will be done. Please note that next step depends on used web browser.
7.2 Preview
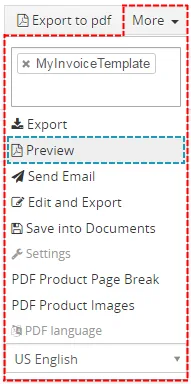
- Go to the detail view of given Module and on the ride side of DetailView, click on button and in the PDF Maker block, choose your PDF Template. The template is selected automatically in case the only one exists for given module or in case the default template is already defined.
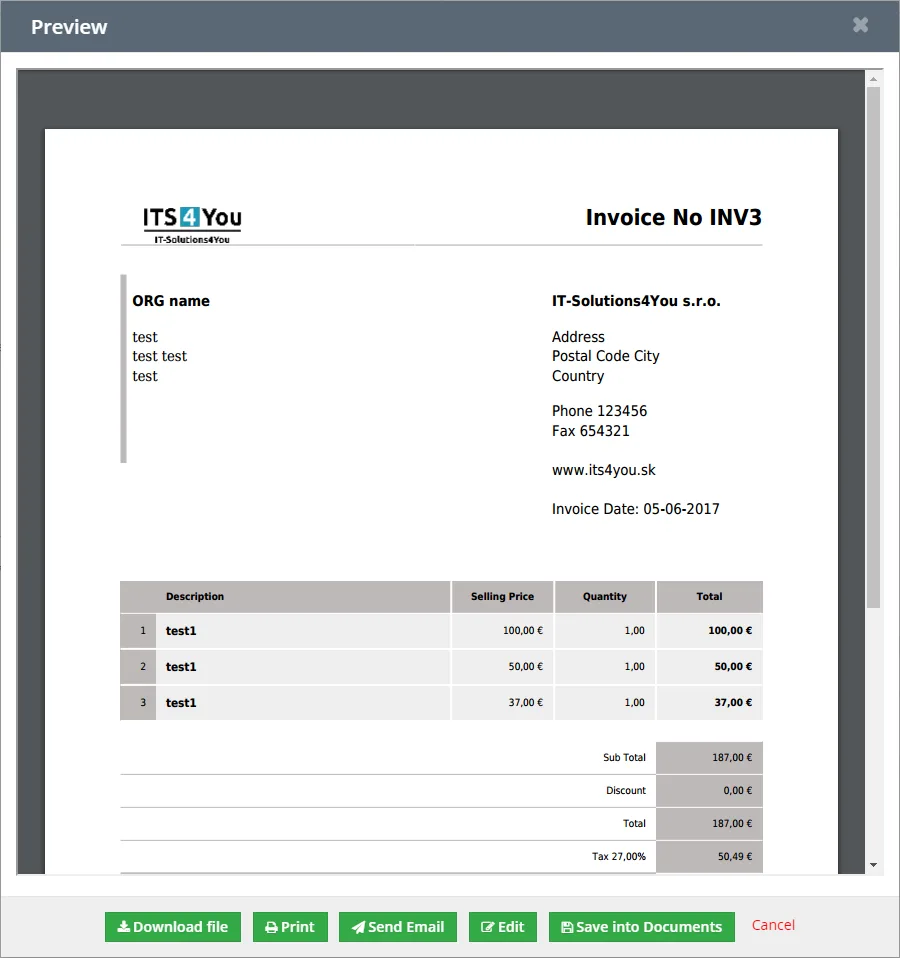
- Click on Preview and Preview window will appear. Here you can also find helpful options like Download file, Print, Send Email, Edit and Save into Documents.
7.3 Send Email
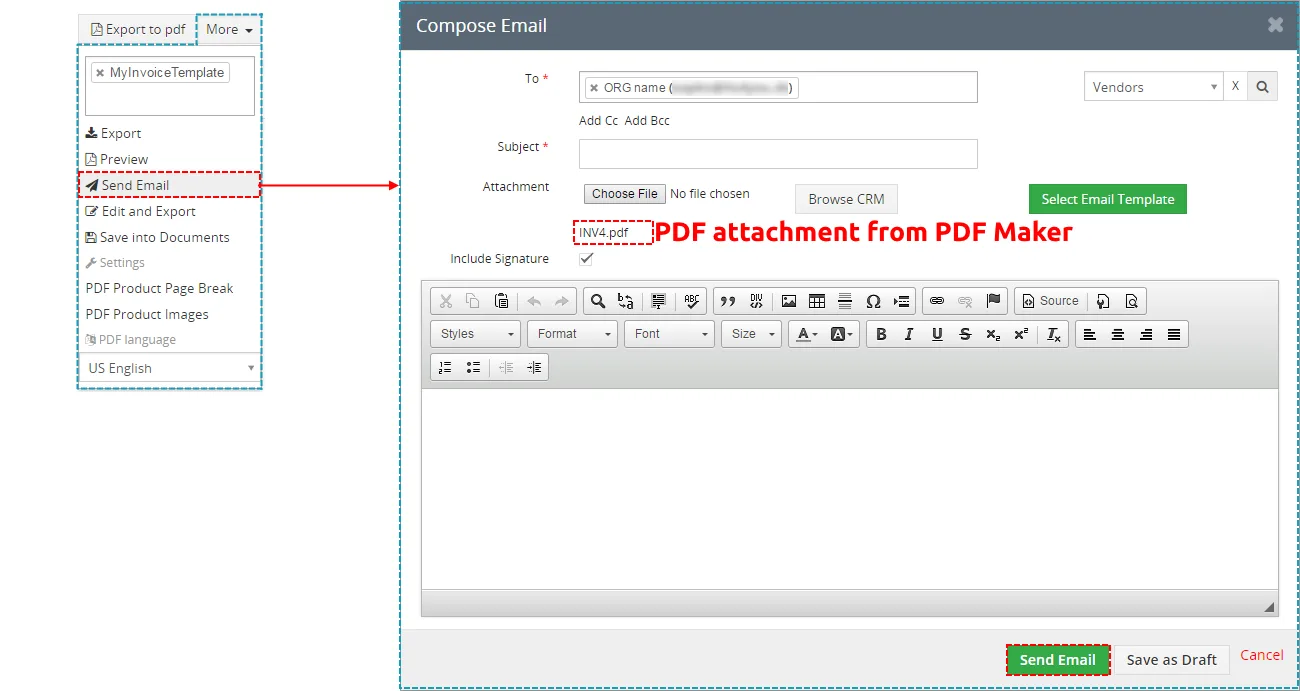
PDF Maker allows you to send your PDF documents via email in few easy steps:
- Go to the detail view of given Module and on the ride side of DetailView, click on button and in the PDF Maker block, choose your PDF Template. The template is selected automatically in case the only one exists for given module or in case the default template is already defined.
- Click on Send Email.
- A popup window “Compose Email” will appear on the screen with already attached PDF file. Please add subject and text according to your needs. You can add additional recipients if necessary as well.
- Click on
 button to send email with attached file(s).
7.4 Edit and Export
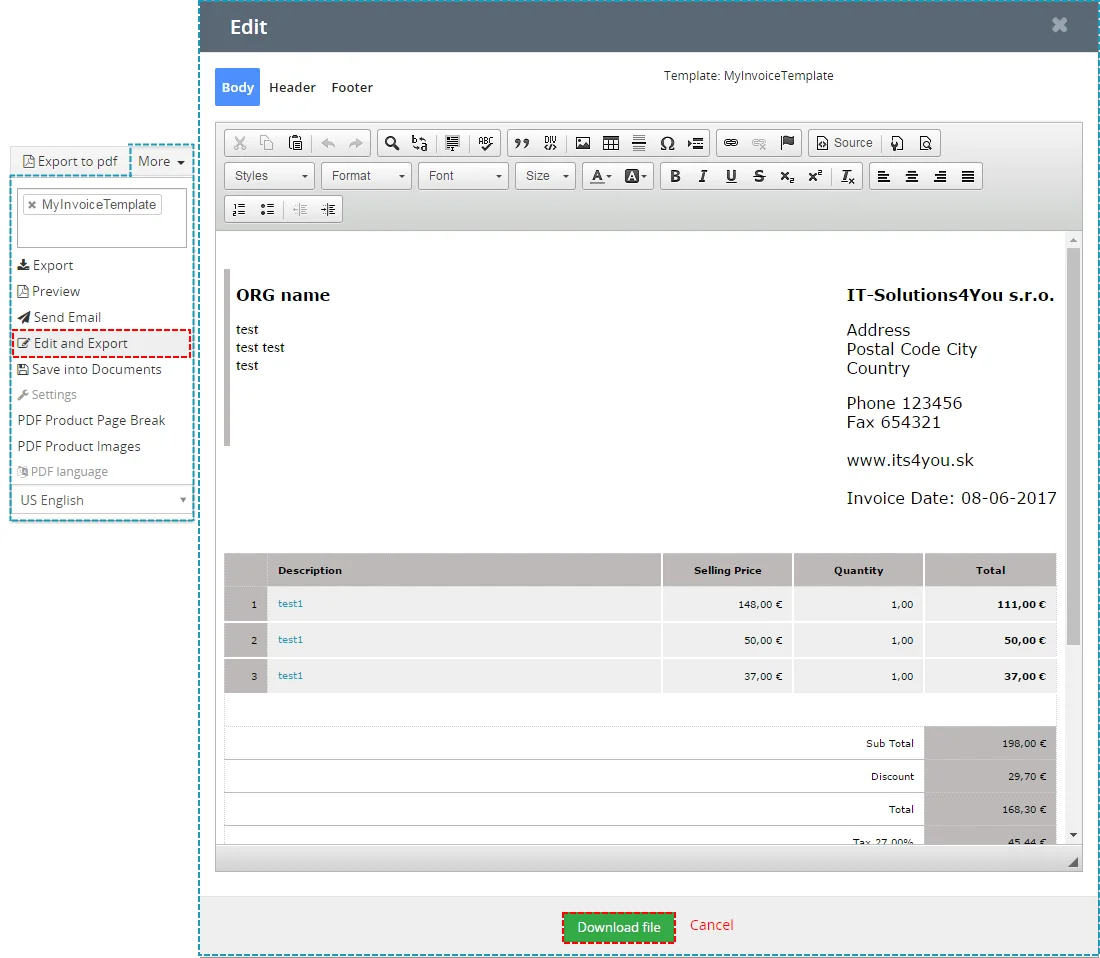
From time to time it is necessary to edit your document before print or save. For example, you can change post address in one document but don’t want to change record in database because it is temporary necessity. In that case you can choose Edit and Export action item which gives you possibility to change not only layout of the document/template but in addition any text. In order to edit and export PDF file:
- Go to the detail view of given Module and on the ride side of DetailView, click on button and in the PDF Maker block, choose your PDF Template. The template is selected automatically in case the only one exists for given module or in case the default template is already defined.
- Click on Edit and Export link.
- A popup window with template will appear in the screen. You can start to modify your document now.
- Click on
 to export the final PDF file.
7.5 Save into Documents
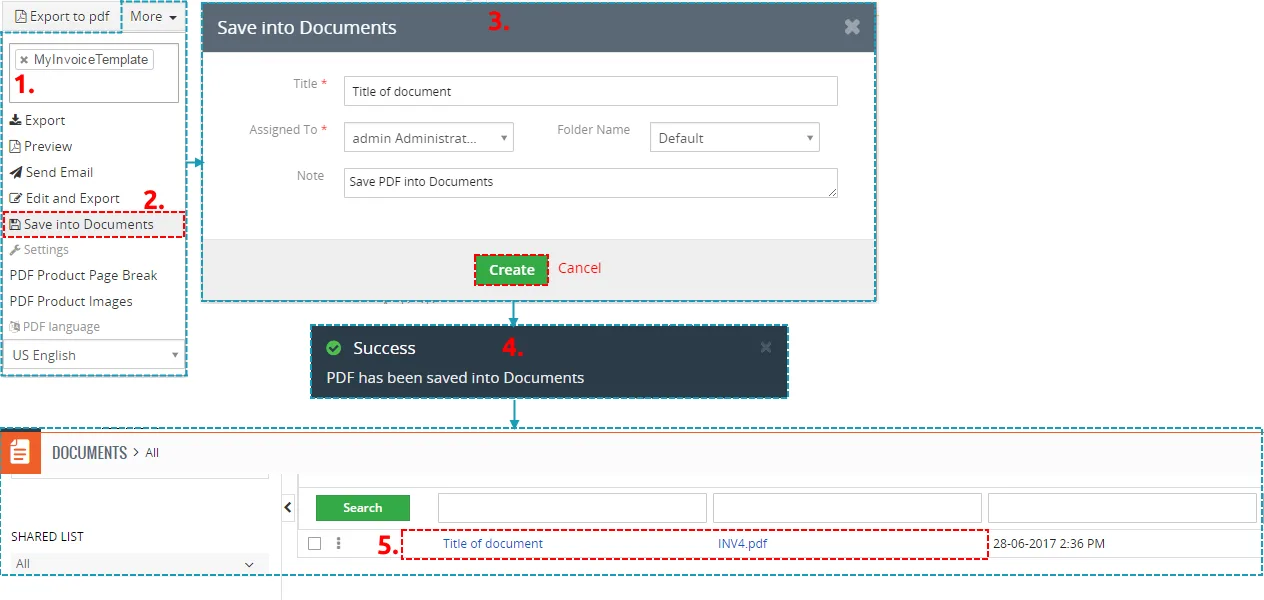
You can save the template or merged templates into the module Documents using following steps:
- Go to the detail view of given Module and on the ride side of DetailView, click on button and in the PDF Maker block, choose your PDF Template(s). The template is selected automatically in case the only one exists for given module or in case the default template is already defined.
- Click on Save into Documents link. A popup window will appear on the screen.
- In the part “Documents” please write the title of the document and select the storage folder. You can also add a note.
- Click on
 button to save the PDF file into Documents.
- After that the document can be find under module Documents.
7.6 PDF Product Page Break
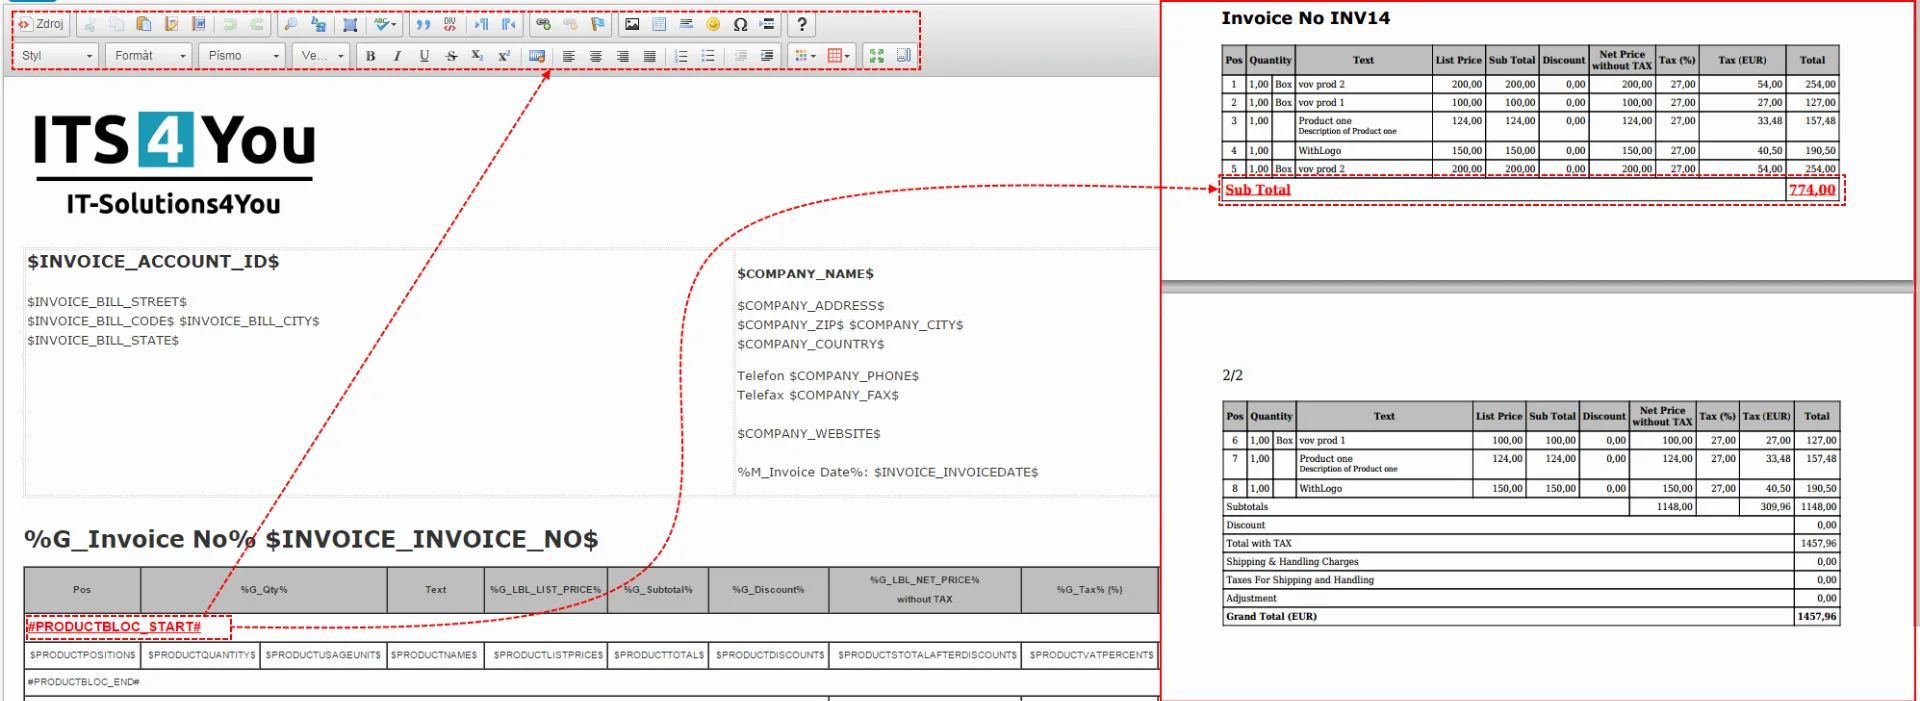
Product blocks are available for some modules (Invoice, SO, PO, Q). PDF Product Page Break action allows
you to setup additional settings according your needs. You can define:
- A position of the page break. The page break will be inserted after each selected product (blue line)
- Show table header after page break – a repetition of the table’s header on the next page (red line)
- Show subtotal before page break – a subtotal value at the end of the page (before page break) (yellow line)
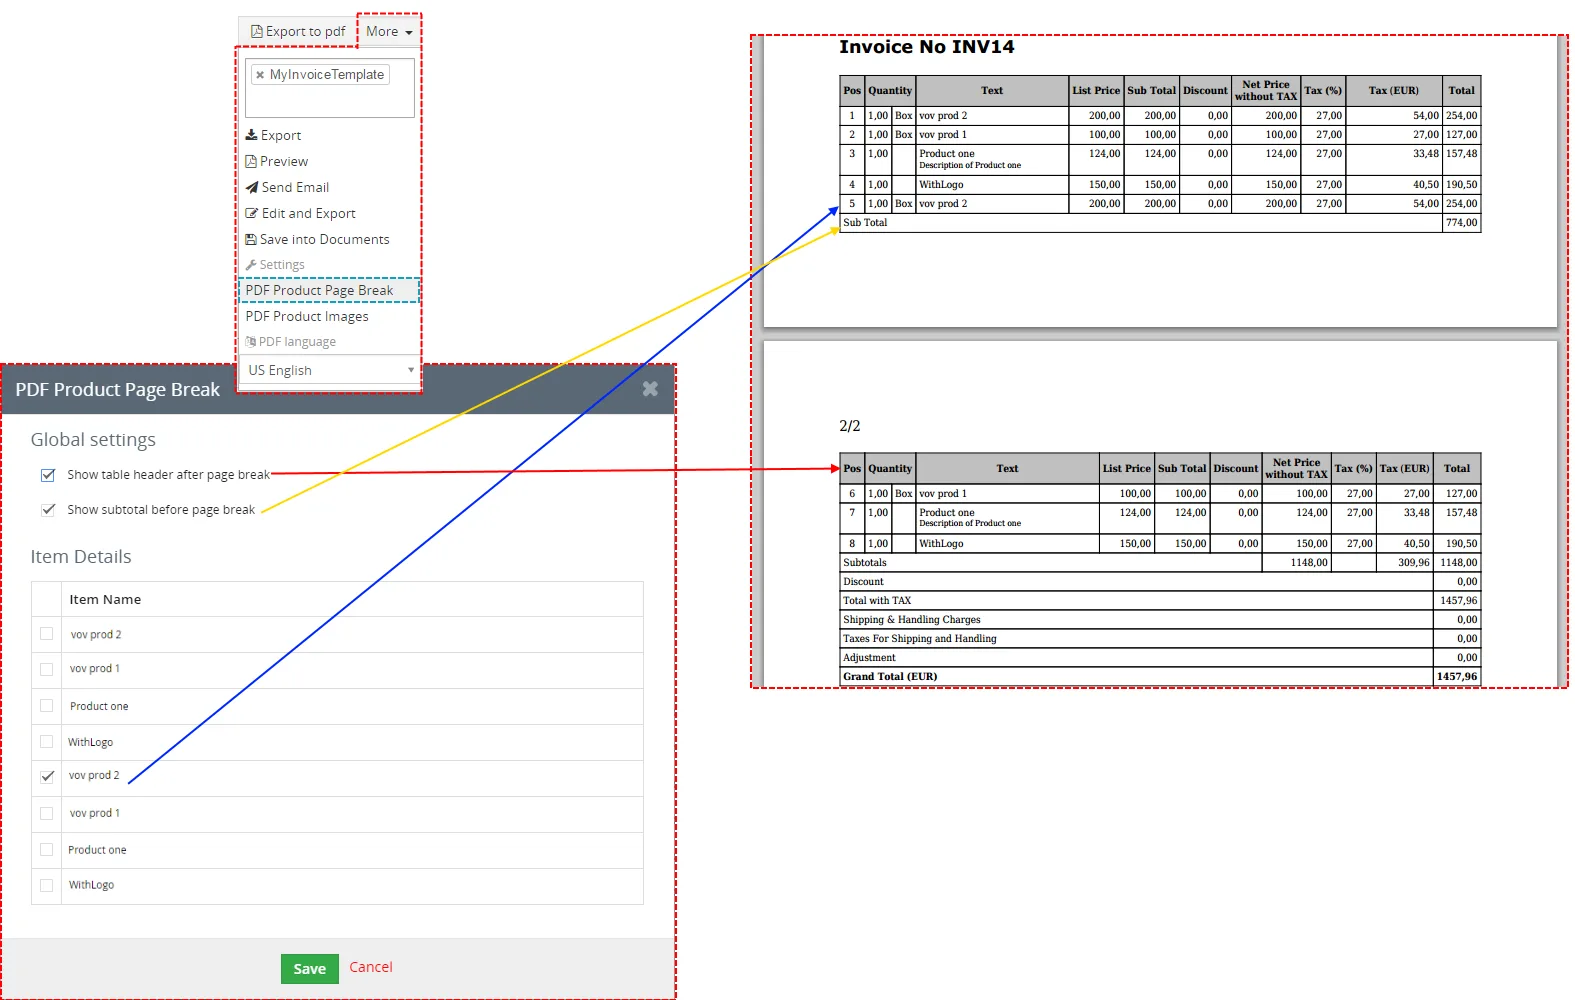
Also good option is modify subtotal before page break. You can edit it if you edit #PRODUCTBLOC_START# in your template.
7.7 PDF Product Images
PDF Product Images action allows you to define some settings related to product images:
- used for product templates
- used inside product blocks
 Note: Please update your PDF Maker to version 700.13.2 in order to use this feature without any issues.
This version was uploaded on 16 December 2019.
7.7.1 PDF Product Images in product templates
The link PDF Product Images is useful in case you are using more images for one product and you would like to select which image has to be used within your PDF exported files. Let’s suppose that variable $PRODUCTS_IMAGENAME$ is used in the template. In order to select which image will be used please provide following steps:
- Go to the detail view of given Module and on the ride side of DetailView, click on button and in the PDF Maker block, choose your PDF Template(s). The template is selected automatically in case the only one exists for given module or in case the default template is already defined.
- Click on PDF Product Images link.
- PDF Product Images window will appear on the screen.
- Select the picture and click on
 button.
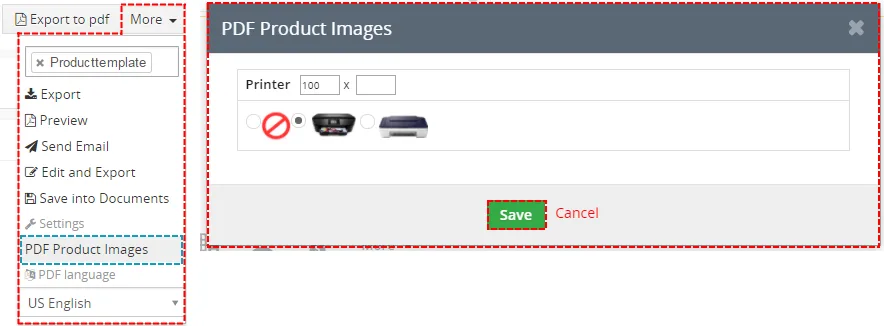
Depending on your selection 4 different situations can happen:
- If more pictures are available only selected picture will be used.
- If only one picture is available it is used automatically.
- If picture is not available then no changes will be visible in the final document.
- In case you don’t want to use picture you are able to switch it off.
Note: Please update your PDF Maker to version 700.13.2 in order to use this feature without any issues.
This version was uploaded on 16 December 2019.
7.7.2 PDF Product Images in product blocks
Note: Please update your PDF Maker to version 700.13.2 in order to use this feature without any issues.
This version was uploaded on 16 December 2019.
The PDF Product Images also allows defining images which will be used in final exported PDF files within product blocks.
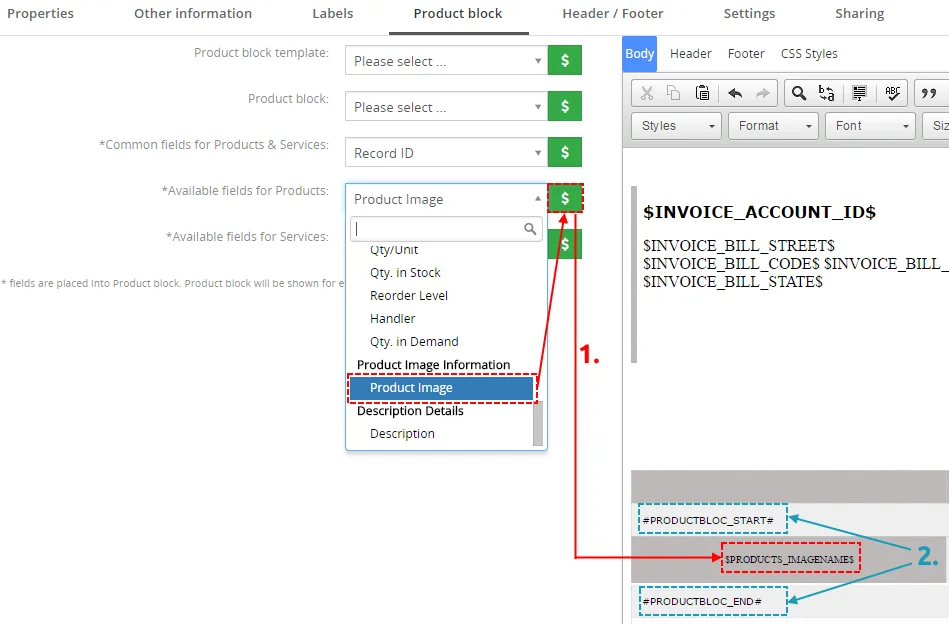
- Start editing of your PDF template. Go to the Product block tab, from “Available fields for Products” select “Product Image” and click on
 button.
- As can be seen below, it is required to insert the variable $PRODUCTS_IMAGENAME$ between #PRODUCTBLOC_START# end #PRODUCTBLOC_END#.
Let’s assume that your PDF template including product image variable is correctly prepared and saved. In order to apply PDF product images settings:
- Go to the detail view of given Module and on the ride side of DetailView, click on button and in the PDF Maker block, choose your PDF Template(s). The template is selected automatically in case the only one exists for given module or in case the default template is already defined.
- Click on PDF Product Images link.
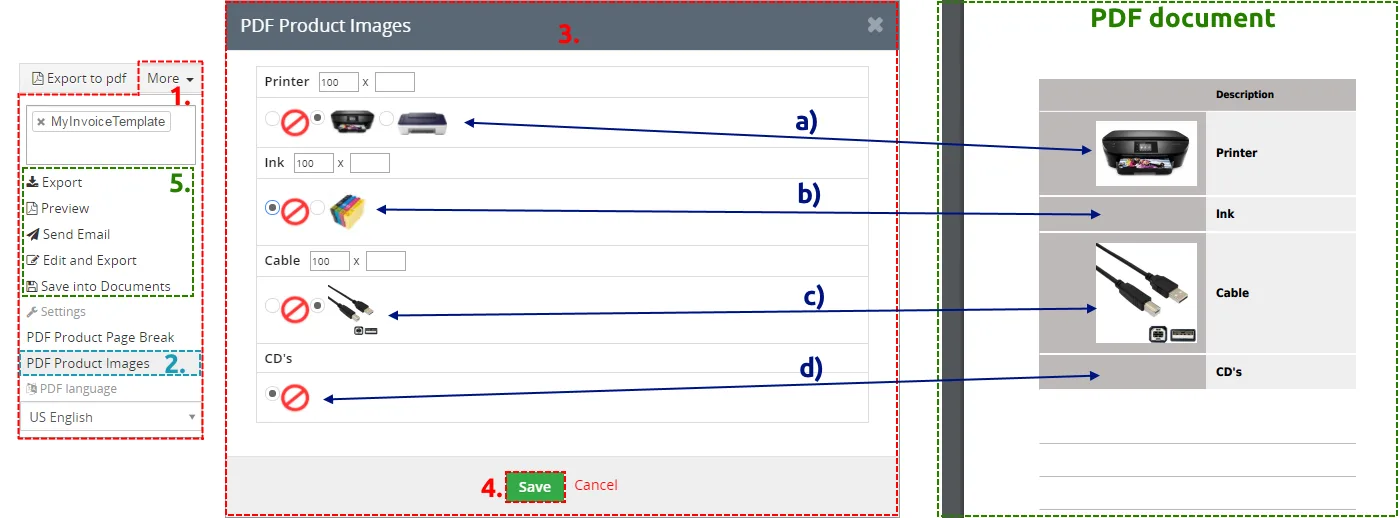
- A popup window “PDF Product images” will appear on the screen. It displays all available pictures for each product from the selected record (for example invoice). The system selects automatically the first available picture but you can select which picture will be used in final PDF document, as well as its size. Depending on your selection 4 different situations can happen:
- If more pictures are available only selected picture will be used.
- In case you don’t want to use picture you are able to switch it off.
- If only one picture is available it is used automatically.
- If picture is not available the cell in the PDF document remains empty.
You can also set a width or height for the generated images. If you leave one of the parameter fields empty, the size of image will be proportional. If you leave both parameter fields empty, the image will be displayed in its original size.
- Click on button to save your setting.
- Now, PDF product images settings are saved and will be used for additional actions, like export to PDF, send email with PDF etc.
Need help with PDF Maker?
Our support team answers questions about installation, templates and settings.