
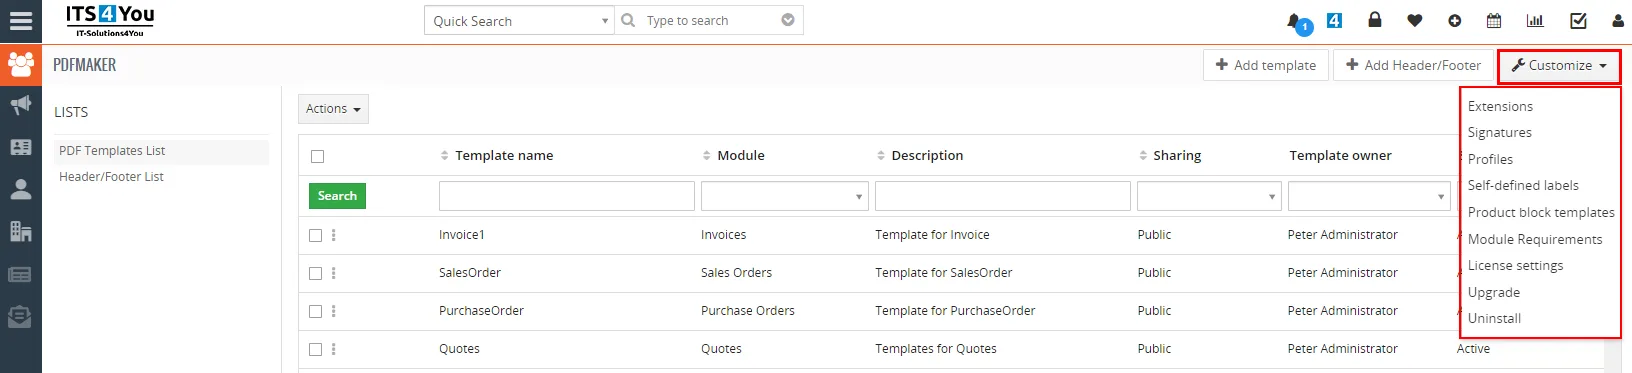
The PDF Maker settings are accessible directly from the List view and consist of:
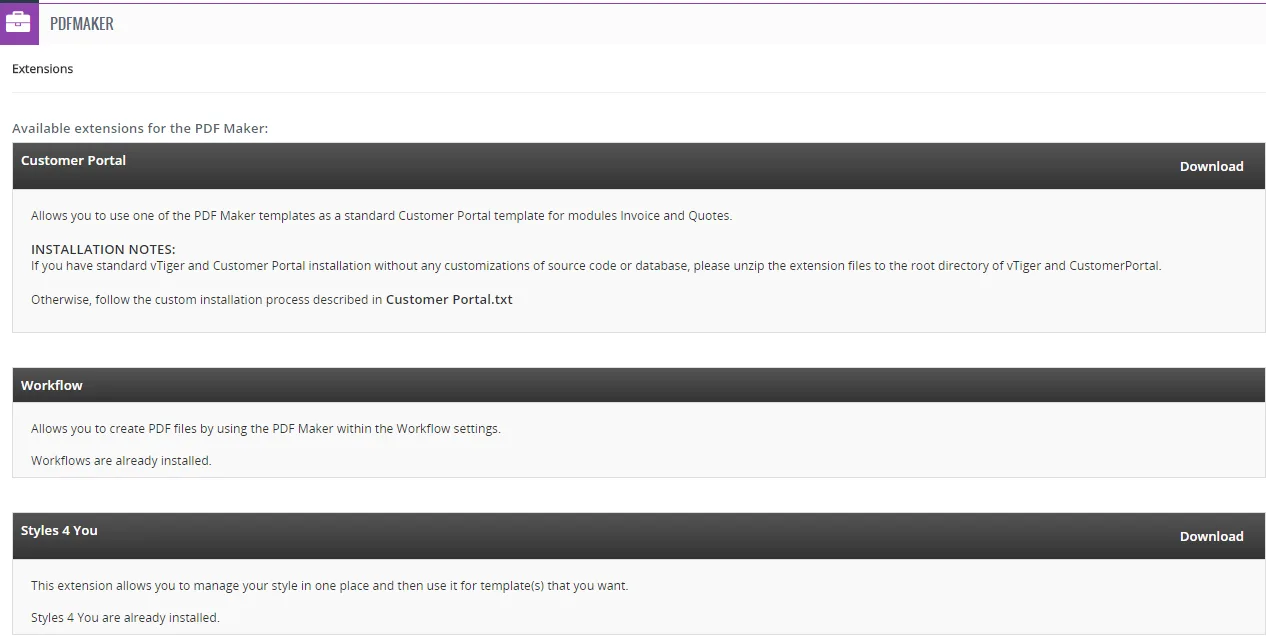
- Extensions – manage extensions: Workflows, Styles4You
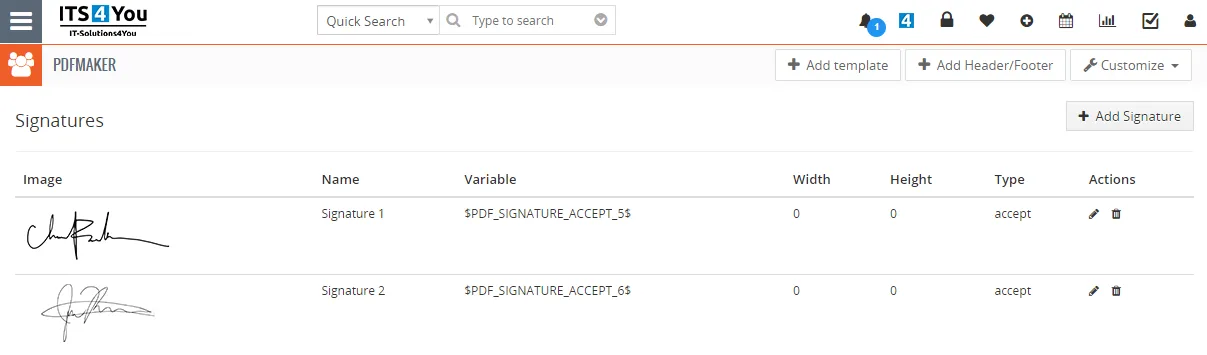
- Signatures – users or Admin can create Signatures in form of Image and then load them into the Templates
This can be used for PDF Signature extension, the Acceptance Signature process - Profiles – manage user-specifics PDF Maker access to different roles
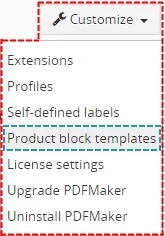
- Self-defined labels – manage your own labels
- Product block templates – manage your own product block templates
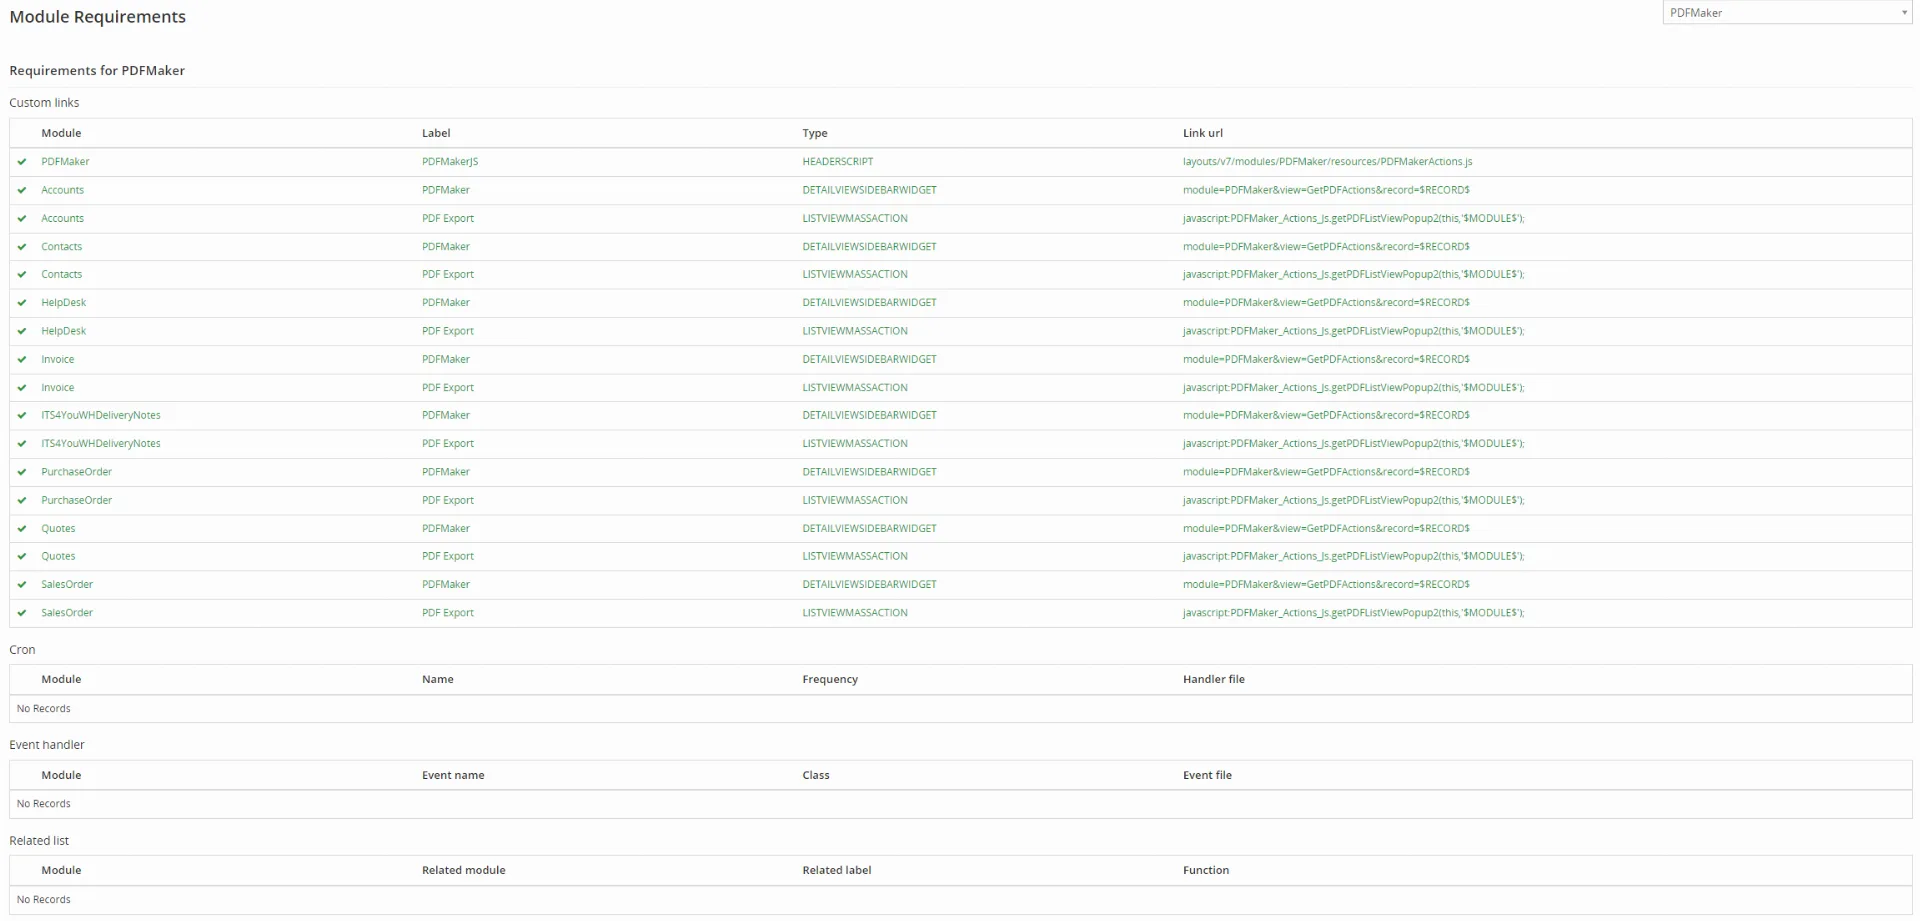
- Module Requirements – here you can check if all module Requirements are meet and green. If not, they should be corrected
- License settings – manage all settings related to your license
- Upgrade – update manually via ZIP file to a higher version or same version
- Uninstall – remove PDF Maker completely from your vTiger
10.1 Extensions
10.1.1 Workflows
PDF Maker Workflow extension is a new package which provides features to enhance usability of standard workflow of the vtiger in cooperation with our PDF Maker. It allows you to create completely new tasks “Save Document from PDF Maker” and “Send Email with PDF Maker attachments” for any workflow.
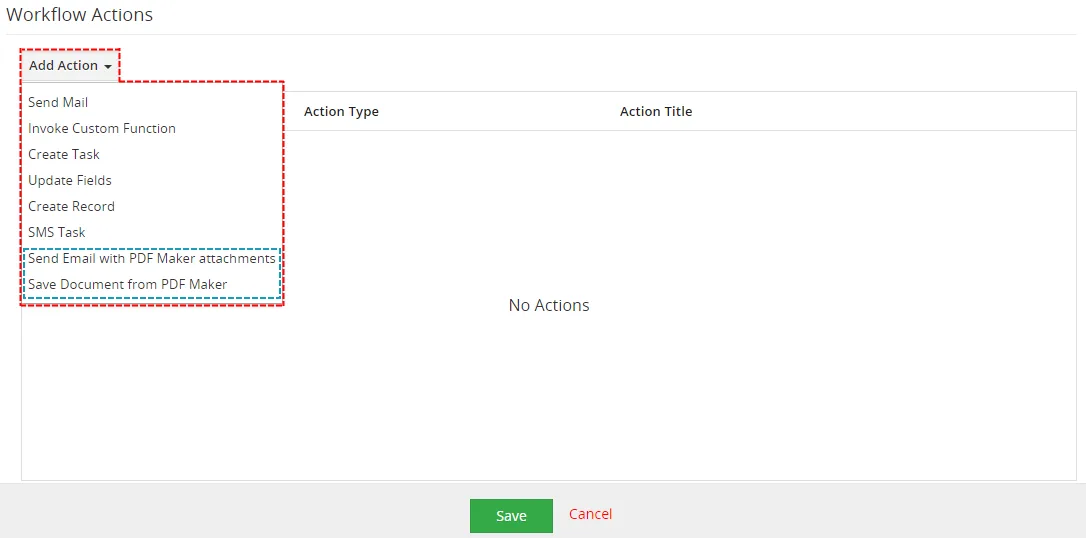
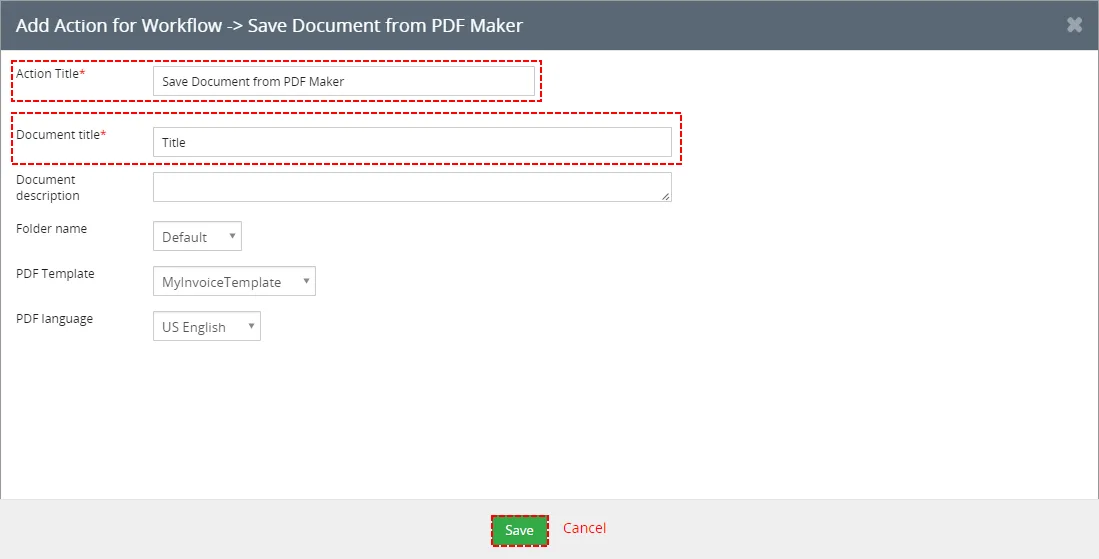
“Save Document from PDF Maker” task brings you the possibility to automatically create and save Documents from PDF Maker templates for module you create workflow for. All you need to do is to create new Workflow for chosen module and create a new Task “Save Document from PDF Maker”.
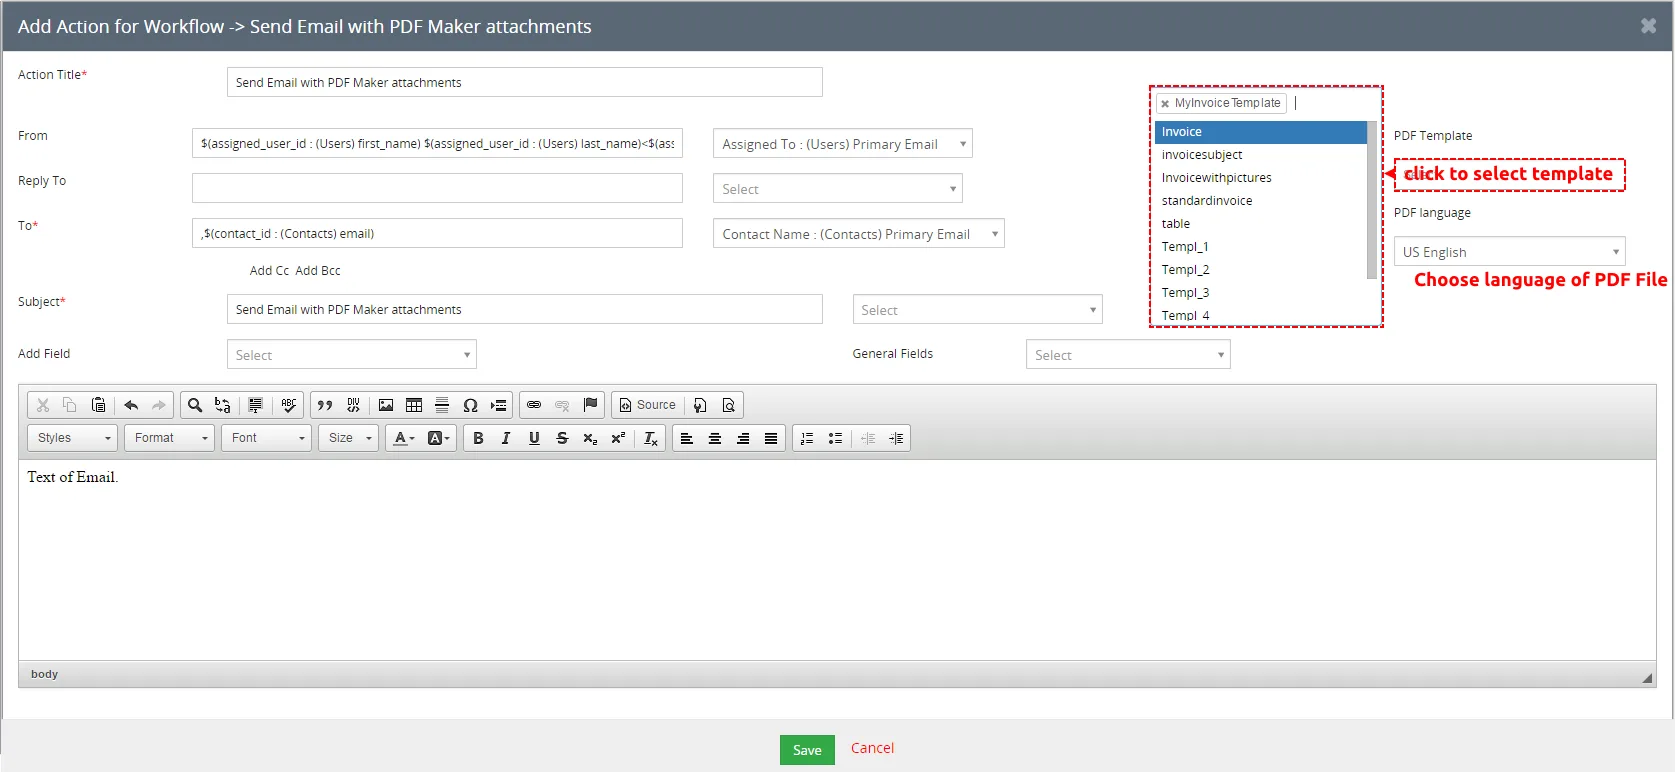
“Send Email with PDF Maker attachments” task brings you the possibility to automatically send email with attached PDF file based on PDF Template(s). When you create new Workflow for chosen module just create a new Task ” Send Email with PDF Maker attachments” and select PDF Template which has to be used .
10.1.1.1 Merge templates/documents
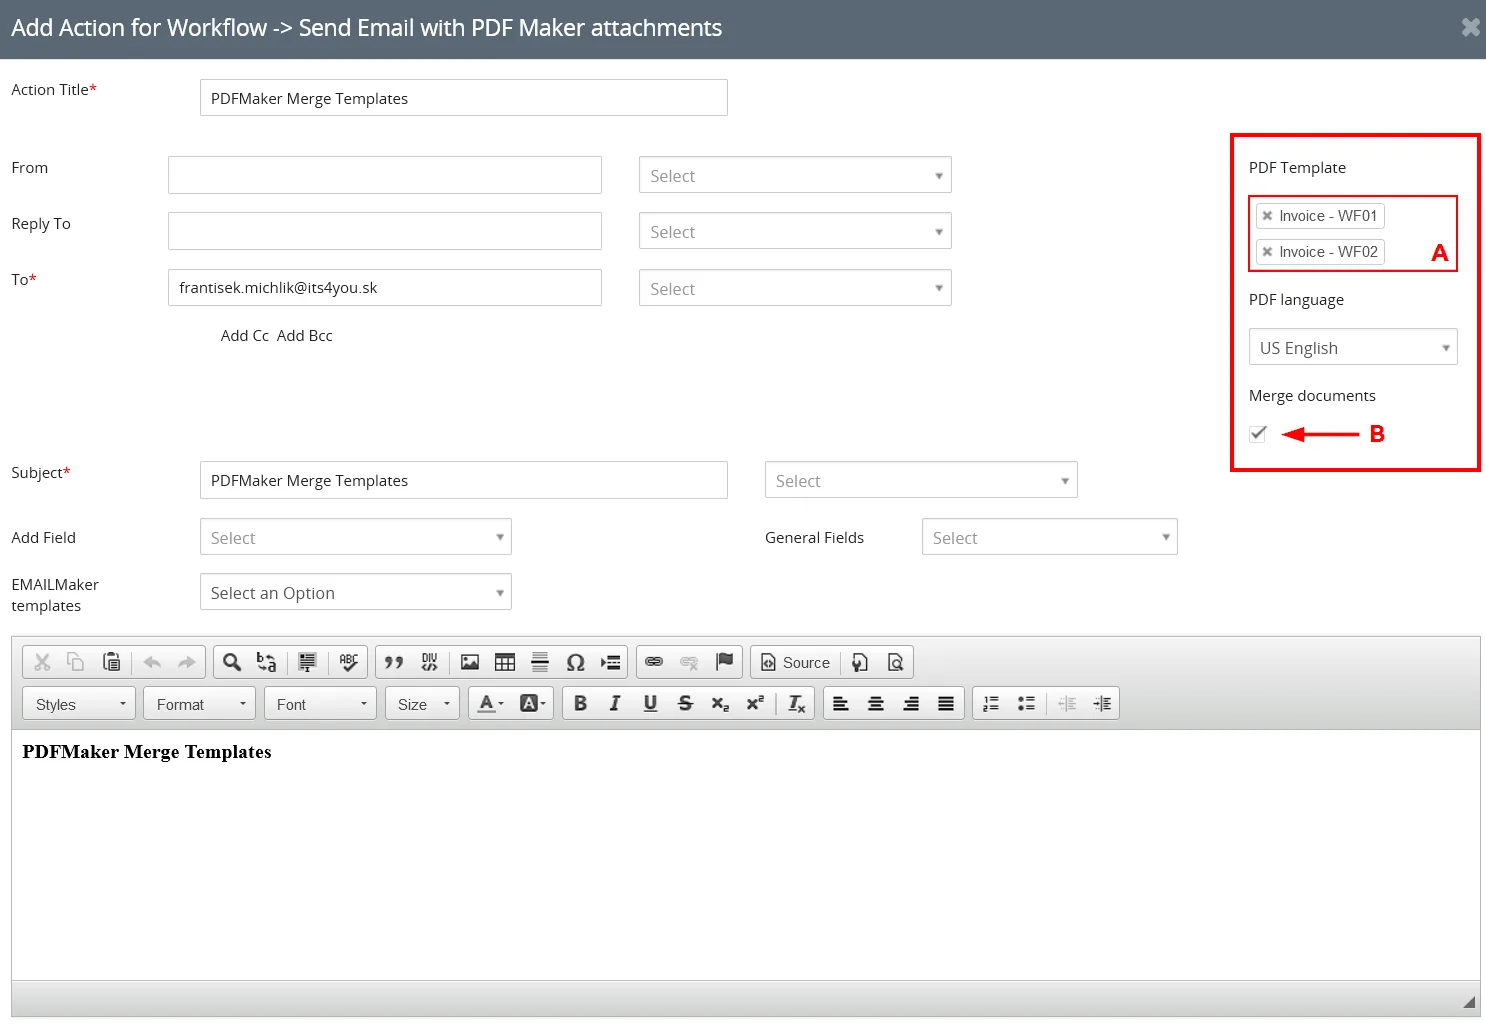
Since version 4.26 you can merge selected templates when creating an action Send Email with PDF Maker attachments.
Select templates you need (A), and then confirm the checkbox Merge documents (B). Selected templates will be merged into one pdf file.
10.1.1.2 Execute action after save
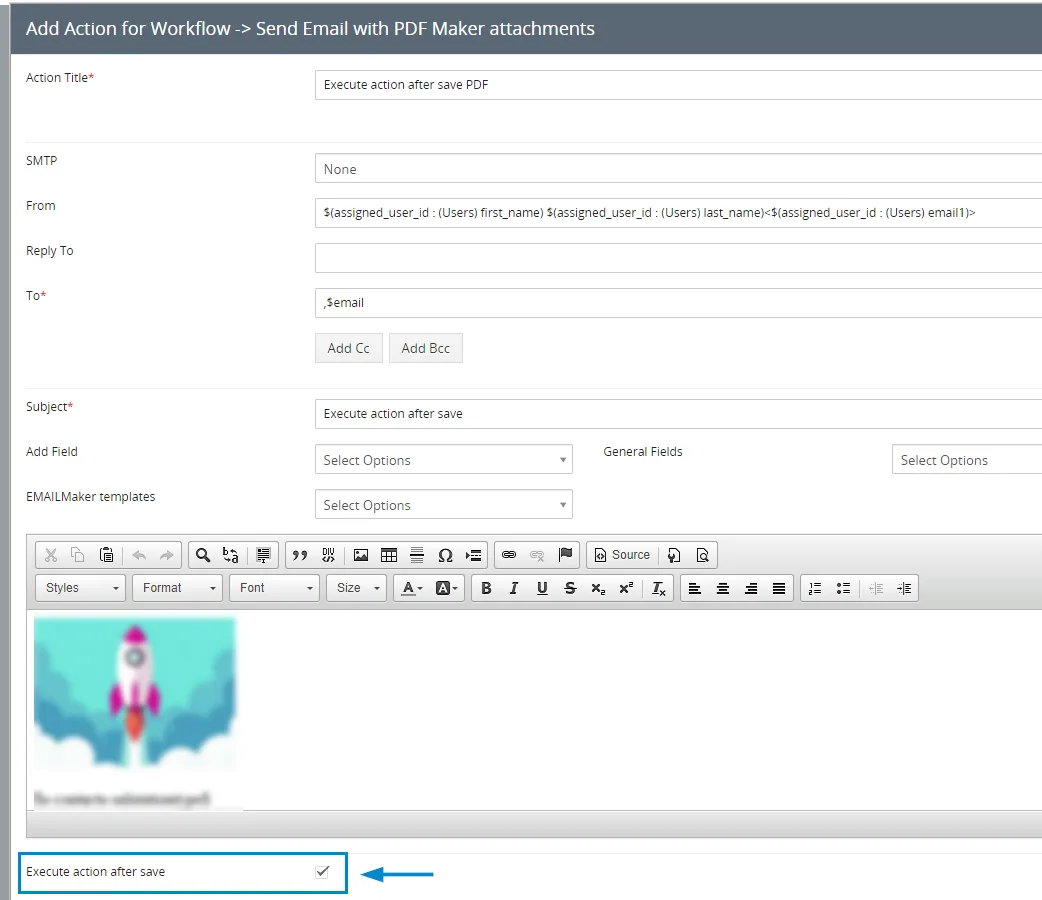
 This feature is available from version 0.55 and higher.
After checking this feature, PDF Maker emails will be sent immediately according to the conditions set in the workflow.
10.1.2 Styles 4 You
Styles4You extension allows to you manage your CSS styles and assigned it to templates.
To install Styles4You please provide following steps:
- Open PDF Maker
- Click on
 button and choose Extensions
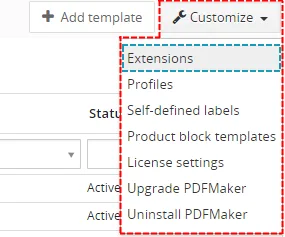
How to install Styles4You - Download zip file by Download button
- Install Styles4You via module manager or Install button

How to install Styles4You
Now Styles4You has been installed into PDF Maker.
Here you can also add new Style or select your created Style. To add your Style to template please open your template click on  button or click on
 button to select style.
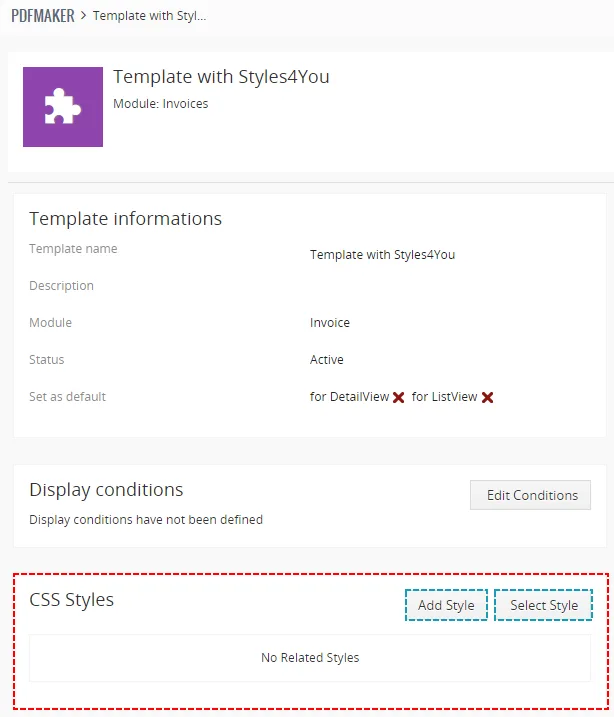
Fill name, insert your style and choose priority. Priority is used when you add more styles to one template. PDF Maker takes CSS with smaller number of priority.
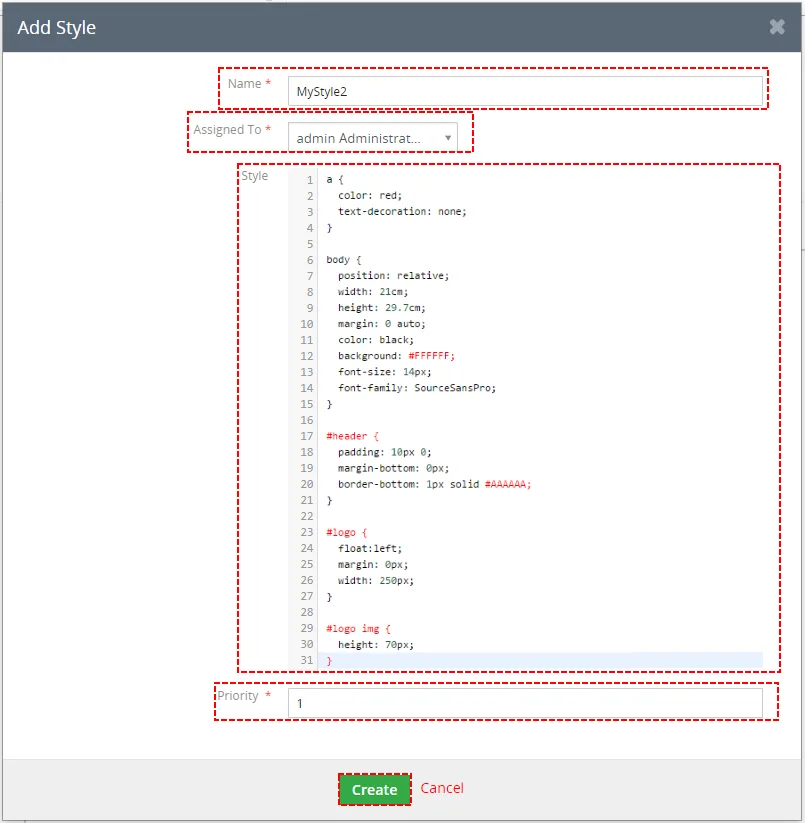
Now, your style has been added to your template.
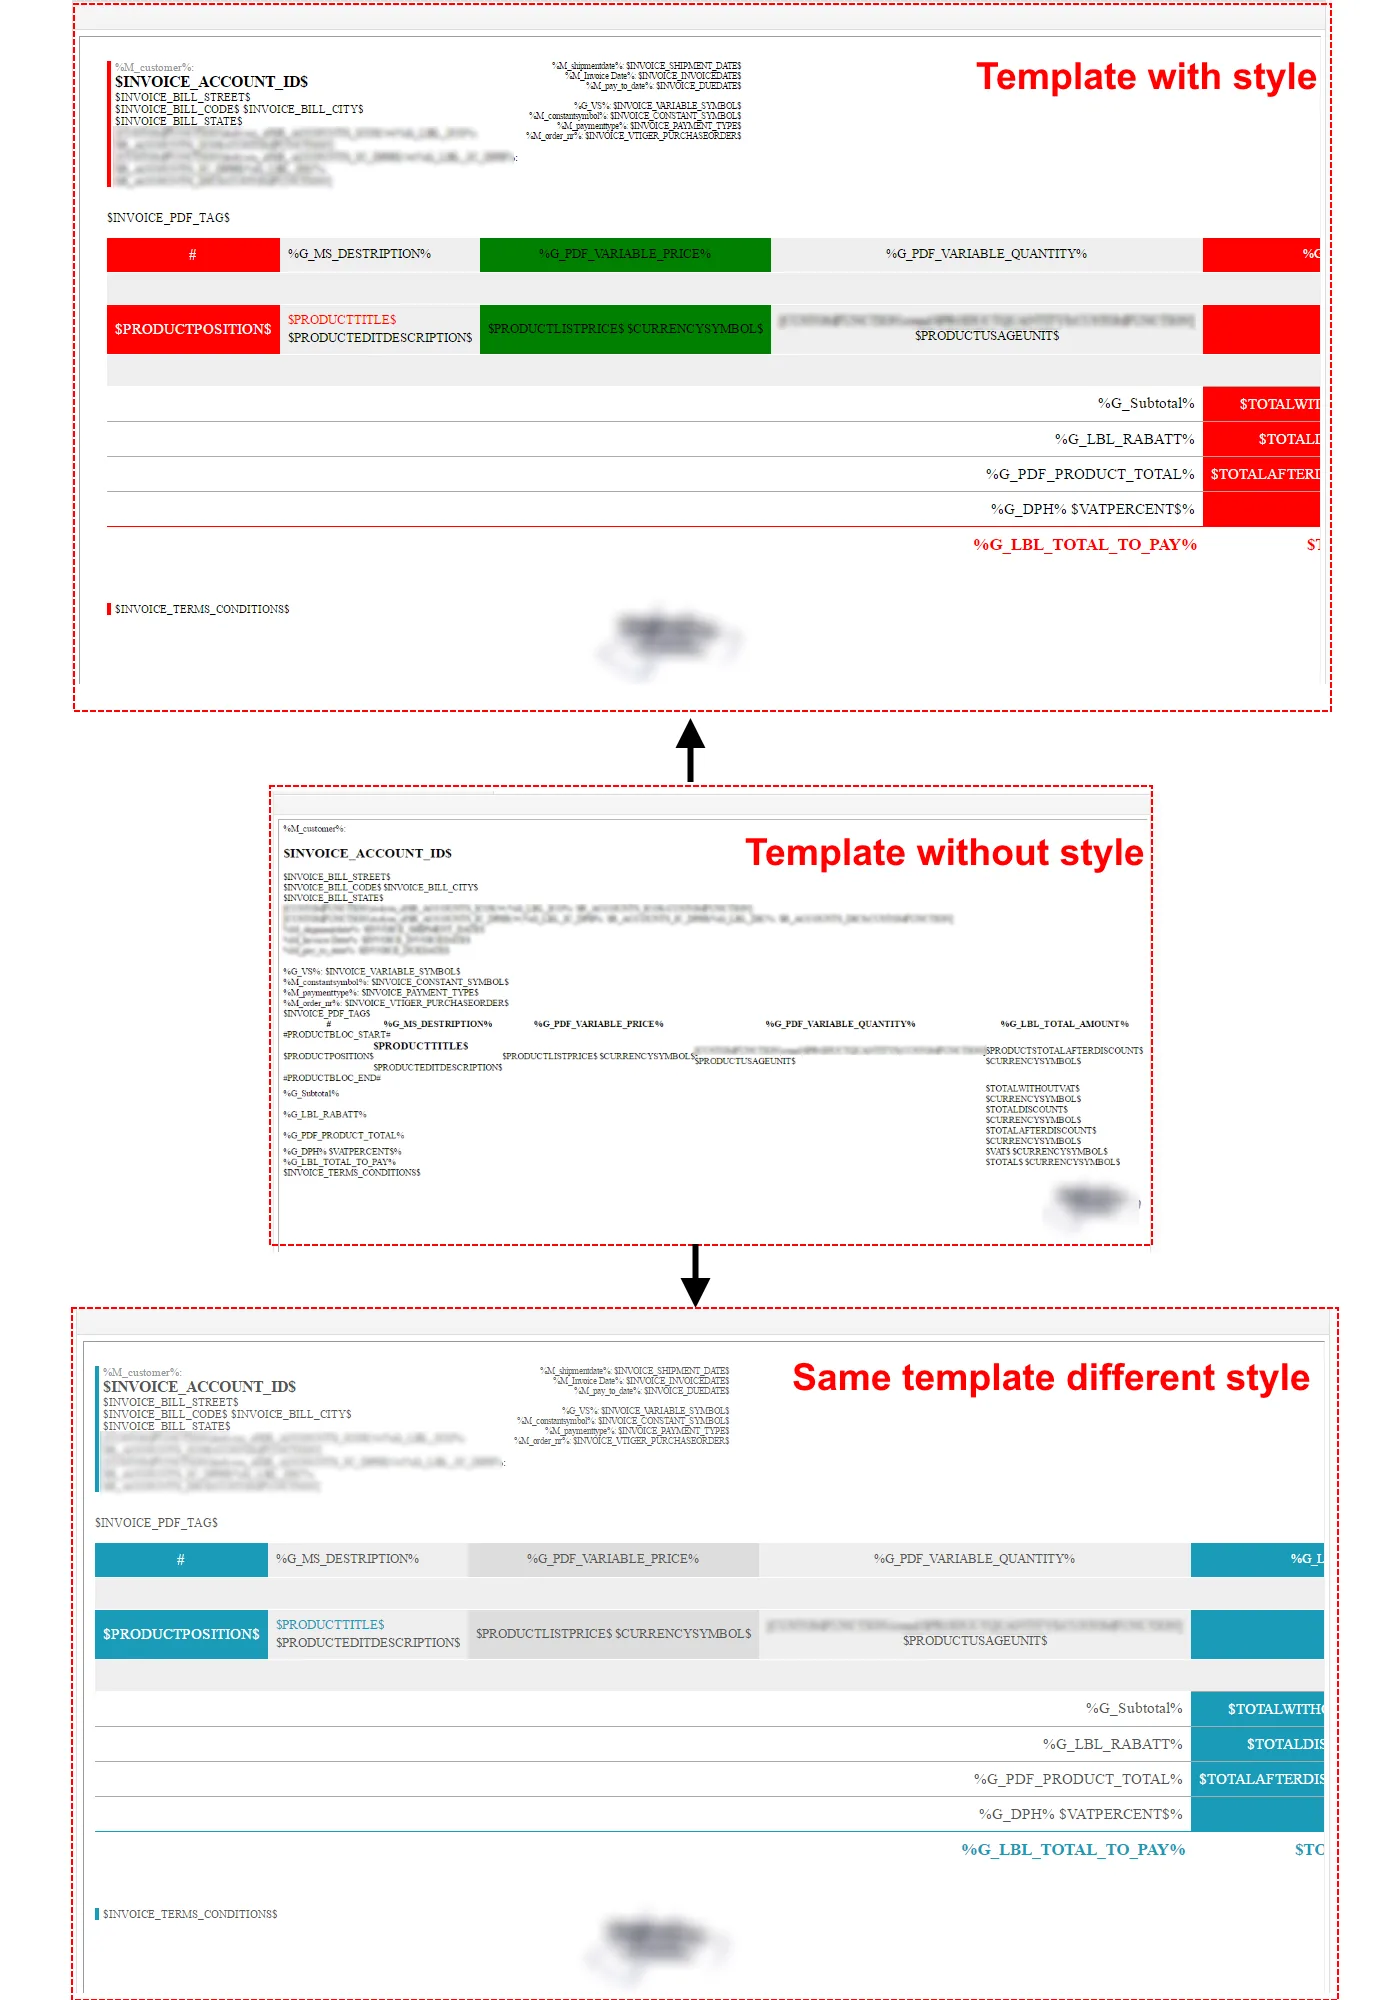
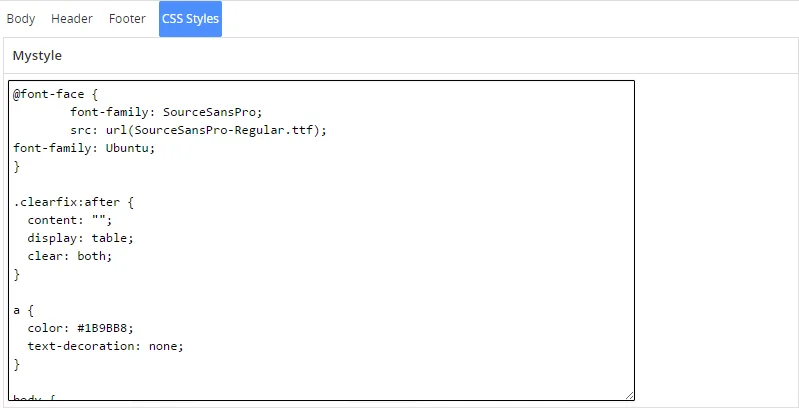
Style used in your template you can also find in edit view of template in CSS Style tab.
10.2 Signatures
This feature was added in version PDF Maker 4.49 on June 2023.
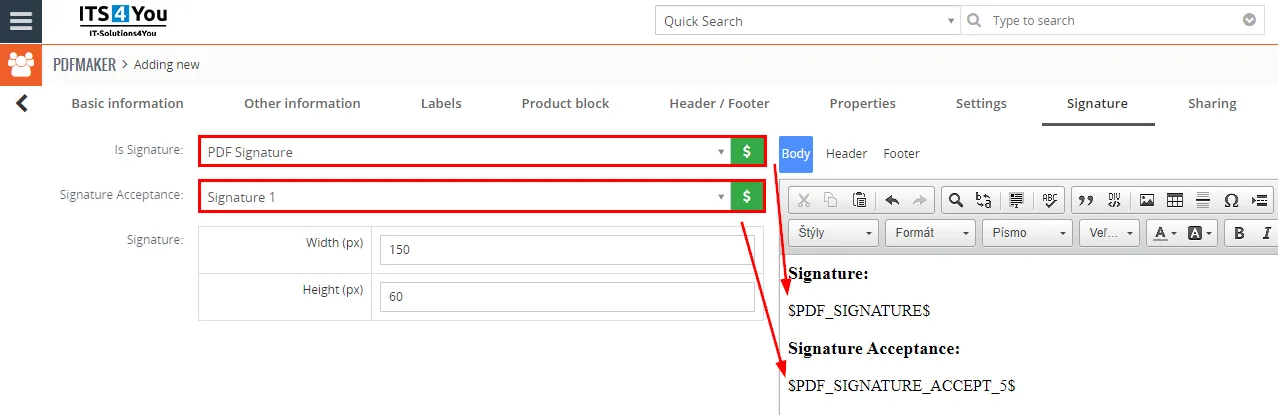
Users or Admin can create Signatures in form of Image and then load them into the Templates.
This can be used for PDF Signature extension, the Acceptance Signature process.
10.3 Profiles
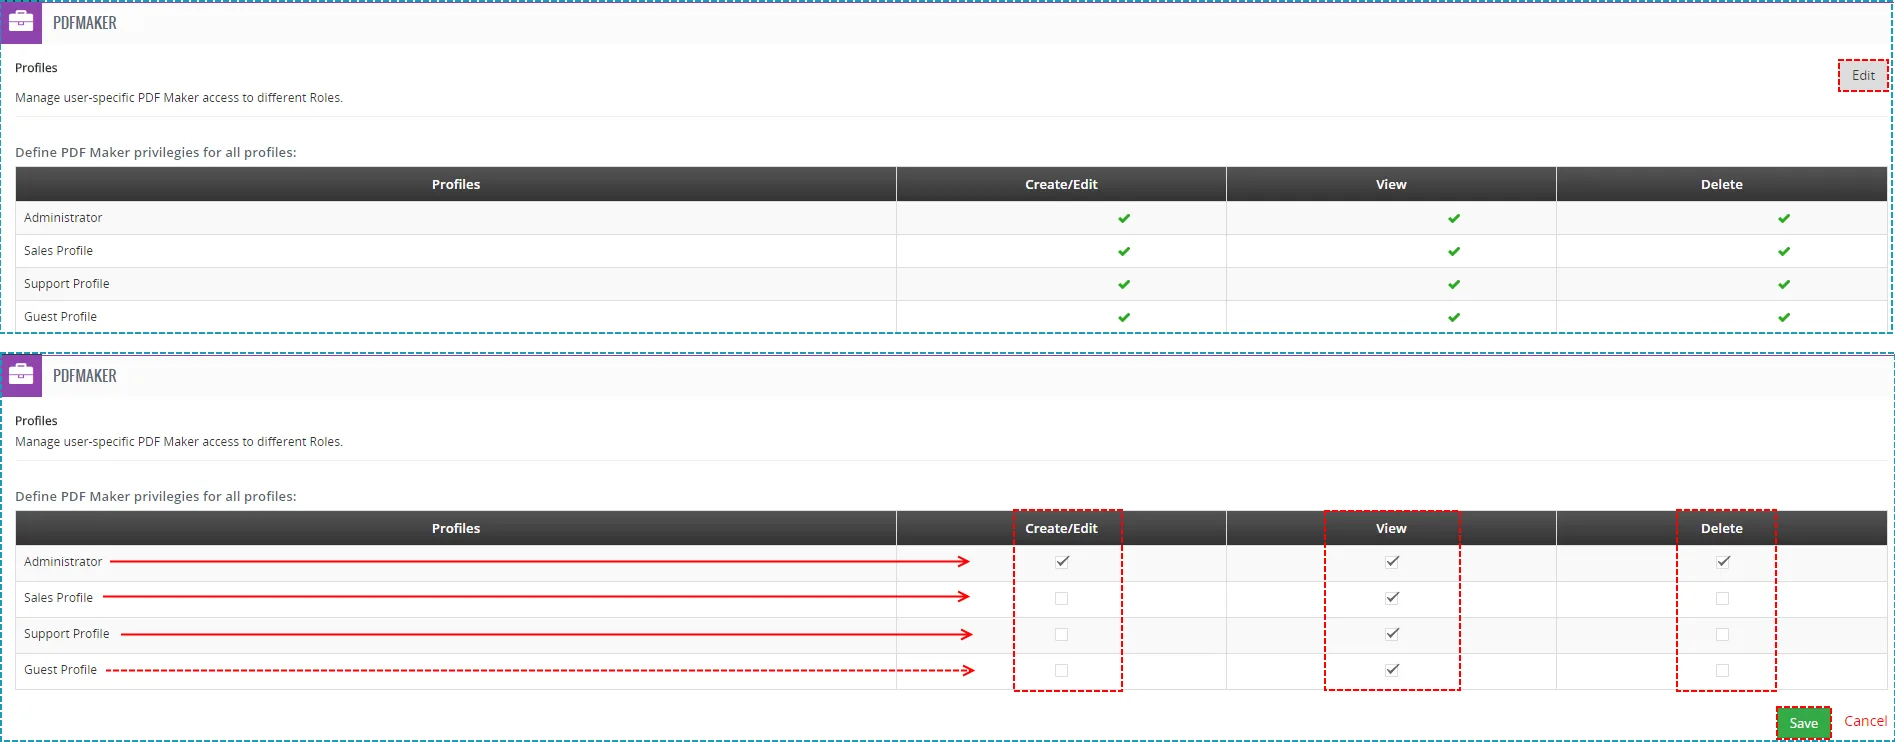
You may define PDF Maker privileges for all profiles. You may define Create/Edit, View and Delete privileges.
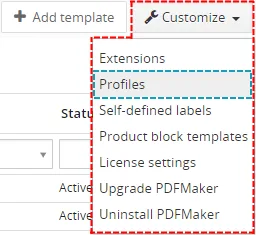
In order to change privileges click on  , use the checkboxes and click on
 button to save changes.
10.4 Self-defined labels
If the global and module related labels are not sufficient for you, it is possible to define self-defined labels. In order to define self-defined please use following steps:
- In customize choose Self-defined labels
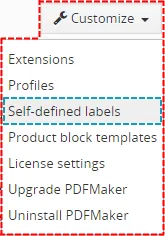
How to define self-defined labels - Click on
 button.

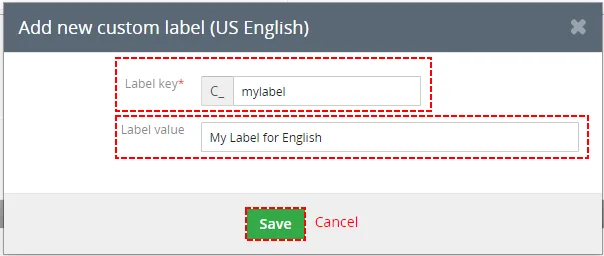
How to define self-defined labels - Define label key C_***** and value for your current language. Click on button.
How to define self-defined labels - In order to define values for other installed languages click on “Edit Other Translations” link.

How to define self-defined labels - Define label value for additional languages and click on button.
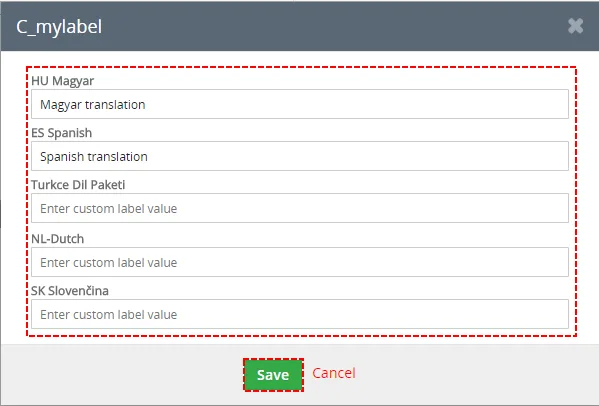
How to define self-defined labels
You can also find here button which allows you to delete unnecessary labels.

10.5 Product block templates
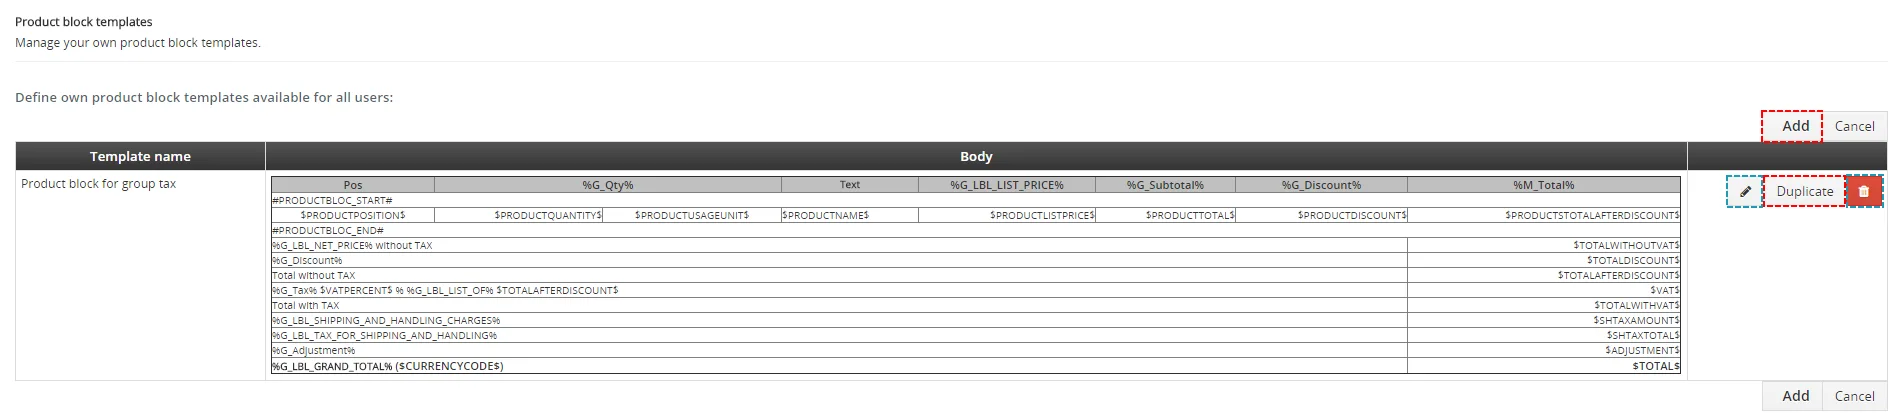
As can be seen in the picture below, you can simply add – , edit –  , duplicate –
 or delete –
 product block templates.
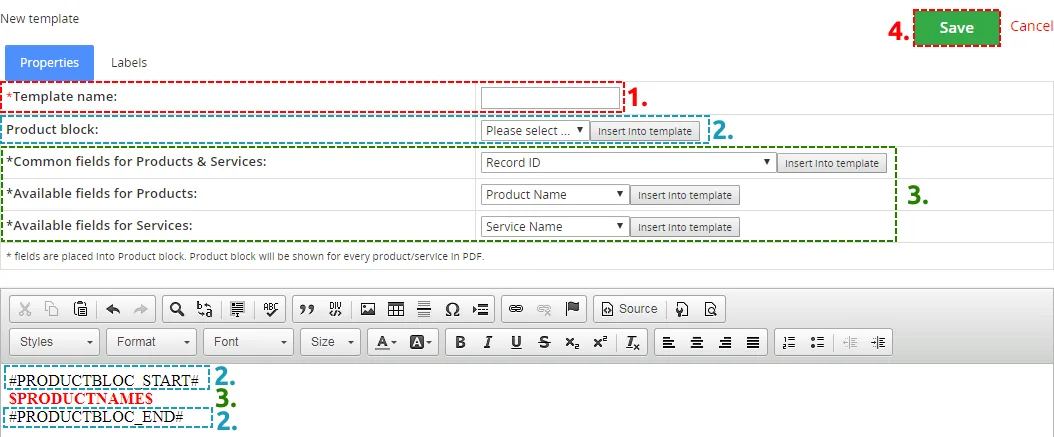
When you click on button following window will appear on your screen. In order to create and save your own product block template please provide following steps:
- Define product block template name.
- Insert product block template start (#PRODUCTBLOC_START#) and product block template end (#PRODUCTBLOC_END#).
- Add all necessary product/service fields according to your needs between (#PRODUCTBLOC_START#) and (#PRODUCTBLOC_END#) and provide formatting if needed.
- Click on button.
10.6 Module Requirements
Here you can check if all module Requirements are meet and green. If not, they should be corrected.
- Red values, can be fixed by deactivating and reactivating PDF Maker in Module Manager
- If the issue persists, please contact our support via Email: info@its4you.sk
10.7 License settings
Since December 2019/January 2020 all our modules will be using Installer to manage licenses. Please check our Installer pages for more information.
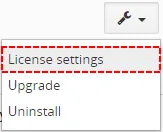
You can access the License settings like its shown below:
(there can be more options from the pick-list, depends on the module)
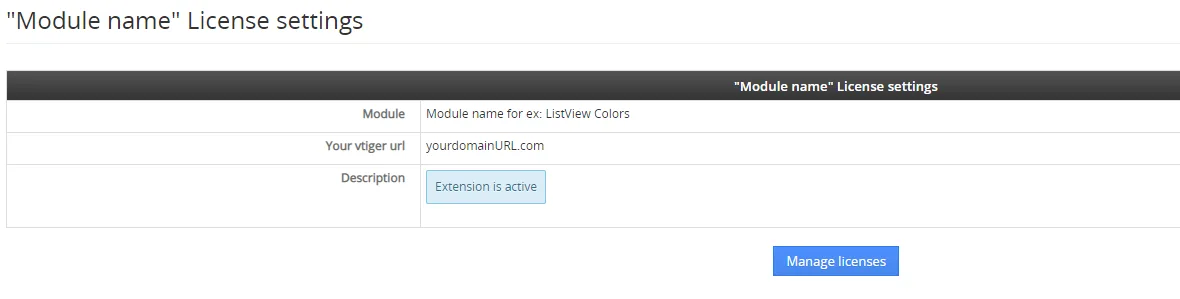
After accessing the License window you can see screen bellow with following information:
- Module name, Your Vtiger domain URL
- Description, if license is activate or not:
 – your license is currently active,
 – your license is not active and you need active it via Installer.
To activate or manage license, click on the  button.
10.7.1 Deactivate license
If you want to deactivate your license, please provide following steps:
- Go to your Installer, by a click on Notifications Icon
 and then on the button ,
or via Main Menu – Settings – CRM Settings – Extensions – ITS4YouInstaller - The following screen will appear (see below):

Installer – deactivation of license You can deactivate license by click on the button

Note:The module will be deactivated but not uninstalled and license will be removed from the Activated Licenses tab.
10.7.2 Reactivate license
To reactivate a license after deactivation, you need to follow the same process as you activated it first time:
- Click on the
 button and enter your license key.

- Confirm with
 button.
When the license was activated you can see module available in the Modules tab below.
Note: To see modules and manage licenses you have to log in to our e-shop with @email and password via  button (top right screen side in Installer module).
10.8 Update
The upgrade of the module is initiated manually or via our Installer.
Updating via Installer:
- open the Installer in the CRM
- in the Modules tab find your installed module and you should see the
 button available
- If the new version is available, you will be notified via Installer Notifications icon
Updating PDF Maker manually:
The upgrade of the PDF Maker is initiated in the same way as PDF maker installation or click on Upgrade PDF Maker link in Customize tab of PDF Maker.

So please refer to above installation part for details how to initiate the import of the module from the file. As can be seen on following picture you will be notified that the PDF Maker module already exists. The upgrade will start immediately when you click on the [Update Now] button.
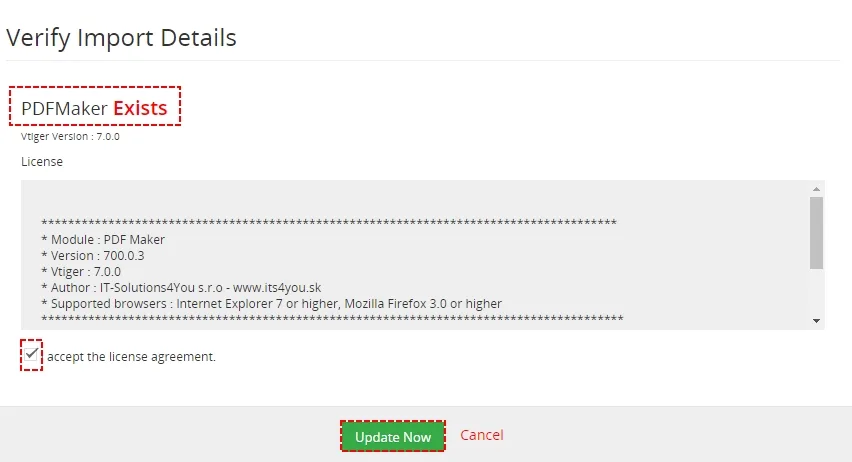
After upgrade the notification about successful upgrade is shown.

10.9 Uninstall
If you need to remove the module from your Vtiger you have two options:
- Uninstall via Installer.
- Manually via going to module Settings and choose Uninstall option.
10.9.1 Uninstall via Installer
You have also option to remove the module via Installer window by accessing the Settings – Uninstall window:
- Go to your Installer, by a click on Notifications Icon and then on the button ,
or via Main Menu – Settings – CRM Settings – Extensions – ITS4YouInstaller - Find the module you need to uninstall in the Modules tab
- Via
 pick list button choose the Uninstall option, you will be redirected to the Uninstall window.
- Click on
 button

- Confirm uninstall with
 button
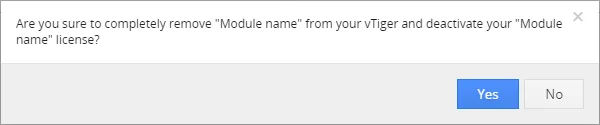
Now, the module has been removed from your Vtiger and your license has been deactivated. To use this module again, you need to provide installation and validation steps (see Installation chapter).
10.9.2 Manual Uninstall
There is also available option to remove PDF Maker from your Vtiger manually. To uninstall please provide following steps:
- Go to the list view of PDF Maker and in Customize choose option Uninstall PDF Maker
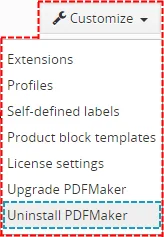
Uninstall PDF Maker
- Click on
 button

Uninstall PDF Maker
- Confirm uninstall with button
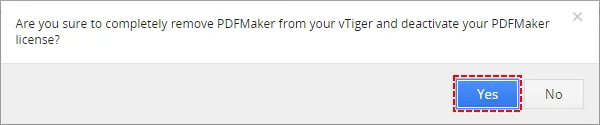
Uninstall PDF Maker
Now, PDF Maker is removed from your Vtiger and your license is deactivated. To use PDF Maker again you need to provide installation and validation steps (see chapter 2.How to install PDF Maker).
Need help with PDF Maker?
Our support team answers questions about installation, templates and settings.