
In the following section you can find short description how to create your first simple PDF template for vtiger CRM using PDF Maker.
Note: The full description of the PDF Maker’s menus, tabs and icons can be found in the later chapters.
4.1 Create the simple PDF template
In order to edit the PDF template you have to start the PDF Maker tool which can be after installation located under the Projects as seen below on the picture.
- In vtiger CRM menu please go to Projects and click on PDF Maker (since vtiger 7 there is no Tools part so records which used to be in Tools tab are in Projects tab now)
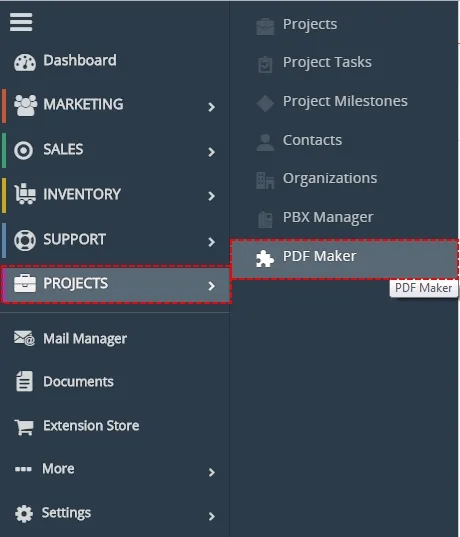
Location of PDF Maker module - The screenshot below shows PDF Maker ListView. You can click on [+Add template] button to add new template.

Add PDF template – PDF Maker Vtiger 7 - In the EditView, go to Properties tab and define the template name and the description.
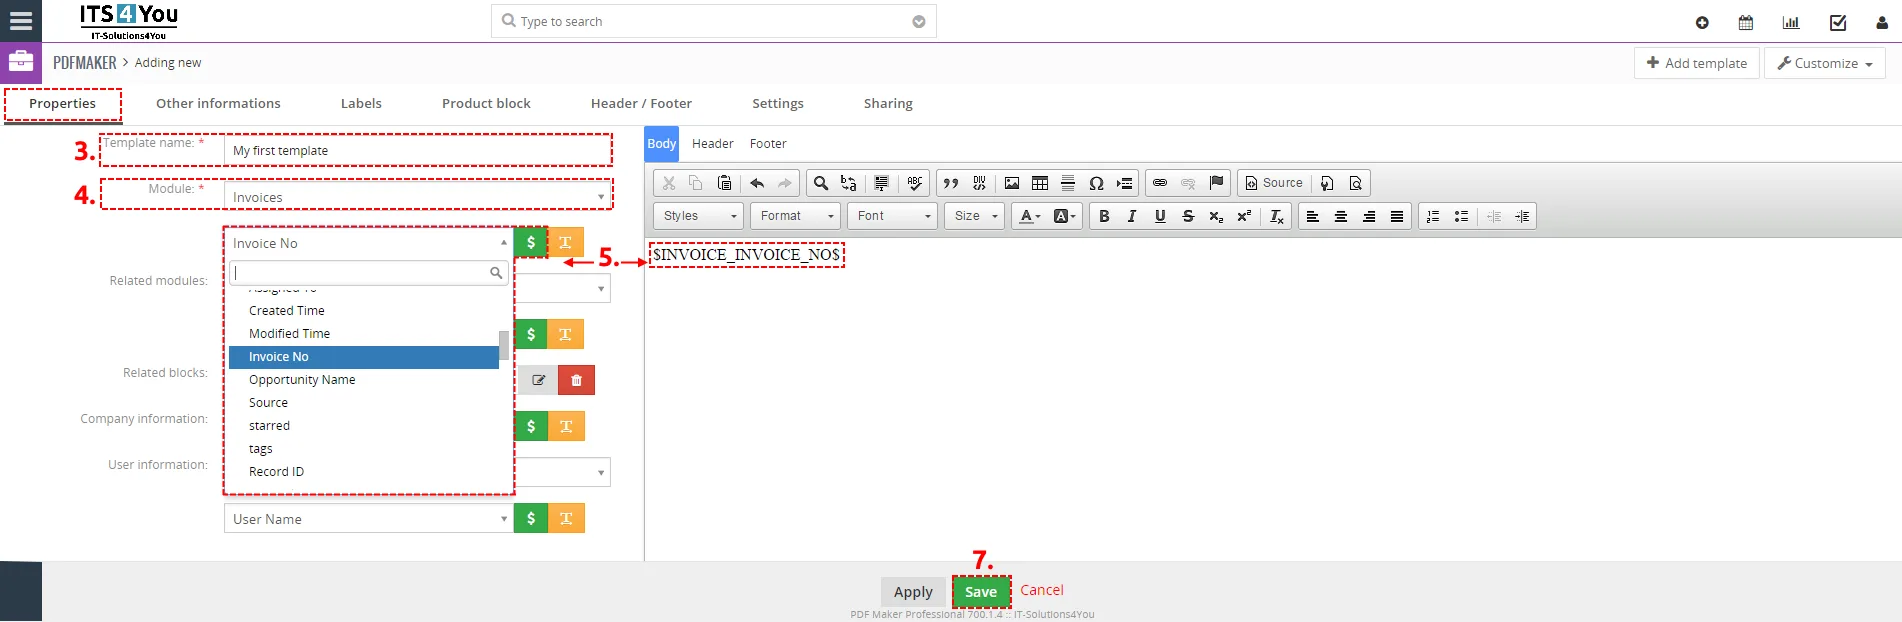
Creation of the template in EditView - Choose the module from the list (i.e. Invoice).
- Choose one of the all available fields from the selected module (i.e. Invoice No) and click on the [$] button to insert it into template.
- Repeat the steps 5. and 6. to finish your pdf template according to your needs.
- Finally click on the [Save] button.
4.2 Create the simple Header/Footer template
In order to edit/create the Header/Footer template you have to start the PDF Maker tool which can be after installation located under the Projects (since Vtiger 7.1.0 again in Tools) as seen below on the picture.
- In vtiger CRM menu please go to Projects and click on PDF Maker (since vtiger 7 there is no Tools part so records which used to be in Tools tab are in Projects tab now)
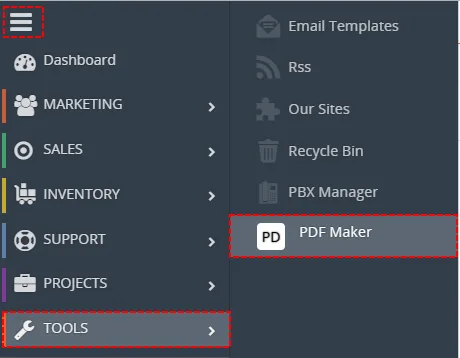
Location of PDF Maker module – PDF Maker Vtiger 7 - The screenshot below shows PDF Maker ListView. You can click on
 button to add new Header/Footer template.

Add Header/Footer template – PDF Maker Vtiger 7 - In the EditView, go to Properties tab and define the template name.
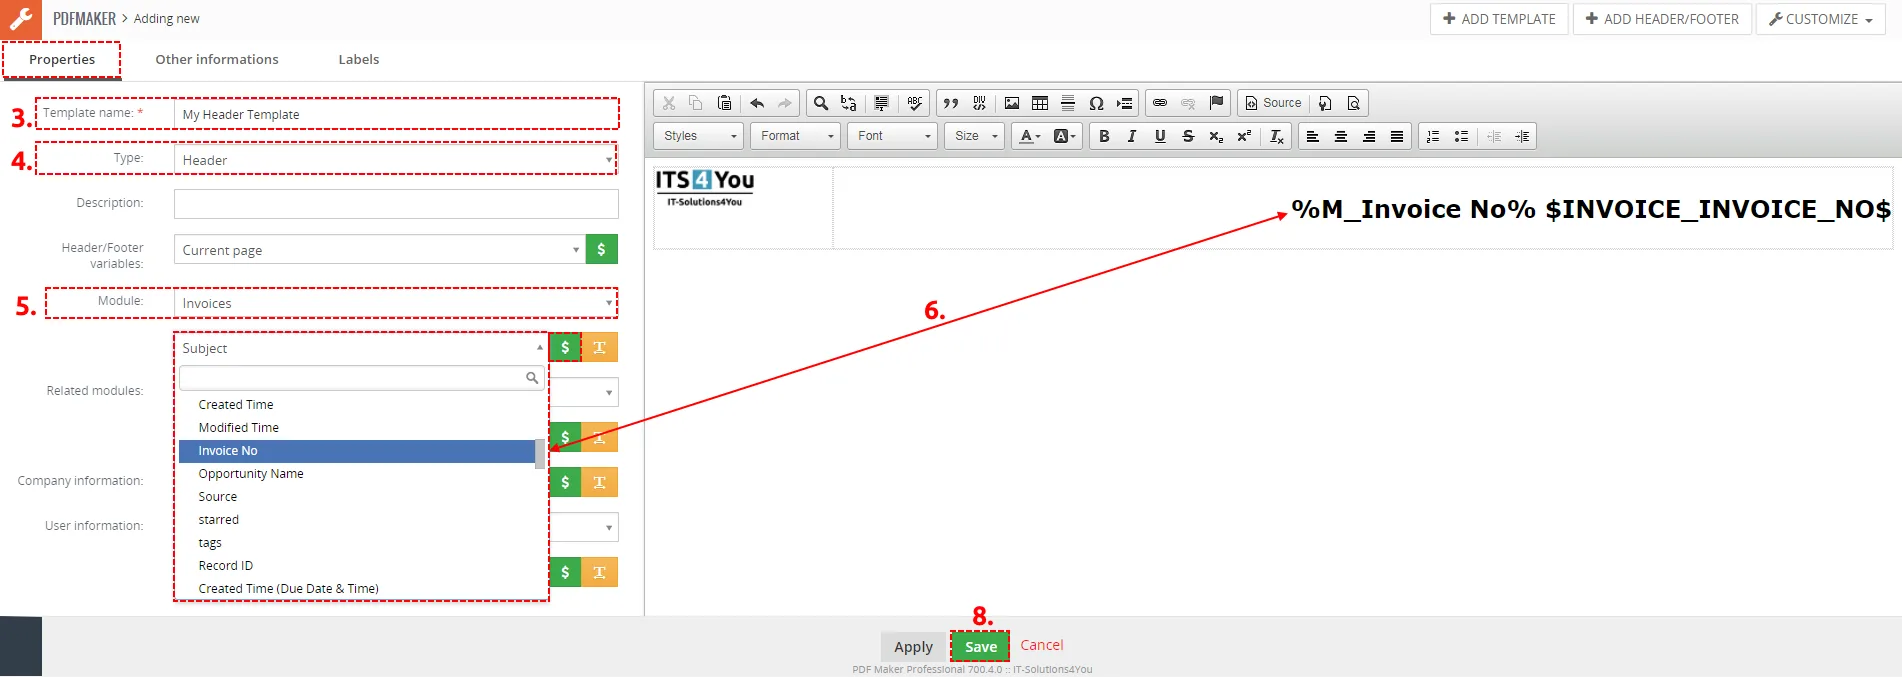
Creation of the Header/Footer template in EditView – PDF Maker Vtiger 7 - Select the type of template from the list (i.e. Header).
- Choose the module from the list (i.e. Invoice) if you want.
- Choose one of the all available fields from the selected module (i.e. Invoice No – if module is selected) or create universal template without module’s variables and click on the
 button to insert it into template.
- Repeat the steps 6. and 7. to finish your Header/Footer template according to your needs.
- Finally click on the
 button.
4.3 How to generate PDF file with PDF Maker template
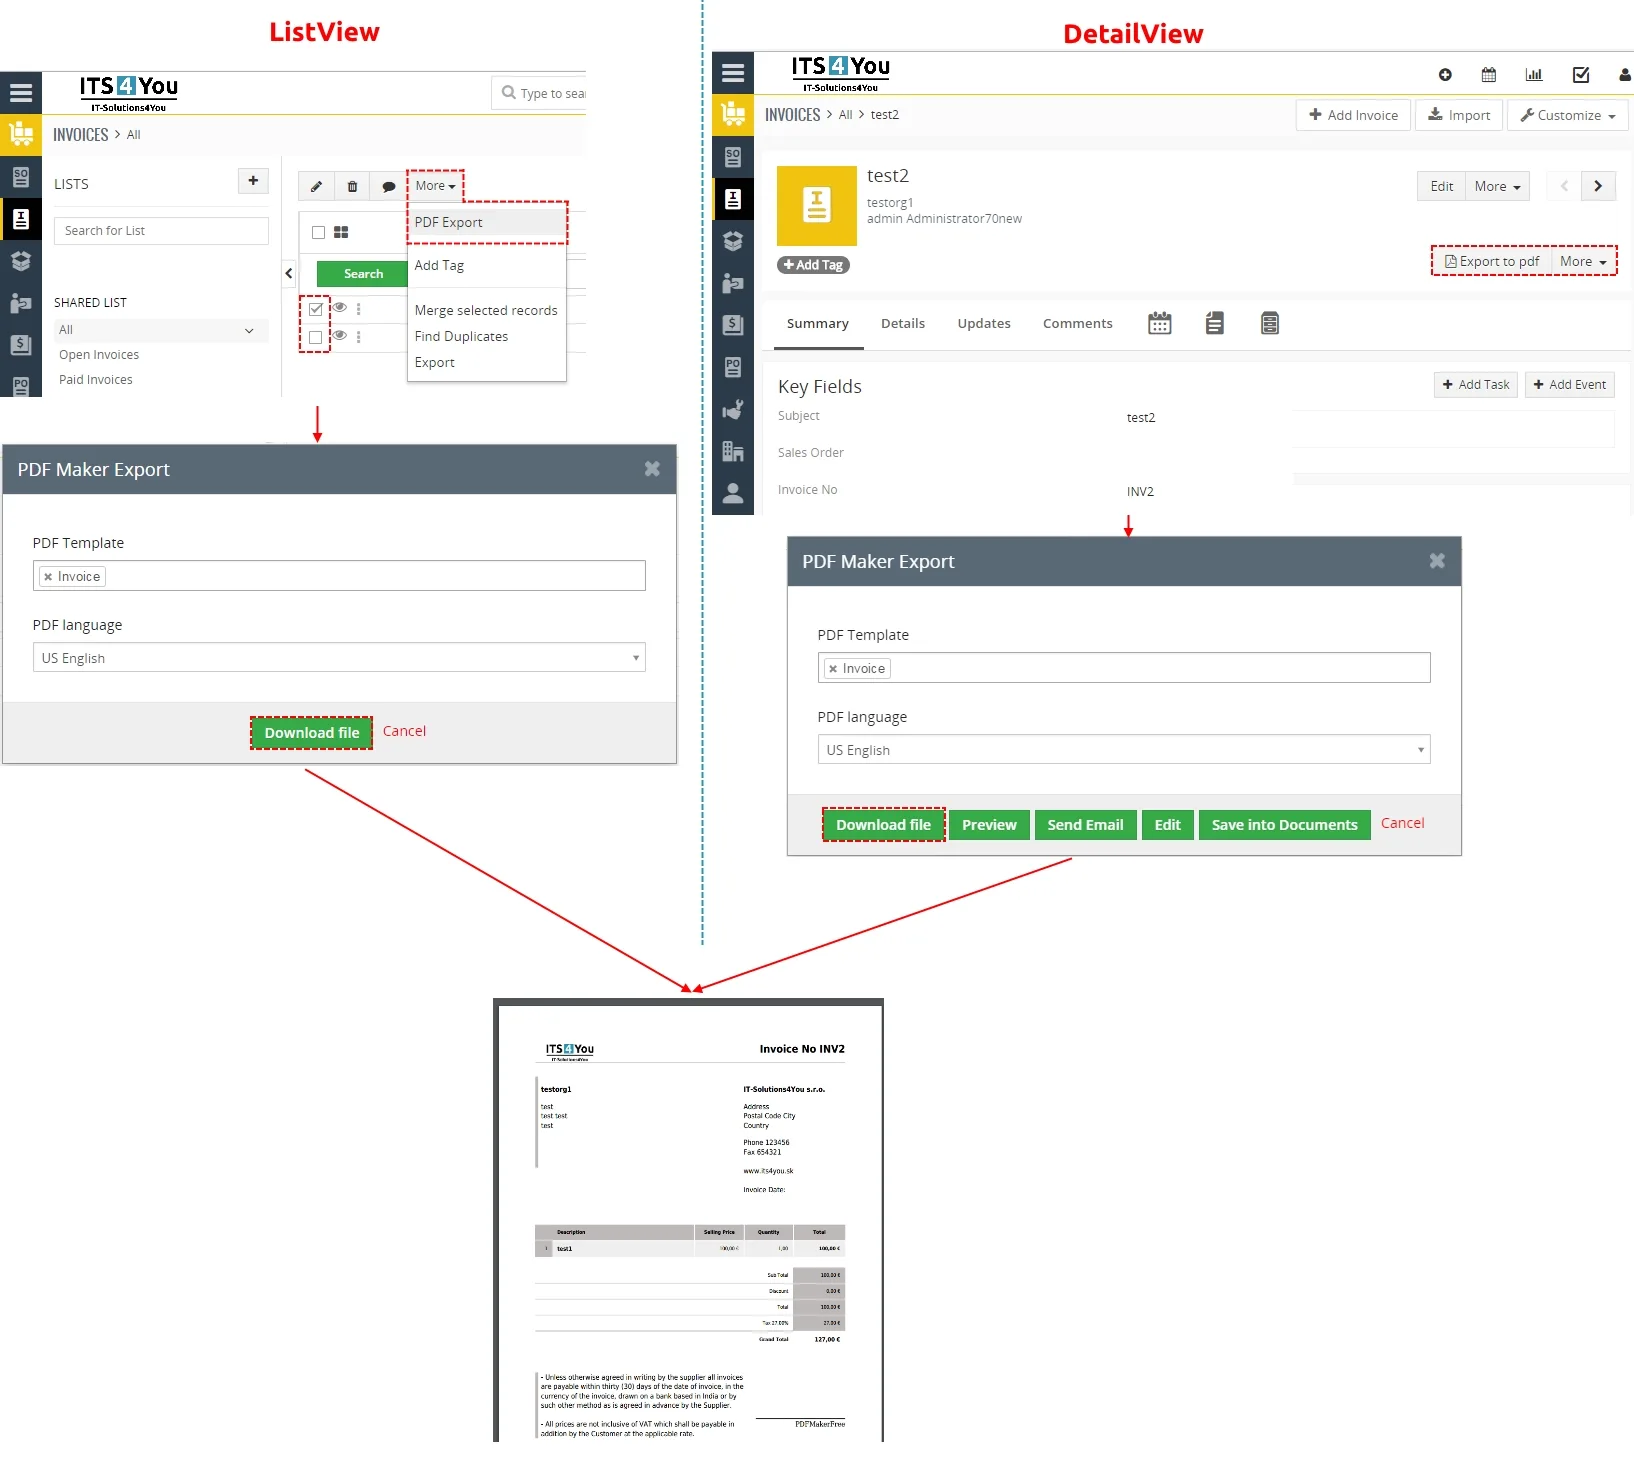
In the following picture you can see how to generate PDF file in the ListView or DetailView using PDF Maker:
Listview
| DetailView
|
Need help with PDF Maker?
Our support team answers questions about installation, templates and settings.